
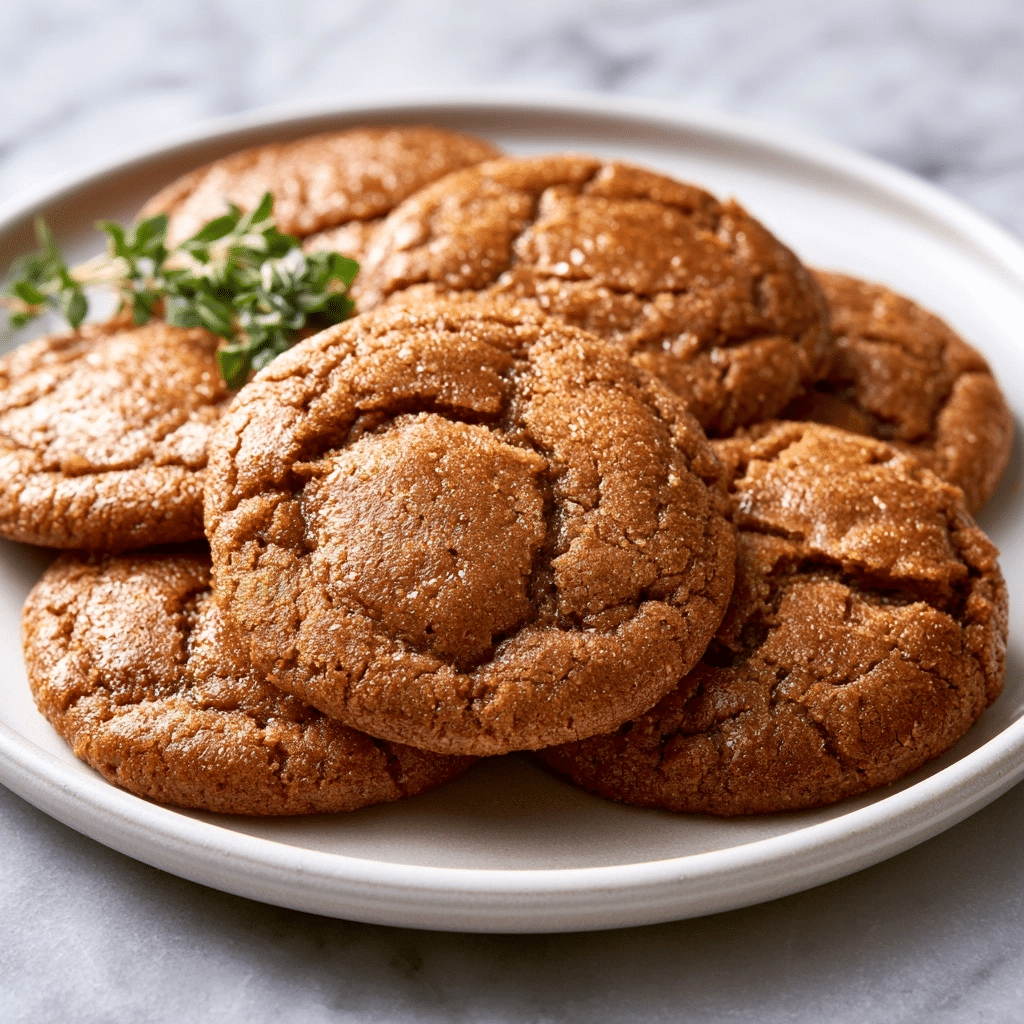
Soft molasses cookies offer a classic, comforting flavor profile that blends warming spices with the deep, rich sweetness of traditional molasses. These cookies provide a tender, chewy texture that satisfies cravings during the holiday season or any time you need a nostalgic homemade dessert. With a balance of earthy ginger, aromatic cloves, and cinnamon, these treats deliver a sophisticated yet accessible experience for bakers of all skill levels. By following specific preparation techniques, you ensure a uniform bake and a perfectly soft center every time.
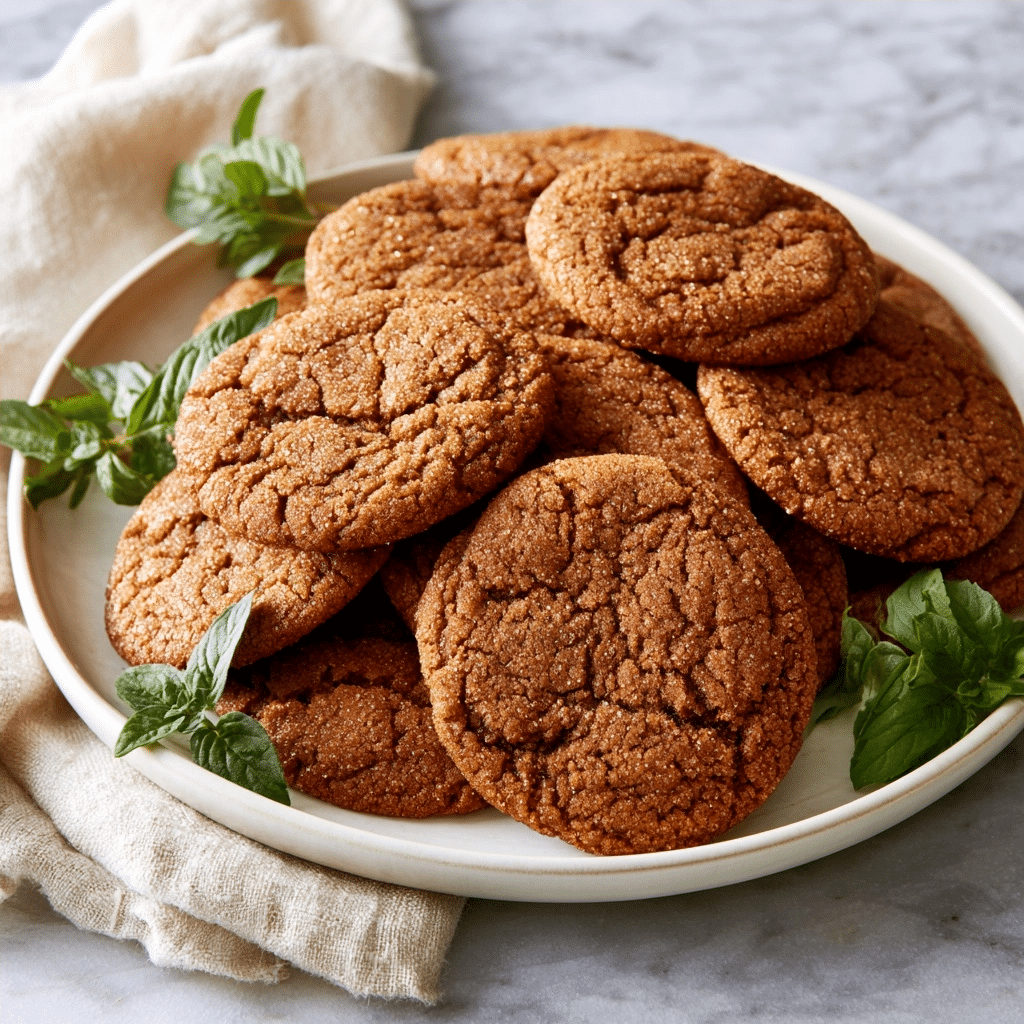
What Is A Soft Molasses Cookie?
Soft molasses cookies are dense, spiced baked goods characterized by their signature chewy center and crackled, sugar-coated exterior. Unlike traditional ginger snaps, which focus on a brittle, crispy crunch, these cookies prioritize moisture and a soft, cake-like crumb. The unique composition uses molasses as a primary sweetener, which introduces complex undertones and deep color. Historically, these cookies evolved from colonial-era recipes that relied on molasses as a readily available sweetener, bridging the gap between simple biscuits and sophisticated spiced cakes.
Recipe Overview
| Prep Time | 15 minutes |
| Cook Time | 10 minutes |
| Total Time | 2 hours 25 minutes |
| Servings | 24 cookies |
| Difficulty Level | Easy |
| Cuisine | American |
| Calories per Serving | 145 |
Why You Will Love This Recipe
- Effortless Preparation: This recipe uses standard kitchen staples and relies on a straightforward mixing method that prevents kitchen fatigue.
- Foolproof Texture: The specific ratio of vegetable oil to molasses creates a reliably soft, chewy crumb that stays fresh for days.
- Crowd-Pleasing Profile: The blend of cinnamon, ginger, and cloves offers a universally appealing flavor that fits any seasonal gathering or lunchbox.
- Time-Saving Steps: While the dough requires chilling, the actual assembly and bake time are minimal, making this ideal for efficient meal planning.
This recipe removes the guesswork usually associated with cookie baking. Its systematic approach ensures that even novice bakers see successful, café-quality results. Whether you are prepping for a bake sale or a cozy weeknight, these cookies deliver consistent satisfaction.
Why This Recipe Works
My extensive experience with home baking has shown that the interaction between acidic molasses and alkaline baking soda is the secret to success here. When combined, these ingredients form a chemical leavening process that produces bubbles, which leads to a soft, airy rise before the edges set. This reaction is fundamental to the signature lift found in a high-quality molasses cookie.
The choice to use vegetable oil instead of butter contributes to a consistently tender crumb. Because oil remains liquid at room temperature, it ensures that the cookies do not lose their moisture during the cooling phase. This technique keeps the cookies soft for an extended period, preventing the premature hardening often seen in butter-based doughs. Furthermore, the two-hour chill time is essential for hydration, allowing the flour to absorb the molasses and oil fully.
The final sensory payoff is excellent. The sugar coating creates a delightful crunch that contrasts with the tender, spiced interior. The molasses provides a robust base that enhances the spices, ensuring that every bite is deeply aromatic. Through the marriage of exact ingredient ratios and temperature control, this recipe achieves a professional balance of flavor and structural integrity.
Pro Tips Before You Start
- Room Temperature Ingredients: Remove your egg at least 30 minutes before mixing to ensure proper emulsification with the oil.
- Accurate Measurement: Use the spoon-and-level method for flour to avoid packing, which can lead to dry, heavy cookies.
- Mise En Place: Prepare all ingredients in separate bowls before activating the mixer to ensure a smooth, uninterrupted workflow.
Ingredients
Here is everything you will need to make perfect soft molasses cookies.
| Ingredient | Quantity | Notes |
|---|---|---|
| All-Purpose Flour | 2 cups (250g) | Standard bleached or unbleached |
| Granulated Sugar | 1 cup (200g) plus extra for rolling | White fine-grain sugar |
| Full Flavor Molasses | 1/4 cup (80g) | Brer Rabbit recommended |
| Vegetable Oil | 3/4 cup (170g) | Neutral flavor oil |
| Large Egg | 1 unit | Room temperature |
| Baking Soda | 2 tsp | Ensure it is fresh |
| Ground Cinnamon | 1 tsp | High-quality spice |
| Ground Cloves | 1/2 tsp | Freshly ground preferred |
| Ground Ginger | 1/2 tsp | Check expiration |
| Salt | 1/2 tsp | Fine sea salt |
Best Ingredients For Soft Molasses Cookies
Quality ingredients dictate the final flavor depth. The molasses is the heart of this dish, so choosing a full-flavor or unsulphured variety ensures a robust profile without an overly bitter aftertaste. Do not use blackstrap molasses, as its bitterness will overwhelm the delicate balance of the cinnamon and ginger.
Additionally, the freshness of your baking soda is critical. Since this recipe relies on the chemical reaction between the acid in the molasses and the base in the baking soda, using old baking soda will cause the cookies to stay dense and flat. Always store your spices in a cool, dark place to maintain their potency; fresh ginger and cloves provide a distinct aromatic punch that stale spices simply cannot replicate.
Step-by-Step Instructions
Phase 1: Prepare the Base
- Whisk the all-purpose flour, ground cloves, ground ginger, baking soda, ground cinnamon, and salt in a medium bowl until blended.
- Set the dry mixture aside while you prepare the wet ingredients to keep your workstation organized and clean.
Phase 2: Emulsify the Dough
- Beat the vegetable oil and 1 cup of granulated sugar in a large bowl on medium-high speed until the mixture looks smooth.
- Add the full-flavor molasses and the room-temperature egg to the oil mixture, beating until the color is uniform and fully combined.
- Switch the mixer speed to low to prevent flour dust from flying during the next step.
- Gradually add the dry ingredients to the wet mixture, stopping the mixer the moment the flour is no longer visible to avoid toughness.
- Cover the bowl tightly with plastic wrap and move to the refrigerator to chill for at least 2 hours until firm.
Phase 3: Bake and Cool
- Adjust the oven rack to the 2nd level position and preheat your oven to 375ºF (190ºC) while you line your baking sheets.
- Form 1-inch dough balls using a cookie scoop or tablespoon to ensure uniform size, which guarantees an identical bake time for every cookie.
- Roll each dough ball in the extra granulated sugar until evenly coated to create that desirable sparkling exterior finish.
- Place the balls onto parchment-lined baking sheets approximately 2 inches apart to allow for proper airflow during the rising process.
- Bake for 8-10 minutes, watching for the edges to set, then remove from the oven while the centers appear slightly soft.
- Cool the cookies on the pan for 5 minutes before transferring them to a cooling rack to prevent them from fracturing.
Chef Tips for Perfect Results
- Doneness Test: Cookies should be removed while the center still looks slightly soft; they will finish setting as they cool on the hot pan.
- Uniformity: Using a cookie scoop ensures all cookies bake at the same rate, preventing some from burning while others remain raw.
- Parchment Paper: Always use premium parchment paper to ensure an easy release and to prevent the sugar coating from sticking to the tray.
- Oven Calibration: Use an oven thermometer to verify 375ºF (190ºC) accurately, as most home ovens vary by up to 25 degrees.
Common Mistakes to Avoid
- Overmixing the Dough: If you mix past the point where flour disappears, the gluten will overdevelop, resulting in a tough, unappealing rubbery texture. Stop as soon as the flour is incorporated.
- Skipping the Chill Time: Failing to chill for 2 hours allows the oil to separate, causing cookies to spread into flat puddles; patience here is non-negotiable.
- Overcrowding the Sheet: Packing too many cookies on a tray disrupts air circulation, preventing the tops from setting correctly and resulting in uneven browning.
- Using Cold Eggs: Cold eggs can cause the oil to coagulate slightly; always use room temperature eggs to ensure a smooth, stable emulsion.
How to Make This Recipe Healthier
You can adjust this recipe to suit different dietary needs while maintaining the integrity of the cookie.
- Whole Wheat Flour: Replace up to 50% of the all-purpose flour with white whole wheat for added fiber; this adds a slightly nuttier flavor but will decrease the overall tenderness.
- Coconut Oil: Substitute vegetable oil with melted coconut oil; this adds a subtle tropical note and increases saturated fat, so use only if you enjoy the flavor.
- Reduced Sugar: You can reduce the granulated sugar in the dough by 15% without significantly harming the texture; however, do not skip the outer rolling sugar, as it is foundational for the structure.
Variations and Substitutions
| Ingredient | Substitution | Flavor Impact | Texture Impact |
|---|---|---|---|
| Vegetable Oil | Melted Coconut Oil | Subtle coconut notes | Slightly firmer when cooled |
| All-Purpose Flour | Gluten-Free 1-to-1 Blend | Neutral | May be slightly more crumbly |
| Ground Ginger | Fresh Grated Ginger | Brighter, zesty punch | No change |
Can You Make This Ahead?
Yes. You can prepare the dough through the chilling step up to 48 hours in advance. Keep the bowl tightly covered in the refrigerator so the dough does not dry out. When you are ready to bake, you may need to let the dough sit on the counter for 10 minutes if it feels too hard to scoop. For the best flavor, bake the cookies fresh from the dough on the day of serving.
Serving Suggestions and Pairings
Serve these cookies alongside a warm mug of spiced chai or a hot black coffee to cut through the molasses sweetness. For a dessert-focused presentation, pair them with a scoop of vanilla bean ice cream between two cookies for an elevated ice cream sandwich experience. They are perfect for holiday cookie exchanges, birthday parties, or a simple afternoon tea. Place them on a tiered platter for visual appeal, accented with a light dusting of extra cinnamon or powdered sugar if desired.
Best Occasions to Serve This Recipe
These cookies are an essential addition to any autumn or winter holiday menu, particularly during Thanksgiving and Christmas. Their portability makes them a top choice for office potlucks, neighborhood cookie swaps, or school events. Because the dough handles well, they are also a great “Sunday project” to prepare for a convenient, ready-to-eat treat throughout the work week.
Storage and Reheating
Store these cookies in an airtight container at room temperature to keep them soft for up to 7 days. If you find they have hardened, place a slice of fresh bread in the container overnight to reintroduce moisture.
| Method | Duration | Instructions |
|---|---|---|
| Room Temperature | 7 days | Airtight container |
| Freezer | 3 months | Flash freeze on a tray, then move to a freezer bag |
| Microwave | 10 seconds | Use low power to prevent toughening |
Nutritional Information
Approximate nutritional values per serving:
| Nutrient | Amount per Serving |
| Calories | 145 |
| Protein | 1g |
| Fat | 7g |
| Carbohydrates | 20g |
| Fiber | 0.5g |
| Sugar | 12g |
| Sodium | 110mg |
*Approximate values based on standard ingredients. Actual nutrition varies by brand and substitutions.
Conclusion
Soft molasses cookies represent the best of classic, comforting baking. By mastering the balance of molasses and spices, you create a treat that is as reliable as it is flavorful. This recipe provides the tools needed to achieve that elusive, perfectly chewy texture without the necessity of complex equipment.
The ease of this process ensures that these cookies remain a staple in your rotation for years to come. Whether you are baking for a festive event or a need for something sweet at home, this recipe delivers consistent results that satisfy every time. Give this recipe a try this weekend and experience the transformation of simple pantry ingredients into a warm, aromatic masterpiece. Share them with your friends to spread the joy of classic, homemade baking.
FAQ
Can I substitute molasses with honey?
No, honey is much thinner and lacks the deep, earthy profile required for this specific cookie chemistry. Using honey will result in a completely different flavor and likely cause the cookies to spread too much during baking.
How do I know when the cookies are done?
The cookies are done when the edges appear set and firm, but the centers still look slightly soft and underdone. Pull them out at this 8-10 minute window, as they continue to cook while resting on the hot pan.
What should I do if my dough is too sticky?
If the dough is too sticky to roll, refrigerate it for an additional 30 minutes; the cold temperature firms the fats, making the dough much easier to handle.
Can I make the dough the day before?
Yes, you can refrigerate the dough for up to 48 hours before baking. This resting period actually helps deepen the spice flavors, making the cookies even better.
Is this recipe suitable for a nut allergy?
Yes, this recipe is naturally nut-free as written. Always verify the labels on your flour and spice brands to ensure they were not processed in a facility that handles tree nuts.
Print
Perfect Soft Molasses Cookies
- Total Time: 145
- Yield: 24 cookies
- Diet: Vegetarian
Description
These soft molasses cookies are a quintessential comfort treat, featuring a tender, chewy crumb and a beautiful crackled sugar crust. Infused with a warming blend of ginger, cinnamon, and cloves, they offer a sophisticated flavor profile that remains perfectly soft in the center. Ideal for holiday gatherings or a quiet afternoon snack, this foolproof recipe uses the reaction between molasses and baking soda to ensure a delightful, pillowy texture that everyone will love.
Ingredients
2 1/4 cups all-purpose flour
1 teaspoon baking soda
1 1/2 teaspoons ground ginger
1 teaspoon ground cinnamon
1/2 teaspoon ground cloves
1/4 teaspoon salt
3/4 cup unsalted butter, softened
1/2 cup granulated sugar
1/2 cup packed brown sugar
1/3 cup molasses
1 large egg
1/3 cup granulated sugar (for rolling)
Instructions
In a medium bowl, whisk together flour, baking soda, ginger, cinnamon, cloves, and salt.
In a large bowl, beat the softened butter, 1/2 cup brown sugar, and 1/2 cup granulated sugar until light and fluffy.
Beat in the egg and molasses until well combined.
Gradually add the dry ingredients to the wet mixture, mixing until just incorporated.
Cover and refrigerate the dough for at least 2 hours to ensure the best texture.
Preheat oven to 350°F (175°C) and line a baking sheet with parchment paper.
Roll the dough into 1-inch balls and roll each ball in the remaining granulated sugar.
Place balls 2 inches apart on the prepared baking sheet.
Bake for 10 minutes, or until the edges are set and tops have crackled.
Cool on the baking sheet for 5 minutes before transferring to a wire rack to cool completely.
Notes
Ensure your molasses is unsulphured for the best flavor balance. Do not overbake as the cookies will continue to firm up slightly while cooling. Store in an airtight container at room temperature for up to 5 days for optimal freshness.
- Prep Time: 15
- Cook Time: 10
- Category: Desserts
- Method: Baking
- Cuisine: American