
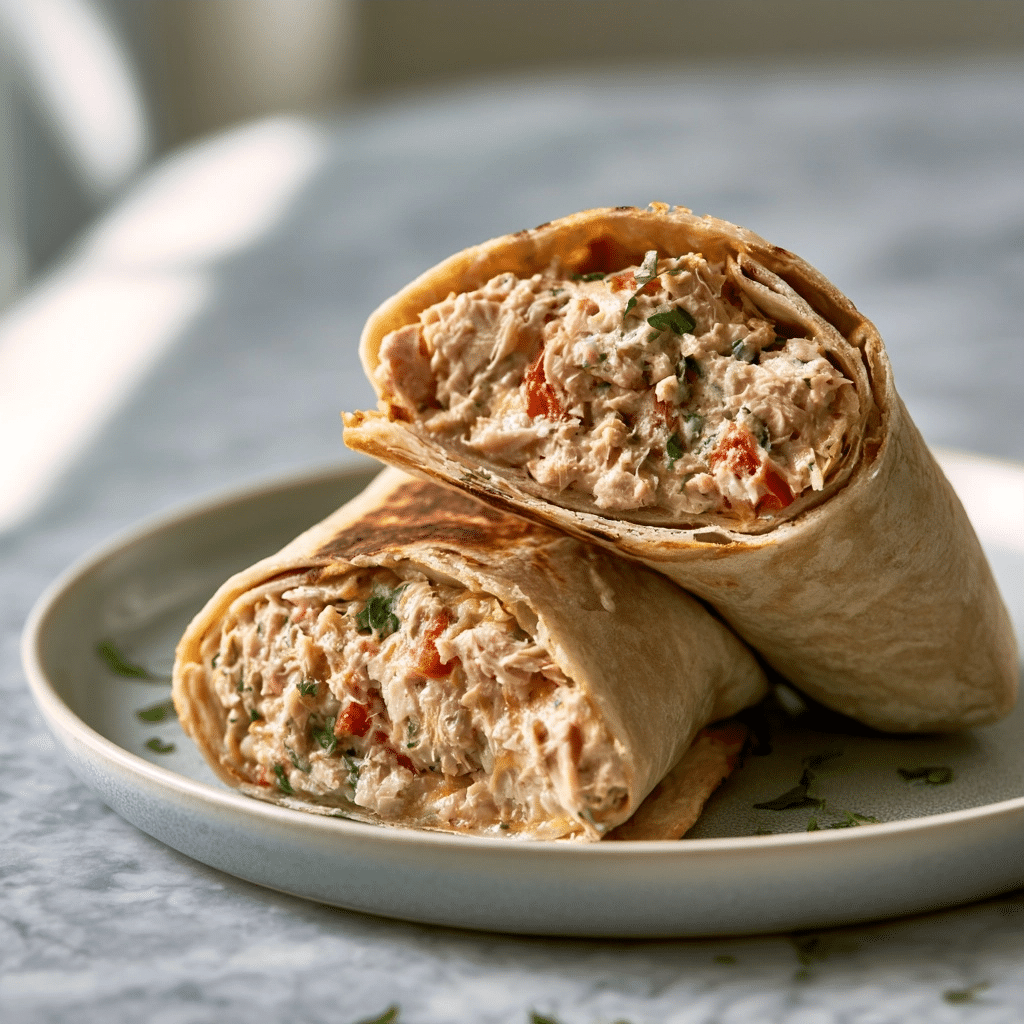
A Healthy Tuna Melt Wrap offers a balanced, convenient meal perfect for busy individuals seeking a protein-packed lunch or dinner. Combining lean tuna with Greek yogurt and crunchy vegetables, this dish provides satisfying textures and vibrant flavors in every bite. Whether you are prepping for the week or need a fast, wholesome meal, this wrap serves as an ideal solution. You will enjoy the contrast of the melted mozzarella against the refreshing crunch of corn and onion for a truly fulfilling experience.

What Is a Healthy Tuna Melt Wrap?
A Healthy Tuna Melt Wrap is a modern, lighter interpretation of the classic toasted tuna melt sandwich. Instead of using bread, this version utilizes a flexible, large tortilla that holds a savory mixture of tuna, aromatics, and melted cheese. By replacing high-fat mayonnaise with Greek yogurt and adding colorful vegetables, it transforms a standard lunch into a nutrient-dense option. The dish centers on the practice of searing the filled wrap to achieve a golden, crisp exterior while ensuring the cheese inside becomes perfectly gooey and warm.
| Prep Time | 10 minutes |
| Cook Time | 7 minutes |
| Total Time | 17 minutes |
| Servings | 1 large wrap |
| Difficulty Level | Easy |
| Cuisine | Fusion |
| Calories per Serving | 420 kcal |
Why You’ll Love This Recipe
Effortless Preparation: This recipe requires minimal kitchen equipment and comes together in less than twenty minutes.
Balanced Macros: High protein from the tuna and yogurt keeps you satiated for longer.
Foolproof Technique: The folding and searing process is straightforward, ensuring a reliable result every time.
Customizable: It is highly versatile, allowing you to easily swap ingredients based on personal preference or pantry availability.
Crowd-Pleasing Taste: The flavor profile balances savory, tangy, and fresh elements that appeal to various palates.
This recipe shines because it addresses the needs of modern, active lifestyles that prioritize both nutrition and flavor. It serves as an excellent weeknight dinner or an efficient meal-prep component, ensuring you always have a wholesome option ready to go.
Why This Recipe Works
In my years of food writing, I have found that the secret to a great wrap lies in the moisture management of the filling. By incorporating Greek yogurt instead of traditional mayonnaise, we maintain the necessary creaminess without the heavy fat, keeping the wrap light and clean.
The technique of using a damp paper towel to heat the wrap is crucial. This step introduces steam/humidity, which increases the elasticity of the flour tortilla, preventing it from cracking during the folding process. Furthermore, the sear on the grill pan ensures the cheese undergoes enough thermal energy to melt, while the exterior develops a satisfying, crisp structure through controlled caramelization.
Ultimately, the sensory payoff is a balance of temperatures and textures. The hot, toasted crust gives way to a cool-yet-warmed interior, where the texture of the corn and onion provides necessary structural contrast to the flakiness of the tuna. The acidity from the lemon juice and mustard brightens the dish, cutting through the richness of the melted mozzarella to create a cohesive bite.
Pro Tips Before You Start
Drain Thoroughly: Ensure the canned tuna is well-drained to prevent a soggy wrap interior.
Temperature Control: Use medium heat to allow the cheese to melt slowly without burning the tortilla exterior.
Consistent Dicing: Uniformly chop your red onions to ensure every bite delivers a consistent flavor profile and crunch.
Mise en Place: Prepare all ingredients before heating the tortilla so you can assemble and sear immediately while it remains soft.
Ingredients
Here is everything you will need to make this healthy tuna melt wrap:
| Ingredient | Quantity | Notes/Alternatives |
|---|---|---|
| Skipjack Tuna | 5 oz (140g) | Canned in water; drain thoroughly |
| Greek Yogurt | 2 tbsp (30g) | Plain, non-fat or full-fat |
| Dijon Mustard | 0.5 tbsp (8g) | Regular mustard works if preferred |
| Lemon Juice | 1 tbsp (15ml) | Freshly squeezed is best |
| Corn | 0.25 cup (40g) | Canned, frozen, or fresh |
| Red Onion | 0.25 cup (40g) | Diced finely |
| Dill Relish | 1 tbsp (15g) | Capers are a great alternative |
| Garlic Powder | 0.5 tsp (2g) | Adds savory depth |
| Black Pepper | 0.25 tsp (1g) | Adjust to taste |
| Mozzarella Cheese | 0.25 cup (28g) | Shredded; use low-moisture |
| Large Wrap | 1 (10-inch) | Siete or La Tortilla Factory |
Best Ingredients for This Recipe
The quality of your canned tuna drastically changes the final product. Opt for high-quality skipjack or yellowfin tuna packed in water to keep calorie counts low. The mustard you choose acts as a seasoning agent, so use a high-quality Dijon for more complex, zesty notes compared to plain yellow varieties.
Additionally, the choice of cheese impacts the melt. Low-moisture shredded mozzarella ensures that your wrap stays structurally sound while providing the iconic stretchy, gooey consistency characteristic of a traditional melt. If you prefer a sharper flavor, a blend of mozzarella and a small amount of sharp cheddar provides a fantastic balance without sacrificing melt quality.
Step-by-Step Instructions
Phase 1: Assemble the Tuna Mixture
Drain the canned tuna completely by pressing it against a fine-mesh sieve or the lid of the can.
Combine the drained tuna, Greek yogurt, mustard, and lemon juice in a medium-sized glass mixing bowl.
Fold in the corn, diced red onion, relish, garlic powder, and black pepper until the mixture is uniform.
Phase 2: Prepare the Tortilla
Heat the burrito-sized wrap by covering it with a damp paper towel and microwaving for 15-20 seconds.
Place the warm wrap flat on a clean surface to prepare for assembly.
Spread the mozzarella cheese in a line near the bottom edge of the wrap.
Add the prepared tuna mixture on top of the shredded cheese layer.
Phase 3: Roll and Sear
Fold the sides of the tortilla inward about two inches to keep the filling secure.
Tuck the bottom edge of the tortilla over the filling and roll it away from you tightly.
Heat a skillet or grill pan over medium heat and add a small amount of olive oil.
Place the wrap seam-side down in the pan to seal it initially for 3-4 minutes.
Flip the wrap carefully using a wide spatula once golden brown and sear for another 2-3 minutes.
Remove the wrap from the heat and allow it to rest for one minute before slicing.
Chef Tips for Perfect Results
Check the Seam: Always place the seam side down first to “glue” the wrap shut using the melting cheese.
Press Gently: Apply light pressure with your spatula during the searing process to ensure even contact and better heat transfer.
Temperature Check: If the tortilla is darkening too fast, immediately turn the heat to medium-low to ensure the center warms through.
Resting Time: Let the wrap rest for 60 seconds after searing to allow the cheese to set slightly, making it easier to slice.
Common Mistakes to Avoid
Not Draining Tuna: Excess liquid leads to a soggy wrap. Always strain your tuna until it is relatively dry.
Overcrowding: Overfilling prevents the wrap from closing tightly. Keep the filling centered to ensure a clean, neat fold.
Skipping the Steam: Heating the tortilla is non-negotiable. Cold tortillas are brittle and will crack or tear upon folding.
Heat Too High: If you use high heat, the outer layer will burn before the internal cheese has reached a melting point.
How to Make This Recipe Healthier
You can optimize this recipe by focusing on fiber and fat quality. Replacing the standard flour wrap with a high-fiber or whole-wheat version increases satiety and adds essential nutrients. Using non-fat Greek yogurt is an effective way to lower total caloric density while maintaining protein intake. Swapping conventional cheese for a part-skim shredded mozzarella also reduces saturated fat without compromising the necessary melt quality.
Variations and Substitutions
This recipe allows for significant creativity. You can make it spicy by adding jalapeños or switch the flavor profile for a Mediterranean twist.
| Ingredient | Substitution | Flavor Impact | Texture Impact |
|---|---|---|---|
| Corn | Diced bell pepper | More aromatic | Crisper |
| Mozzarella | Vegan mozzarella shreds | Slightly nuttier | Less stretchy |
| Dill Relish | Chopped olives | Briny and savory | Similar |
| Greek Yogurt | Mashed avocado | Creamy and rich | More natural moisture |
Can You Make This Ahead?
Yes, you can prepare the tuna filling up to 3 days in advance if it is stored in an airtight container in the refrigerator. However, I recommend waiting to assemble and toast the wrap until you are ready to eat. Pre-assembled wraps can become soft or soggy if left in the fridge, so building them fresh ensures the ideal texture.
Serving Suggestions and Pairings
Serve this warm wrap alongside a crisp green salad tossed with a simple vinaigrette to contrast the warmth of the tuna melt. For a heartier meal, enjoy it with a side of roasted sweet potato wedges or a light vegetable soup. Pair the dish with a glass of sparkling water infused with fresh lemon or a chilled herbal tea to complement the flavors.
Best Occasions to Serve This Recipe
This meal excels during busy weekday lunches when you need something efficient yet nourishing. It is also an excellent option for meal prep Sundays, allowing you to have portions of the tuna mixture ready for the week. For casual gatherings, provide a variety of wraps for a DIY station where guests can customize their own fillings.
Storage and Reheating
Follow these instructions for maximum freshness of your leftovers.
| Method | Duration | Instructions |
|---|---|---|
| Refrigerator | 3 days | Store filling in an airtight container |
| Freezer | Not Recommended | The moisture from thaw ruins the texture |
| Reheating (Skillet) | 5 minutes | Reheat on low heat to crisp the tortilla exterior |
| Reheating (Oven) | 8 minutes | Place in a 350°F oven until warmed through |
Nutritional Information
Approximate nutritional values per serving:
| Nutrient | Amount per Serving |
|---|---|
| Calories | 420 |
| Protein | 28g |
| Fat | 12g |
| Carbohydrates | 48g |
| Fiber | 4g |
| Sugar | 3g |
| Sodium | 650mg |
*Approximate values based on standard ingredients. Actual nutrition varies by brand and specific ingredient choices.
Conclusion
The Healthy Tuna Melt Wrap delivers a perfect balance of nutrition and convenience, making it a reliable staple for your daily rotation. By using high-quality tuna, fresh aromatics, and a Greek yogurt base, you transform a classic comfort dish into a wholesome powerhouse. This recipe proves that quick meals do not need to sacrifice flavor or texture.
You will discover that the simple technique of searing the wrap creates a superior experience compared to standard cold sandwiches or salads. This dish provides an impressive result with minimal effort, catering to both busy families and individuals looking for efficient, healthy choices. Master the folding technique, choose your favorite ingredients, and enjoy the delicious payoff.
Save this recipe for your next busy afternoon or meal-prep session. Share it with friends and family who value simple ingredients and effective cooking methods. This healthy tuna melt wrap transforms how you approach lunch, setting a new standard for your daily routine.
FAQ
Can I substitute the skipjack tuna?
Yes, you can substitute skipjack or yellowfin tuna with canned chicken or chickpeas. Each alternative provides a similar textural base while allowing you to adjust the protein source to your dietary preferences.
How do I know when the wrap is done?
The wrap is done when the exterior reaches a deep golden brown color and the interior cheese has achieved a soft, malleable state. You should also notice the tortilla becoming firmer and more rigid to the touch.
What should I do if the tortilla cracks?
Ensure the tortilla is warm and moist before you start folding it. If it still cracks, use slightly less filling or ensure you are heating the tortilla for the full 20 seconds with a damp paper towel.
Can I make this the day before?
You can prepare the tuna filling ahead of time, but you should not wrap or toast the tortilla until you are ready to serve. Assembling the wrap too early will result in a soft, unappealing texture.
How do I reheat the wrap without it getting soggy?
Avoid the microwave for reheating, as it softens the tortilla quickly. Instead, use a dry skillet on medium-low heat to regain the crispness on the outside while warming the interior.
Is this recipe suitable for gluten-free diets?
Yes, simply substitute the standard burrito-sized wrap with a high-quality gluten-free tortilla. Ensure the tortilla is flexible by following the same damp paper towel heating method.
PrintHealthy Tuna Melt Wrap
- Total Time: 17
- Yield: 1 large wrap
- Diet: Pescatarian
Description
A light and nutritious twist on the classic tuna melt, this healthy wrap replaces heavy mayonnaise with zesty Greek yogurt and packs in fresh vegetables, corn, and gooey mozzarella. It is a protein-rich, balanced meal perfect for a quick lunch or dinner. The wrap is lightly seared until crisp, providing a satisfying, golden exterior that holds all the creamy, savory flavors inside. It is an effortless, wholesome way to fuel your day without the heaviness of traditional comfort food.
Ingredients
1 can (5 oz) tuna in water, drained
2 tablespoons Greek yogurt
1/4 cup shredded mozzarella cheese
2 tablespoons canned corn, drained
1 tablespoon finely diced red onion
1 large flour tortilla
1/2 teaspoon dried parsley
Salt and pepper to taste
Instructions
In a medium bowl, combine the drained tuna, Greek yogurt, diced onion, corn, parsley, salt, and pepper.
Lay the flour tortilla flat on a clean surface.
Spread the tuna mixture onto the center of the tortilla.
Top the tuna mixture evenly with the shredded mozzarella cheese.
Fold in the sides of the tortilla and roll it up tightly into a wrap.
Heat a non-stick skillet over medium-high heat.
Place the wrap seam-side down in the hot skillet.
Sear for 3-4 minutes per side until the tortilla is golden brown and the cheese is fully melted.
Notes
Ensure the tuna is well-drained to keep the wrap from becoming soggy.
For extra crunch, add finely diced celery or bell pepper to the tuna mixture.
The wrap can be served immediately while warm for the best texture.
- Prep Time: 10
- Cook Time: 7
- Category: Meals
- Method: Pan-searing
- Cuisine: Fusion