
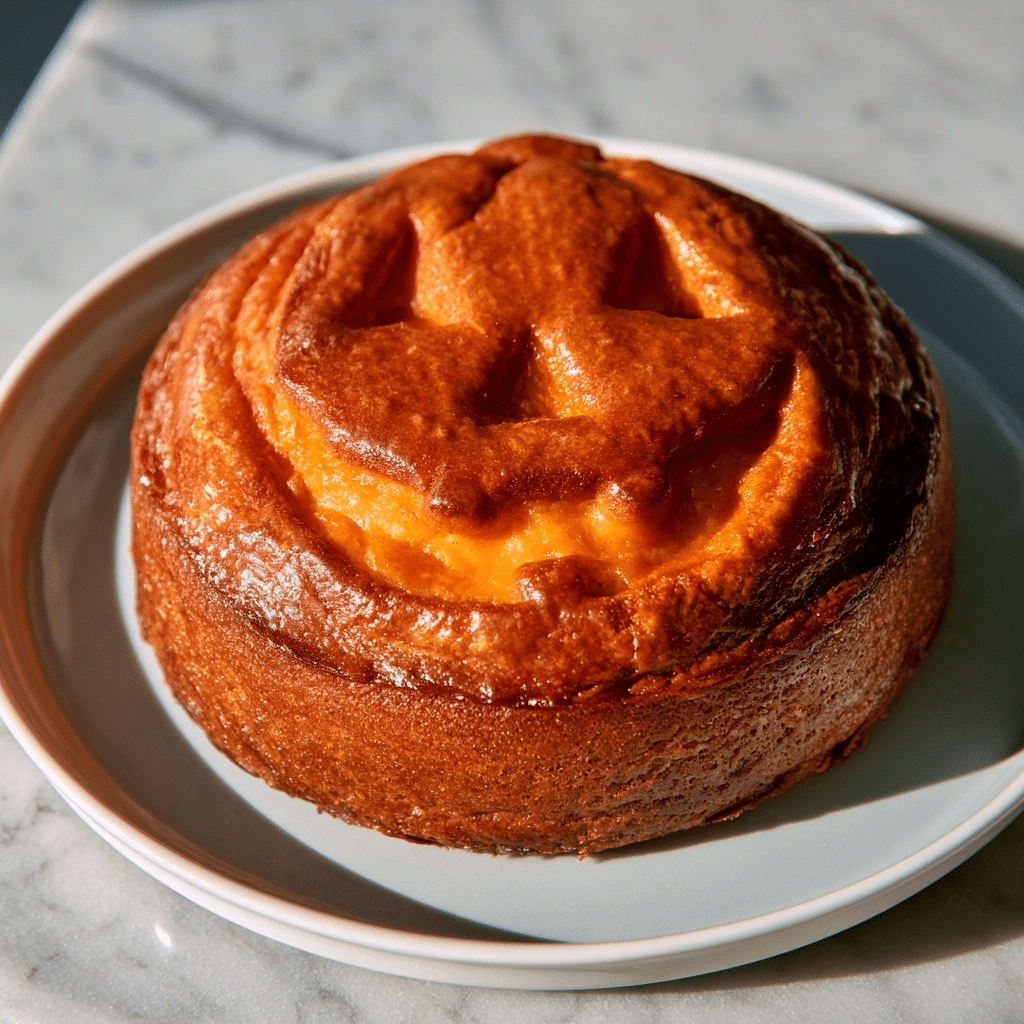
The Perfect Jack-O’-Lantern Halloween Cake provides a festive centerpiece for your holiday celebrations with its rich chocolate flavor and iconic carved appearance. This layered masterpiece uses two chocolate bundt cakes stacked to mimic the shape of a plump pumpkin, making it an ideal choice for bakers looking to impress guests at themed parties. Its moist, tender crumb contrasts beautifully with sweet American buttercream, ensuring every slice tastes as spectacular as it looks. You can achieve professional-looking results at home by following this straightforward assembly guide that transforms simple pantry staples into a memorable seasonal treat.
What Is A Jack-O’-Lantern Halloween Cake?
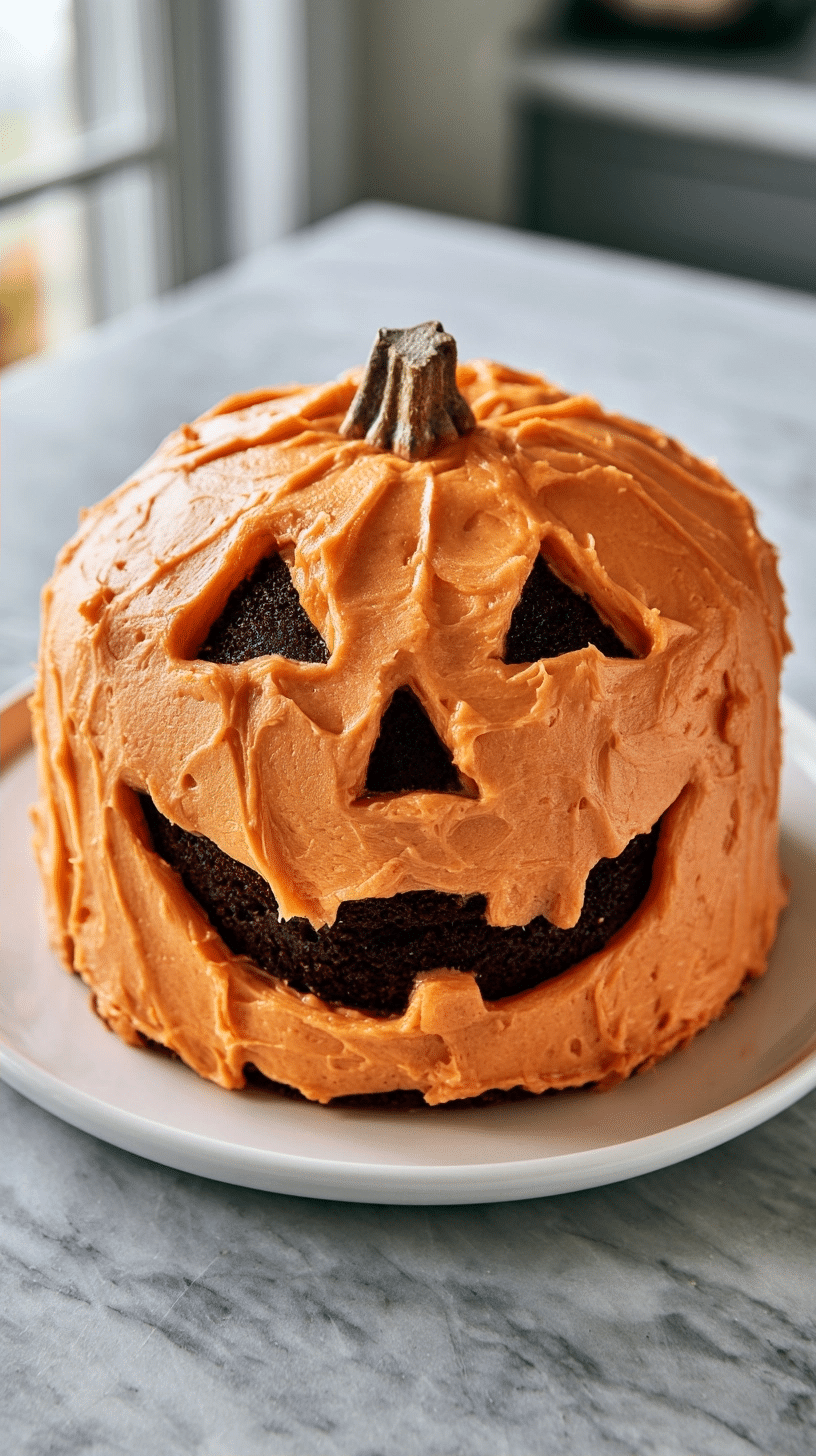
A Jack-O’-Lantern Halloween Cake is a sculpted dessert designed to look like a traditional carved pumpkin using stacked bundt cakes. By layering two circular cakes, you create the rounded form necessary to mimic a gourd, which is then smoothed over with vibrant orange frosting. This style of cake often features carved-out sections filled with dark chocolate icing to replicate a classic pumpkin face. It stands apart from standard holiday cakes due to its sculptural nature, requiring careful frosting techniques to achieve the smooth, rounded edges that define this popular autumn confection.
| Prep Time | 60 minutes |
| Cook Time | 100 minutes |
| Total Time | 160 minutes |
| Servings | 16 |
| Difficulty Level | Intermediate |
| Cuisine | American |
| Calories per Serving | 580 |
Why You’ll Love This Recipe
- Effortless assembly: The bundt shape naturally provides the pumpkin curvature, saving you from complex carving.
- Foolproof technique: Using a crumb coat ensures your final finish is smooth and professional.
- Crowd-pleasing flavor: The combination of rich cocoa and sweet vanilla buttercream appeals to all ages.
- Versatile scaling: You can easily adjust the size by using smaller or larger bundt pans as needed.
- Impressive presentation: This cake serves as an eye-catching focal point for any Halloween dessert table.
The primary appeal of this recipe lies in its accessibility for home bakers. You do not need specialized sculpting tools to create a realistic pumpkin aesthetic, making it an excellent project for weekend baking. Whether you are hosting a festive gathering or preparing a showstopper for the family, this cake delivers consistent, reliable results every time.
Why This Recipe Works
In my years of developing seasonal desserts, I have found that the bundt cake structure provides the most stable foundation for stacking. The specific density of the crumb holds up well under the weight of the buttercream, preventing the layers from shifting or sliding while you carve the face.
This recipe relies on the chemical leavening provided by bicarb soda combined with the acidity of the cocoa powder. When these ingredients react, they create a light yet sturdy texture that absorbs moisture from the butter and milk. This ensures the cake remains soft for days, even after being frosted and chilled. The key to the pumpkin shape is the crumb coating stage; by chilling the cake after the initial layer, you lock in loose particles, allowing the final orange coat to remain perfectly smooth.
The sensory payoff is a balance of deep, earthy chocolate notes against the sugary brightness of the orange frosting. Because the cake is carved into the frosting rather than the sponge itself, you preserve the structural integrity of the dessert while achieving a dramatic visual contrast. The addition of a chocolate stalk and piped vines completes the design, creating a multi-dimensional experience that looks as good as it tastes.
Pro Tips Before You Start
Room Temperature Ingredients: Remove eggs, butter, and milk from the refrigerator 30 minutes before mixing to ensure proper emulsification.
Proper Pan Preparation: Use a high-quality silicone pastry brush to ensure every crevice of your bundt pan is coated with butter and cocoa to prevent sticking.
Mise en Place: Measure all dry and wet ingredients into separate bowls before you turn on your mixer to maintain a steady workflow.
Ingredients
Here’s everything you’ll need to make your Jack-O’-Lantern Halloween Cake.
| Ingredient | Quantity | Notes |
| Unsalted Butter (melted) | 125g | For coating |
| Cocoa Powder | 50g | Plus extra for dusting |
| All-Purpose Flour | 700g | Total for 2 cakes |
| Caster Sugar | 900g | Total for 2 cakes |
| Bicarb Soda | 2 tsp | Total for 2 cakes |
| Salt | 2 tsp | Total for 2 cakes |
| Eggs | 8 large | Room temp |
| Milk | 700g | Room temp |
Best Ingredients for Jack-O’-Lantern Halloween Cake
High-quality cocoa powder is the most important element for this recipe. Dutch-processed cocoa provides a darker color and a smoother, less acidic flavor compared to standard natural cocoa. If your budget allows, choose a premium brand, as the cocoa provides the base flavor for the cake and the dark frosting. Use fresh, high-quality butter; since it forms the base of your frosting, any off-flavors in the butter will be magnified. Finally, using a gel-based food coloring is essential. Liquid colors can alter the consistency of your buttercream, whereas gels provide intense color with minimal impact on texture.
Step-by-Step Instructions
Phase 1: Preparing the Cake Base
- Coat the inside of your bundt tin thoroughly with melted butter and dust with cocoa powder, tapping out the excess.
- Combine the flour, sugar, bicarb soda, salt, and cocoa powder in a large mixing bowl, whisking until uniform.
- Add the softened butter one tablespoon at a time while the mixer runs on low speed.
- Pour the eggs and milk into the mixture slowly, then mix for 3-4 minutes to develop the structure.
- Scrape the sides of the bowl down, then mix for an additional 1-2 minutes until the batter is smooth.
- Bake the batter at 140C (285F) for 45-50 minutes until a toothpick inserted into the center comes out clean.
- Cool the cake in the pan for 10 minutes, then invert onto a wire rack and repeat for the second batch.
Phase 2: Frosting and Assembly
- Mix three batches of American buttercream, adding orange food gel to the majority for the main pumpkin color.
- Color one-quarter of the remaining frosting green and add cocoa powder and melted chocolate to the rest.
- Divide the chocolate portion, adding black food gel to one half to create the face details.
- Secure the first cake curved side down on a board, then add frosting to the flat side and top with the second cake.
- Apply a thin crumb coat of orange frosting over the entire stacked cake and chill in the fridge for 2 hours.
- Smooth the remaining orange frosting over the chilled cake, working from bottom to top to create the pumpkin ridges.
Phase 3: Carving and Decorating
- Trace the face outline onto the frosting using a clean skewer to ensure symmetry before carving.
- Carve away the frosting carefully using a small offset spatula or knife to create the eye and mouth holes.
- Fill the carved sections with your black chocolate frosting, smoothing it level with the orange surface.
- Pipe the chocolate frosting onto the top to form the stalk and smooth with a small spatula.
- Pipe the vines and leaves using your green frosting to finish the pumpkin aesthetic.
Chef Tips for Perfect Results
- Temperature Control: Use an instant-read thermometer to check that the cake reaches 200F (93C) internally to ensure it is fully set.
- Levelling Success: Use a long, sharp serrated knife to level the cake bottoms while they are cold to avoid crumbling.
- Smoothing Trick: Dip your offset spatula in warm water and wipe it dry before smoothing the final orange coat for a polished finish.
- Chilling Advantage: Do not skip the 2-hour chill time, as the frosting needs to firm up to allow for precise carving.
- Vivid Colors: Let the colored frosting sit for 30 minutes before decorating, as colors deepen as they hydrate.
Common Mistakes to Avoid
- Overmixing the Batter: Results in a tough, dense cake. Develops gluten too quickly. Stop as soon as ingredients are combined.
- Uneven Cooling: Leads to cake breakage. Cakes must reach room temperature before leveling. Use a wire rack for airflow.
- Excessive Heat: Causes the cake to dome or crack. Bake at 140C fan-forced to ensure a flat, even rise.
- Warm Crumb Coat: Results in frosting sliding off. Always chill the crumb coat until firm to the touch.
How to Make This Recipe Healthier
While this is a celebratory dessert, you can make minor adjustments to improve the nutritional profile. All-purpose flour → White whole wheat flour: Increases fiber content significantly without altering the texture too drastically. Granulated sugar → Coconut sugar: Adds a slight caramel undertone and contains trace minerals, though it will darken the cake color. Butter → Applesauce: Replaces half the fat with fruit puree, reducing overall calories, though it creates a moister, denser crumb.
Variations and Substitutions
Customizing your cake allows you to tailor the flavors to your preference.
| Ingredient | Substitution | Impact on Flavor | Impact on Texture |
| All-Purpose Flour | Gluten-Free Blend | Slightly nuttier | More crumbly |
| Milk | Almond Milk | Nutty undertone | Minimal change |
| Dark Chocolate | Milk Chocolate | Sweeter/Milder | Softer set |
Can You Make This Ahead?
Yes, you can make this cake ahead of time. Bake the two bundt cakes up to 3 days in advance and store them wrapped tightly in plastic wrap at room temperature. You can also assemble and crumb coat the cake up to 2 days before serving, keeping it refrigerated. Apply the final orange frosting and carvings on the day of the event to ensure the frosting remains fresh and vibrant.
Serving Suggestions and Pairings
Serve this cake at room temperature to allow the butter in the frosting to soften for a better mouthfeel. Pair it with a hot cup of spiced chai tea or a non-alcoholic apple cider punch to complement the autumn flavors. Place the cake on a dark slate or rustic wooden pedestal to highlight the bright orange color. For an added touch, scatter small chocolate-covered pumpkin candies around the base of the cake board during service.
Best Occasions to Serve This Recipe
This cake is the ultimate showstopper for Halloween dinner parties or classroom celebrations. It is perfect for family gatherings where you want a festive, handmade dessert that feels special. Consider making it for a neighborhood potluck or a themed fall birthday party. Its sturdy nature also makes it ideal for events where you need to transport the dessert, as it is less fragile than a multi-tiered sponge cake.
Storage and Reheating
Proper storage is essential to maintain the texture of your decorated cake.
| Method | Duration | Instructions |
| Refrigerator | 4 days | Keep in an airtight cake carrier |
| Freezer | 1 month | Freeze un-frosted layers wrapped in plastic |
Nutritional Information
Approximate nutritional values per serving:
| Nutrient | Amount per Serving |
| Calories | 580 |
| Protein | 6g |
| Fat | 28g |
| Carbohydrates | 72g |
| Fiber | 3g |
| Sugar | 54g |
| Sodium | 320mg |
*Approximate values based on standard ingredients. Actual nutrition varies by brand and substitutions.
Conclusion
The Jack-O’-Lantern Halloween Cake delivers a perfect blend of visual impact and rich, chocolate satisfaction. By utilizing the natural shape of the bundt pan, you gain a professional-looking result without needing advanced structural engineering skills. This recipe transforms standard pantry items into a holiday centerpiece that defines the spirit of the season.
You will discover that the process is as rewarding as the final product. Every step, from the initial batter preparation to the final pipe of the green vines, is designed for success. Whether you are a novice baker or an experienced pro, this cake provides the ideal way to celebrate the holiday with a touch of homemade magic.
Share this recipe with friends and family to make your next celebration unforgettable. Try creating your own version today and enjoy the sweet success of a perfectly carved pumpkin cake.
FAQ
Can I substitute cocoa powder with carob powder?
You can substitute cocoa powder with carob powder in a 1:1 ratio, though it will result in a sweeter, maltier flavor profile rather than a deep chocolate taste.
How do I know when the bundt cake is done cooking?
The cake is done when a wooden skewer inserted into the thickest part comes out clean or with only a few moist crumbs, and the top springs back when touched lightly.
What should I do if the cake sticks to the pan?
If the cake sticks, let it cool for exactly 10 minutes and tap the sides gently. If it persists, place a warm, damp towel over the bottom of the pan to help loosen the butter.
Can I make the cake the day before?
Yes, preparing the cakes ahead of time is recommended as it makes the structure easier to handle during assembly and carving.
How do I reheat the cake without it drying out?
You should serve this cake at room temperature, but if you must heat it, do so in short 5-second bursts in the microwave to avoid melting the buttercream.
Is this recipe suitable for gluten-free diets?
This recipe can be made gluten-free by substituting the all-purpose flour with a high-quality, cup-for-cup gluten-free flour blend that contains xanthan gum.
Print
Perfect Jack-O’-Lantern Halloween Cake
- Total Time: 160
- Yield: 16 servings
- Diet: Vegetarian
Description
Create a stunning centerpiece for your Halloween celebration with this Jack-O’-Lantern cake. By stacking two chocolate bundt cakes, you form the perfect pumpkin shape without any complex carving. Covered in vibrant orange buttercream and finished with dark chocolate icing details, this moist and rich dessert is as delicious as it is impressive. It is a fantastic, festive project for home bakers of all skill levels looking to serve a show-stopping, crowd-pleasing treat.
Ingredients
3 cups all-purpose flour
2 cups granulated sugar
1 cup unsweetened cocoa powder
2 tsp baking powder
1 tsp baking soda
1 tsp salt
1 cup unsalted butter, softened
4 large eggs
1 cup whole milk
1 cup sour cream
1 tbsp vanilla extract
2 cups unsalted butter, softened (for frosting)
6 cups powdered sugar
2 tsp vanilla extract
1 tbsp milk
Orange food coloring
1/2 cup dark chocolate chips (for face decoration)
Instructions
Preheat your oven to 350°F (175°C) and grease two bundt pans.
Whisk together flour, sugar, cocoa, baking powder, baking soda, and salt in a large bowl.
Beat in the softened butter, eggs, milk, sour cream, and vanilla until smooth.
Divide the batter between the two bundt pans and bake for 45-50 minutes or until a toothpick comes out clean.
Cool completely before removing from the pans.
Prepare the buttercream by beating butter, powdered sugar, vanilla, and milk until fluffy; tint orange with food coloring.
Place one bundt cake flat side down, frost the top, and place the second cake flat side down on top to form the pumpkin sphere.
Frost the entire exterior with the orange buttercream, smoothing it out.
Use melted chocolate chips to draw the jack-o’-lantern face on the front of the cake.
Notes
Ensure cakes are completely cool before frosting to prevent the butter in the buttercream from melting. You can use a bit of extra frosting to fill the center hole of the cake for more stability. Store in a cool, dry place.
- Prep Time: 60
- Cook Time: 100
- Category: Desserts
- Method: Baking
- Cuisine: American