
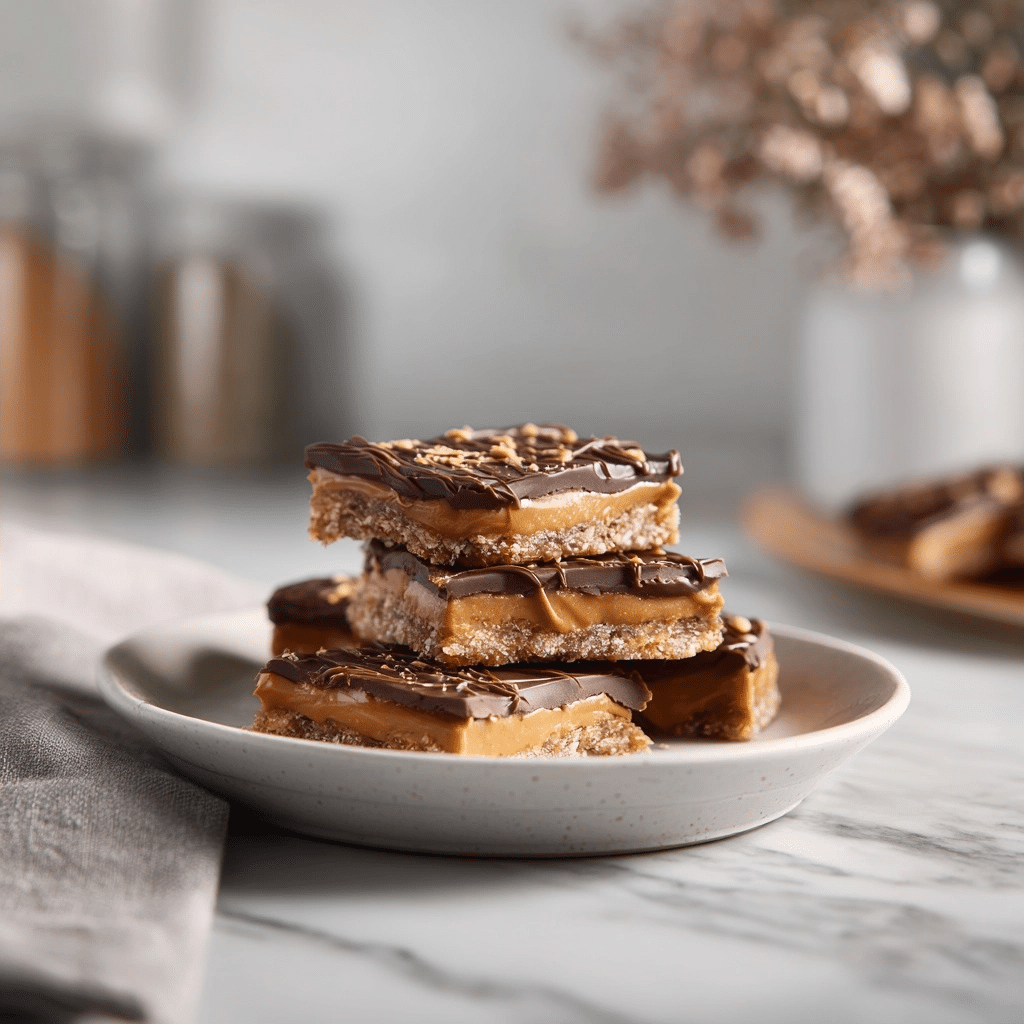
Peanut butter chocolate bars represent the ultimate no-bake dessert combining a salty graham cracker crust with a rich, velvety chocolate topping. These Peanut Butter Chocolate Bars utilize high-quality fats and sugars to create a dense, fudge-like texture that requires no oven time or complicated techniques. This classic confection relies on the structural integrity of finely ground graham cracker crumbs and softened butter to hold its shape once chilled. Home bakers prefer this specific preparation because it delivers professional-grade results with a short ingredient list and minimal cleanup requirements. Every bite provides a satisfying crunch from the cracker base followed by the smooth melt of semi-sweet chocolate chips. This recipe serves as a staple for potlucks, bake sales, and holiday dessert platters due to its universal appeal and consistent structural stability when served at room temperature.
Recipe Overview
| Prep Time | Cook Time | Total Time | Servings | Difficulty | Cuisine |
|---|---|---|---|---|---|
| 15 Minutes | 0 Minutes | 135 Minutes | 24 Bars | Easy | American |
Why This Recipe Works
I have spent years perfecting the ratio of fat to dry ingredients to ensure these bars never crumble when sliced. The combination of melted butter and creamy peanut butter acts as a binding agent that solidifies into a sturdy base when refrigerated. Unlike many baked goods, the flavor of these bars intensifies as they sit, making them an ideal candidate for advanced meal preparation. The powdered sugar provides a smooth sweetness that dissolves instantly, avoiding the gritty texture often found in recipes using granulated sugar.
The addition of graham cracker crumbs introduces a subtle honeyed note that complements the salty profile of the peanut butter perfectly. I find that using semi-sweet chocolate chips provides the necessary bitterness to balance the sugar content in the base. This balance ensures the dessert is indulgent without becoming cloying after a single bite. The chilling process allows the oils to stabilize, resulting in a clean cut and a uniform appearance that rivals expensive bakery offerings.
Ingredients
| Ingredient | Quantity | Notes and Alternatives |
|---|---|---|
| Unsalted Butter | 1 cup | Melted; can use salted butter but reduce added salt. |
| Graham Cracker Crumbs | 2 cups | Finely ground; digestive biscuits work as a substitute. |
| Powdered Sugar | 2 cups | Sifted to remove lumps for a smooth texture. |
| Peanut Butter | 1 cup | Creamy commercial brands work best for stability. |
| Chocolate Chips | 1.5 cups | Semi-sweet or dark chocolate for best flavor contrast. |
Step-by-Step Instructions
Phase 1: Preparing the Peanut Butter Base
- Melt the butter in a microwave-safe bowl or heavy-bottomed saucepan over low heat until completely liquid.
- Combine the melted butter, graham cracker crumbs, and powdered sugar in a large mixing bowl.
- Add the creamy peanut butter to the mixture and stir vigorously until a thick, uniform dough forms.
- Line a 9×13 inch baking dish with parchment paper to ensure easy removal and clean slicing.
- Press the peanut butter mixture firmly into the bottom of the dish using a flat-bottomed measuring cup.
Phase 2: Applying the Chocolate Coating
- Melt chocolate chips in the microwave in 30-second intervals, stirring between each session to prevent burning.
- Pour the smooth, melted chocolate over the prepared peanut butter layer in the baking dish.
- Spread the chocolate evenly using an offset spatula to reach all four corners and edges.
- Refrigerate the dish for 1 to 2 hours until the chocolate layer is firm to the touch.
- Slice into 24 rectangular bars using a sharp, warm knife for the cleanest edges before serving.
Chef Tips for Perfect Results
- Use an offset spatula to create an even, professional-looking chocolate surface without dragging the base layer.
- Sift your powdered sugar before adding it to the butter and peanut butter to eliminate stubborn clumps.
- Line the baking pan with enough parchment paper to leave an overhang, which acts as a sling for lifting.
- Warm your knife under hot water and wipe it dry before every slice to prevent the chocolate from cracking.
- Pulse whole graham crackers in a food processor until they achieve a sand-like consistency for the best binding.
Common Mistakes to Avoid
Skipping the parchment paper lining is a major error that leads to bars sticking to the pan and breaking upon removal. You must use a liner to allow the entire block to be lifted out for precise geometric slicing. Using “natural” peanut butter that requires stirring often results in a greasy base that fails to set properly at room temperature. The high oil content in natural varieties lacks the stabilizers needed for structural integrity in no-bake desserts. Overheating the chocolate chips can cause the cocoa solids to seize, resulting in a grainy and unspreadable mass. Always melt chocolate slowly and stop when a few small lumps remain, letting the residual heat finish the job. Failing to press the base layer firmly enough results in crumbly bars that fall apart when handled. Use significant pressure to ensure the graham cracker crumbs are fully compacted into the butter and sugar matrix.
Variations and Substitutions
| Ingredient | Substitution | Impact on Flavor |
|---|---|---|
| Graham Crackers | Pretzel Crumbs | Increases saltiness and adds a distinct malty crunch. |
| Peanut Butter | Almond Butter | Provides a milder, nuttier flavor with a slightly softer set. |
| Chocolate Chips | White Chocolate | Creates an extremely sweet, creamy profile without bitterness. |
| Butter | Coconut Oil | Adds a subtle tropical note and keeps the bars firm when cold. |
Serving Suggestions and Pairings
These Peanut Butter Chocolate Bars perform exceptionally well as a standalone treat for casual gatherings or high-end dessert displays. Serve them alongside a cold glass of whole milk to balance the rich fats and sugars of the peanut butter. For a sophisticated presentation at a dinner party, garnish each bar with a sprinkle of flaky sea salt or crushed roasted peanuts. These bars are also an excellent accompaniment to a hot cup of espresso, as the coffee’s acidity cuts through the sweetness. They are particularly popular during summer picnics since they do not require an oven, keeping the kitchen cool. Package them in decorative tins for a thoughtful homemade gift during the holiday season or as a thank-you gesture.
Storage and Reheating
| Method | Duration | Instructions |
|---|---|---|
| Refrigerated | Up to 2 Weeks | Store in an airtight container with parchment between layers. |
| Freezer | Up to 3 Months | Wrap tightly in plastic wrap and place in a heavy-duty freezer bag. |
| Room Temp | 2-3 Days | Keep in a cool, dark place to prevent the chocolate from softening. |
Nutritional Information
| Nutrient | Amount per Serving |
|---|---|
| Calories | 280 kcal |
| Total Fat | 18g |
| Saturated Fat | 9g | 145mg |
| Total Carbohydrates | 28g |
| Dietary Fiber | 1g |
| Sugars | 22g |
| Protein | 4g |
Approximate values based on a 24-serving yield.
Conclusion
Creating these Peanut Butter Chocolate Bars is a straightforward process that yields a highly rewarding and decadent dessert. By focusing on the quality of your peanut butter and the precision of your crumb base, you can elevate a simple house treat into a professional-grade confection. This recipe bridges the gap between candy and cake, offering a dense texture that satisfies even the strongest cravings. The interplay between the salty peanut butter and the semi-sweet chocolate topping creates a profile that is both nostalgic and sophisticated. Because no baking is required, this recipe remains accessible for children and novice cooks while still impressing experienced bakers. The structural integrity of these bars allows for easy transport, making them the perfect centerpiece for any social event or celebration. As you master the basic technique, you can beginning experimenting with different toppings or crumb bases to suit your personal palate. Always ensure your chocolate layer is fully set before slicing to maintain the sharp, clean lines that define these iconic treats. Your guests will consistently request this recipe due to its perfect balance of textures and its unmistakable signature peanut butter flavor.
FAQ
Can I substitute natural peanut butter in this recipe?
Natural peanut butter is generally not recommended because the separation of oils can prevent the bars from setting firmly. Standard commercial creamy peanut butter contains stabilizers that ensure a consistent, fudge-like texture. If you must use natural, ensure it is stirred exceptionally well and realize the bars may be softer.
How do I know when the bars are ready to slice?
The bars are ready for slicing once the chocolate topping feels completely firm and does not leave a fingerprint when touched gently. This typically takes approximately two hours in a standard refrigerator environment. Slicing too early will result in the chocolate smearing into the peanut butter base.
Why did my chocolate layer crack when I cut it?
Cracking occurs when the chocolate is too cold and brittle or when using a dull knife. To prevent this, let the bars sit at room temperature for ten minutes before slicing with a hot, thin blade. Wiping the knife between cuts also reduces friction that causes the chocolate to snap.
Can I make these peanut butter bars in advance?
These bars are an excellent make-ahead dessert and can be prepared up to three days before your event. Storing them in the refrigerator preserves their texture and keeps the chocolate from blooming. Simply keep them in an airtight container to prevent the base from absorbing other refrigerator odors.
How should I serve these for a large crowd?
Serving these bars for a crowd is easiest when they are cut into small, uniform squares and placed in individual mini cupcake liners. This prevents the bars from sticking together on a platter and allows for easy, mess-free grabbing by guests. Keep the platter in a cool area to maintain the structural integrity of the chocolate throughout the event.
Print
Peanut Butter Chocolate Bars
- Total Time: 135
- Yield: 24 Bars
- Diet: Vegetarian
Description
Indulgent, no-bake peanut butter chocolate bars with a crunchy graham cracker base and silky chocolate topping. Perfect for gatherings and easy to prepare with minimal cleanup.
Ingredients
1 cup unsalted butter, melted
2 cups graham cracker crumbs
2 cups powdered sugar
1 cup creamy peanut butter
1 cup semi-sweet chocolate chips
Instructions
Combine melted butter and graham cracker crumbs in a bowl
Stir in powdered sugar until well mixed
Press mixture firmly into a parchment-lined 9×13-inch pan
In a separate bowl, mix peanut butter and 1 cup melted butter
Spread peanut butter mixture over the crumb base
Top with melted semi-sweet chocolate chips
Chill for 2 hours until firm
Cut into 24 bars
Notes
Use digestives as a substitute for graham crackers
Salted butter can be used if 1/4 tsp salt is omitted from the recipe
Chill until set for clean slices
Store in an airtight container in the refrigerator for up to 5 days
- Prep Time: 15
- Category: Reese’s Cups & Copycat Peanut Butter Chocolates
- Method: No-Bake
- Cuisine: American