
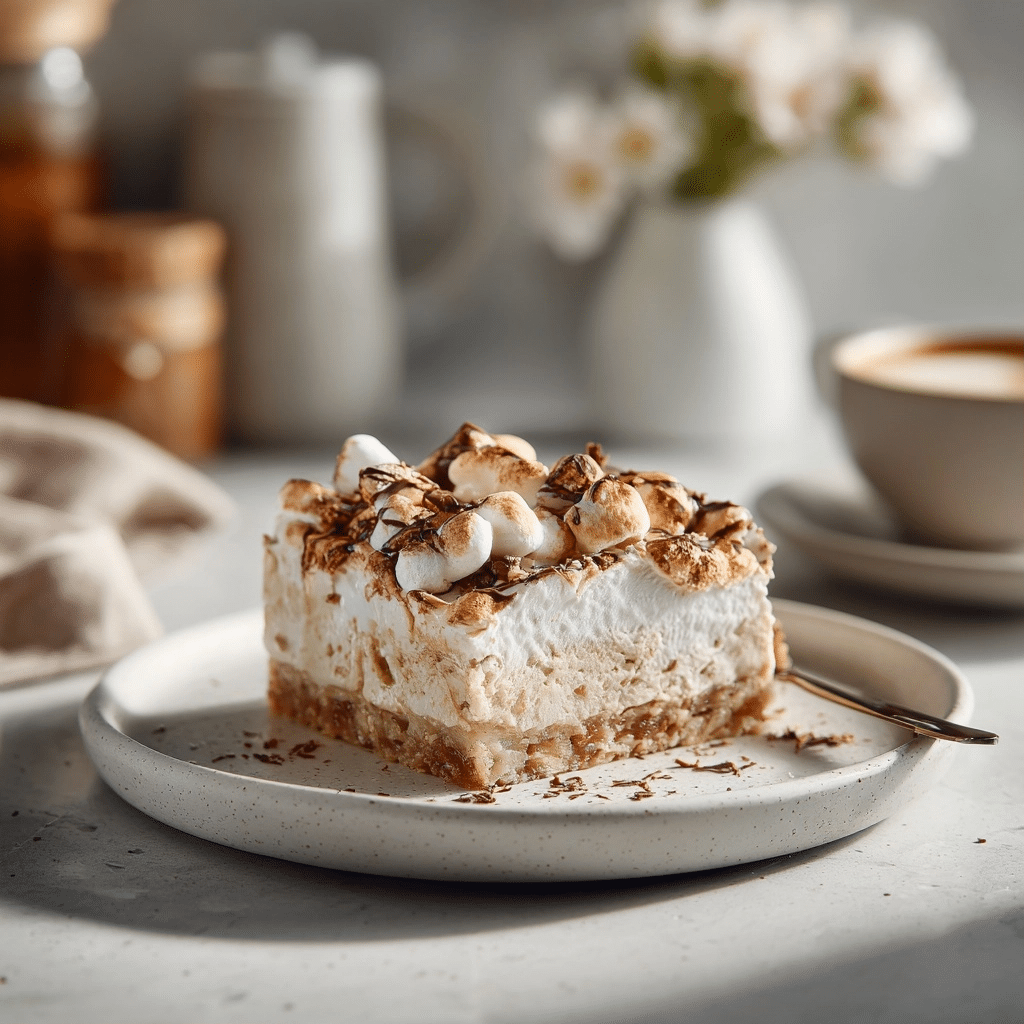
Marshmallow bars are a classic no-bake dessert made by combining melted marshmallows and butter with crispy rice cereal to create a chewy, sweet snack. This specific Marshmallow Bars recipe focuses on achieving the perfect ratio of gooey marshmallow to satisfying crunch through gentle temperature control and high-quality vanilla extract. You will find that these treats remain soft for days because the marshmallows are melted slowly over low heat to prevent the sugar from crystallizing or becoming brittle. This timeless American confection serves as a versatile base for lunchbox treats, party platters, or quick late-night snacks that require minimal cleanup and zero oven time. By following this method, you ensure every bite provides a consistent texture that balances airy lightness with a rich, buttery finish.
Recipe Overview
| Attribute | Details |
|---|---|
| Prep Time | 10 Minutes |
| Cook Time | 5 Minutes |
| Total Time | 15 Minutes (+30 min cooling) |
| Servings | 12 Bars |
| Difficulty | Easy |
| Cuisine | American |
Why This Marshmallow Bars Recipe Works
I have spent years perfecting the texture of these treats to ensure they never turn into tooth-breaking bricks after an hour on the counter. The key lies in the low-temperature melting process which preserves the moisture content within the marshmallows while creating a smooth emulsion with the butter. Using fresh marshmallows is non-negotiable because older, stale marshmallows have already lost the internal moisture needed to create that iconic “cheese pull” stretch.
The addition of pure vanilla extract elevates the flavor profile from a simple children’s snack to a more sophisticated dessert. Most generic recipes skip this step, but the aromatic floral notes of the vanilla cut through the heavy sugar and butter, providing a depth of flavor that keeps you coming back for a second piece. I also recommend a light touch when pressing the mixture into the pan to maintain air pockets that contribute to a superior mouthfeel.
Ingredients for Marshmallow Bars
| Ingredient | Quantity | Notes and Alternatives |
|---|---|---|
| Crispy Rice Cereal | 6 Cups | Use puffed rice or gluten-free rice cereal for dietary needs. |
| Mini Marshmallows | 1 Bag (10-12 oz) | Ensure they are fresh; vegan marshmallows work as a direct sub. |
| Unsalted Butter | 4 Tablespoons | Use high-fat European butter for a richer flavor profile. |
| Vanilla Extract | 1 Teaspoon | Provides depth; almond extract can be used for a nutty twist. |
Step-by-Step Instructions
Phase 1: Melting the Base
- Melt butter in a large pot over very low heat until it is completely liquid and golden.
- Add marshmallows to the pot and stir constantly using a heat-resistant spatula.
- Stir until marshmallows are ninety percent melted, then remove from heat to let residual warmth finish the job.
Phase 2: Flavoring and Mixing
- Mix in vanilla extract immediately after the marshmallows have reached a smooth, liquid state.
- Fold in the crispy rice cereal gently to ensure every piece is coated without crushing the puffed grains.
- Continue folding from the bottom of the pot until the mixture is uniform and sticky.
Phase 3: Setting the Bars
- Press mixture into a greased 9×9 inch baking dish using lightly buttered fingers or a piece of wax paper.
- Apply minimal pressure to Level the surface without compacting the cereal into a dense block.
- Let cool for 30 minutes at room temperature to allow the marshmallow bonds to stabilize.
- Slice into bars using a sharp, greased knife and serve immediately.
Chef Tips for Perfect Marshmallow Bars Results
- Use fresh marshmallows from a newly opened bag to guarantee the best elastic texture and moisture levels.
- Brown the butter slightly before adding marshmallows to create a nutty, toasted savory note that balances the sweetness.
- Grease your spatula and hands with a small amount of butter to prevent the sticky mixture from clinging during the transfer.
- Measure your cereal precisely by using a dry measuring cup rather than eyeballing to maintain the ideal marshmallow-to-cereal ratio.
- Avoid refrigerating the bars as the cold air will cause the sugars to harden and make the cereal lose its crunch.
Common Mistakes to Avoid
- Overheating the marshmallows is a frequent error that results in rock-hard bars because high heat changes the sugar structure.
- Packing the mixture too tightly into the baking pan creates a dense, tough texture that is difficult to bite through.
- Using stale cereal will lead to a soggy or chewy sensation instead of the desired light, crispy snap in every mouthful.
- Skipping the salt or vanilla leads to a one-dimensional sweet flavor that lacks the complexity found in professional-grade treats.
Variations and Substitutions
| Ingredient | Substitution | Impact on Flavor |
|---|---|---|
| Butter | Coconut Oil | Adds a subtle tropical aroma and makes the recipe dairy-free. |
| Mini Marshmallows | Marshmallow Fluff | Results in a much softer, almost fudge-like consistency. |
| Rice Cereal | Chocolate Rice Cereal | Creates a double-chocolate experience without needing extra cocoa. |
| Vanilla Extract | Maple Extract | Gives the bars a warm, autumnal flavor profile. |
Serving Suggestions and Pairings
Marshmallow bars are best served at room temperature within twenty-four hours of preparation to ensure maximum freshness and elasticity. These treats are the perfect addition to a summer picnic or a child’s birthday party where finger foods are preferred over plated desserts. For a more indulgent presentation, drizzle the top of the set bars with melted dark chocolate or sprinkle with flaky sea salt. You can pair these bars with a cold glass of milk or a hot cup of coffee to balance the sugary sweetness. For holiday gatherings, cut them into star or heart shapes using metal cookie cutters for a festive and decorative touch.
Storage and Reheating
| Method | Duration | Instructions |
|---|---|---|
| Room Temperature | 3 Days | Store in an airtight container with parchment paper between layers. |
| Freezer | 6 Weeks | Wrap individual bars in plastic film and place in a freezer bag. |
| Reheating | 5 Seconds | Microwave for a few seconds if they become slightly firm over time. |
Nutritional Information
| Nutrient | Amount per Serving (Roughly 50g) |
|---|---|
| Calories | 150 kcal |
| Total Fat | 4g |
| Carbohydrates | 28g |
| Sugar | 15g |
| Sodium | 120mg |
Note: Approximate values based on standard ingredients.
Conclusion
Perfecting these Marshmallow Bars requires attention to detail regarding temperature and technique rather than complex culinary skills or expensive equipment. By utilizing the low-heat melting method and incorporating high-quality vanilla extract, you create a snack that surpasses the store-bought versions in both flavor and texture. This recipe provides a nostalgic trip to childhood while offering the reliability needed for modern entertaining needs. Remember that the freshness of your marshmallows is the most significant factor in achieving the characteristic gooey stretch that defines a premium cereal treat.
The simplicity of the four-ingredient list makes this a go-to option for busy households looking for a quick yet impressive dessert. Whether you are preparing these for a school bake sale or a weekend family movie night, the consistent results will make this your preferred method for years to come. Do not be afraid to experiment with the different variations mentioned to keep the recipe feeling fresh and exciting for every season. The balance of the buttery binder and the airy cereal ensures that every single square provides a satisfying crunch. Master the gentle folding technique to keep the bars light and enjoy the decadent, sweet, and comforting essence of this classic Marshmallow Bars recipe.
Frequently Asked Questions
Can I use large marshmallows for Marshmallow Bars?
Yes, you can use large marshmallows as long as you use the equivalent weight of standard mini marshmallows. Large ones simply take longer to melt, so you may need to cut them into smaller pieces to ensure they liquefy evenly without burning the butter. Always maintain low heat regardless of the marshmallow size to keep the mixture from becoming tough.
How do I know when Marshmallow Bars are done setting?
The bars are ready when they no longer feel warm to the touch and the surface is firm enough to resist a light finger press. This cooling process typically takes thirty minutes at room temperature, depending on the humidity of your kitchen environment. If you try to slice them too early, the bars will be too sticky and will not hold their rectangular shape.
Why are my Marshmallow Bars too hard?
Hard bars are usually the result of using high heat during the melting process or over-compressing the mixture into the baking dish. High temperatures cause the sugar in the marshmallows to caramelize and harden as it cools, while over-packing removes the air that provides a soft bite. To fix this next time, melt the ingredients slowly and use a light touch when leveling the cereal.
Can I make Marshmallow Bars ahead of time?
You can prepare these treats up to two days in advance as long as you store them in an airtight container at room temperature. Making them further in advance is not recommended as the cereal will eventually lose its crispness and the marshmallow will start to dry out. Always ensure the container is sealed tightly to prevent any humidity from softening the cereal prematurely.
What is the best way to slice Marshmallow Bars cleanly?
The best way to achieve clean edges is to use a large chef’s knife that has been lightly coated with butter or non-stick cooking spray. Press the knife straight down through the bars rather than using a sawing motion to prevent tearing the cereal pieces. If the marshmallow is sticking to the blade, wipe it clean and re-grease it between every few cuts for a professional finish.
Print
Marshmallow Bars Recipe: The Ultimate Crispy Treat Guide
- Total Time: 45
- Yield: 12 bars
- Diet: Vegetarian
Description
These air-filled, buttery marshmallow bars combine melted marshmallows with crispy rice cereal for a soft, chewy texture. Perfect for quick snacks or party platters with zero oven time required.
Ingredients
6 cups crispy rice cereal
10-12 oz mini marshmallows
4 tablespoons unsalted butter
1 teaspoon pure vanilla extract
additional rice cereal, for rolling pan
Instructions
Line an 8×8-inch baking dish with parchment paper and dust with rice cereal
Melt butter in a large saucepan over low heat
Gradually add marshmallows, stirring constantly until fully melted
Remove from heat and stir in vanilla extract
Gradually mix in rice cereal until evenly coated
Press mixture firmly into prepared pan using a light touch to preserve air pockets
Chill for 30 minutes
Cut into 12 bars and serve
Notes
Use a spatula to wipe down the sides of the saucepan for smoother mixture
For extra crispiness, add a sprinkle of rice cereal on top of final product
Store at room temperature up to 3 days in an airtight container
Vegan marshmallows and non-dairy butter work well as substitutes
- Prep Time: 10
- Cook Time: 5
- Category: Easy Homemade Dessert Recipes & Treats
- Method: No-Bake
- Cuisine: American