
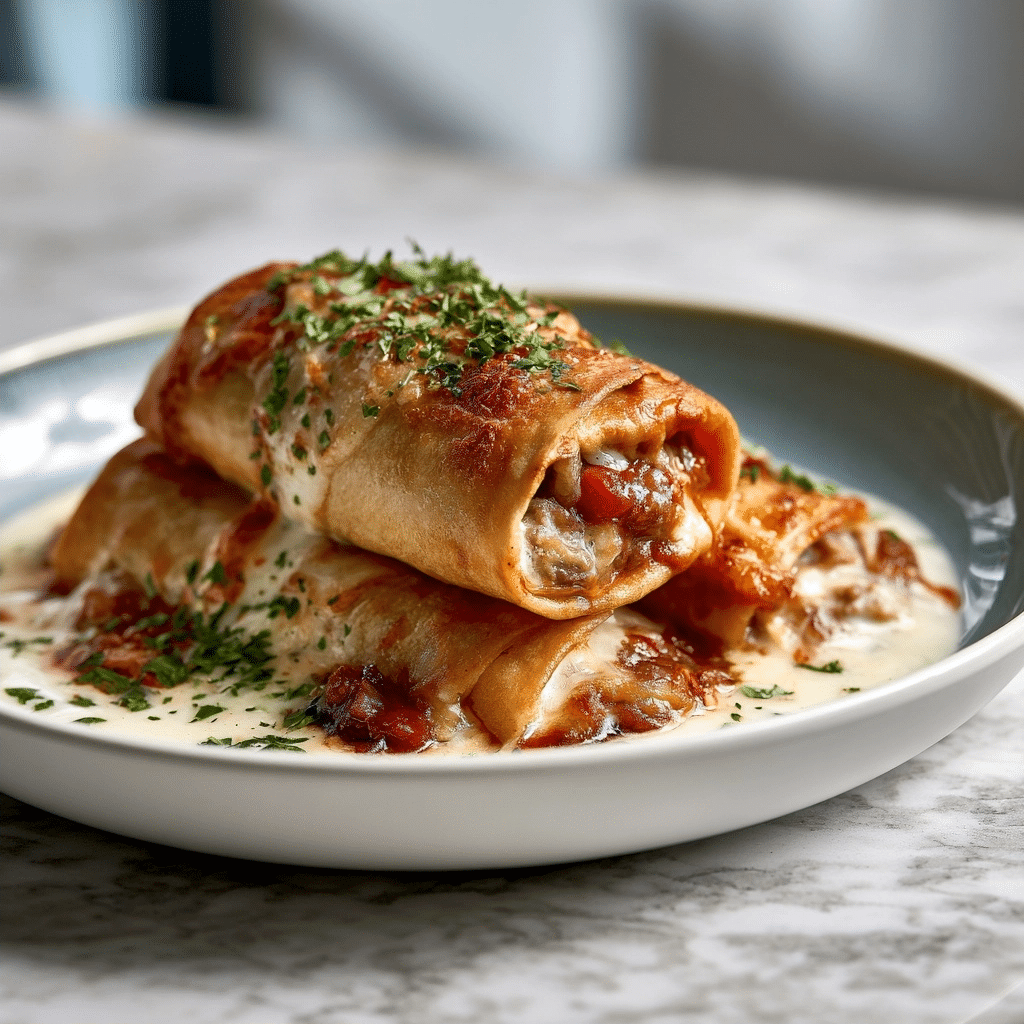
Beef and cheese chimichangas provide a satisfying, handheld meal that delivers savory protein, gooey melted cheese, and a perfect golden crunch in every bite. This recipe is designed for busy home cooks who crave authentic Tex-Mex flavors without the need for traditional deep frying. By combining seasoned ground beef with aromatic onions and hearty refried beans, you transform standard pantry items into a restaurant-style dinner that appeals to both children and adults. The contrast of the crispy flour exterior against the creamy, spiced center creates a textured experience that stands apart from standard tacos or burritos. Mastering this dish provides you with a versatile, crowd-pleasing option for any night of the week.
What Is a Beef and Cheese Chimichanga?
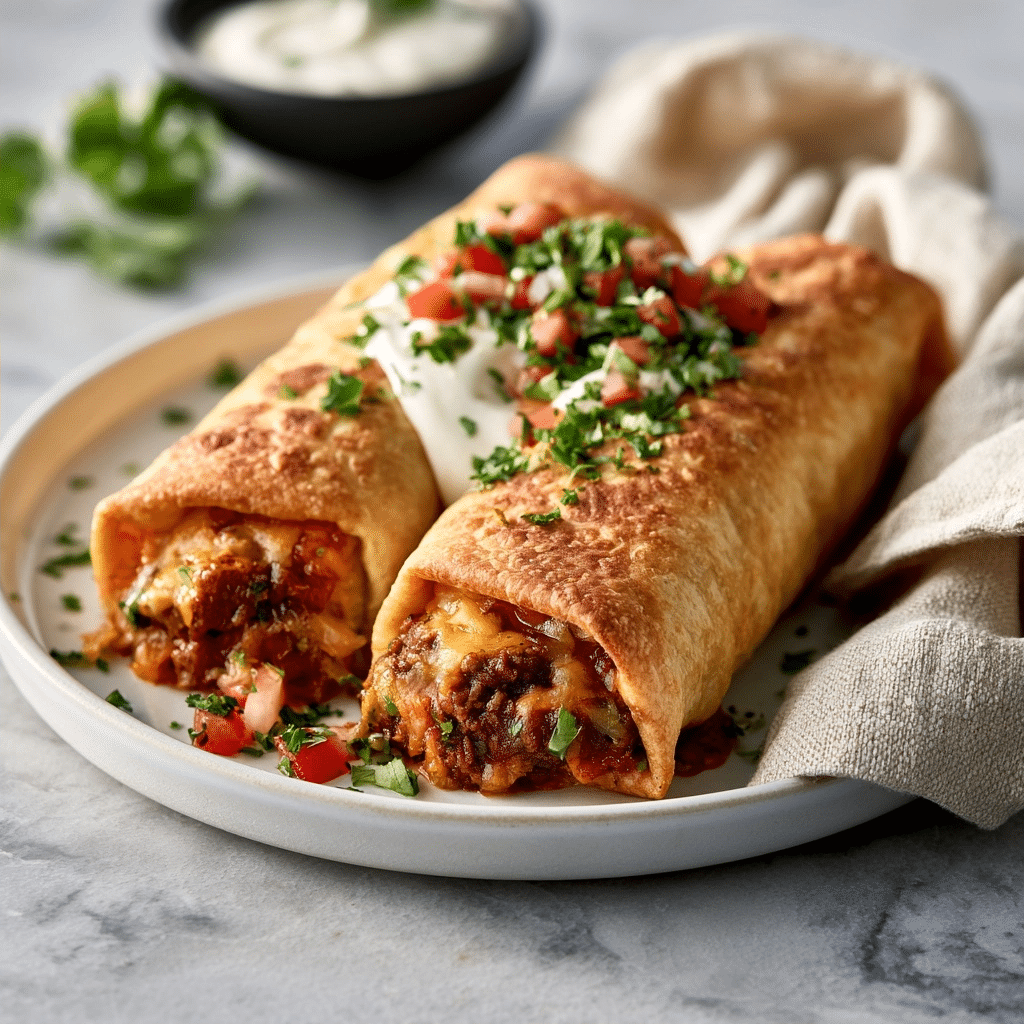
A beef and cheese chimichanga is a deep-fried or baked burrito filled with seasoned meat, beans, and cheese. Originating from the American Southwest, specifically the Sonoran region, the dish is essentially a flash-fried burrito that results in a noticeably crisp outer shell. While standard burritos are usually served soft, the chimichanga requires a precise wrapping technique and a high-heat cooking method to achieve its signature texture. This dish remains a staple in Tex-Mex cuisine due to its ability to hold heat well and its satisfying, substantial portion size.
Recipe Overview
| Prep Time | 10 minutes |
| Cook Time | 20 minutes |
| Total Time | 30 minutes |
| Servings | 6 servings |
| Difficulty Level | Easy |
| Cuisine | Tex-Mex |
| Calories per Serving | 450 kcal |
Why You’ll Love This Recipe
- Effortless Preparation: This recipe uses straightforward ingredients and common cooking techniques, making it achievable even for beginners.
- Time-Saving Efficiency: You can assemble the components quickly, making this a reliable solution for weeknight dinners.
- Foolproof Results: The dual cooking options allow you to achieve a crisp finish without needing a deep fryer, reducing kitchen cleanup.
- Crowd-Pleasing Flavors: The combination of savory beef and gooey cheddar cheese is universally liked, ensuring your meal is a success with family or guests.
The primary appeal of this dish lies in its balance of textures. It offers the comfort of a standard taco but elevates the experience through a crisp, golden-brown crust. Whether you are meal prepping for a busy week or hosting a casual gathering, these chimichangas provide a consistent, high-quality result every time.
Why This Recipe Works
My years of developing Mexican-inspired dishes have taught me that seasoning layers are the difference between bland meat and a flavorful core. By sweating the onions before browning the beef, you build a foundation of sweetness that balances the saltiness of the taco seasoning. This specific method ensures the moisture is controlled, which prevents the tortilla from becoming soggy during the oven-baking or shallow-frying process.
The technique of using refried beans as a “glue” for your filling is essential. The beans provide a thick, stable base that keeps the beef and cheese securely packed within the tortilla roll. When the cheese melts, it emulsifies with the beef juices, creating a creamy center that contrasts beautifully with the firm tortilla. The searing process, whether in a skillet with oil or in a hot oven, triggers the Maillard reaction, producing a crispy brown exterior that adds a nutty, toasted flavor profile.
Ultimately, the structural integrity of the tortilla matters. By ensuring the meat mixture is not overly wet, you allow the heat to penetrate the layers quickly without steaming the interior. This results in a crisp biting surface that yields to a warm, savory, and rich center, providing a complete sensory journey in every serving.
Pro Tips Before You Start
Room Temperature Tortillas: If your tortillas are cold, they will crack during rolling. Keep them at room temperature or warm them in the microwave for 10 seconds to increase flexibility.
Drain Excess Grease: Removing excess fat after browning the meat prevents the filling from leaking or turning the tortilla base soggy.
Mise en Place: Arrange all your fillings and tools before you start rolling. This ensures you can assemble the chimichangas quickly so the filling stays warm.
Ingredients
Here is everything you will need to make beef and cheese chimichangas.
| Ingredient | Quantity | Notes/Alternatives |
| Ground Beef | 1 lb (450g) | Use lean ground beef to reduce excess grease. |
| Onion | 1 small | Finely diced for even distribution. |
| Garlic | 2 cloves | Minced finely. |
| Taco Seasoning | 1 packet (28g) | Store-bought or homemade spice blend. |
| Salsa | ½ cup (120ml) | Smooth salsa works best for texture. |
| Refried Beans | 1 cup (250g) | Standard canned variety. |
| Cheddar Cheese | 1 ½ cups (170g) | Shredded Mexican blend is a great alternative. |
| Flour Tortillas | 6 large | Burrito-size, approximately 10-12 inches. |
| Vegetable Oil | 2 tbsp | For brushing or shallow frying. |
Best Ingredients for Success
The quality of your beef and cheese directly influences the final outcome. I recommend using 85% lean ground beef, as it retains enough fat for flavor without leaving a pool of oil in your skillet. If you go too lean, the filling can turn dry quickly.
Shredding your own cheddar cheese ensures a superior melt compared to pre-shredded bags, which are often coated in cellulose to prevent clumping. That extra step provides a much smoother, stretchier cheese interior. Finally, choosing a high-quality flour tortilla with enough elasticity is crucial. If the tortilla is thin and brittle, it will tear when folded, so look for thick, pliable brands designed specifically for burritos.
Step-by-Step Instructions
Phase 1: Prepare the Beef Filling
- Heat a large skillet over medium heat (approx. 350°F / 175°C) and add the ground beef and onion.
- Sauté the mixture for 6–8 minutes, stirring frequently until the meat is browned and the onions are soft.
- Drain the excess grease carefully from the skillet using a spoon or a strainer to ensure a crisp final product.
- Stir in the minced garlic, taco seasoning, and salsa, ensuring all ingredients are well combined and coated.
- Simmer the mixture for 3–4 minutes over medium-low heat until the liquids thicken into a consistent, savory base.
Phase 2: Assemble the Chimichangas
- Lay a large flour tortilla on a flat surface and spread a generous spoonful of refried beans down the center.
- Top the beans with a scoop of the seasoned beef mixture and a sprinkle of the shredded cheese.
- Fold in the two opposite sides of the tortilla over the filling to contain the ingredients securely.
- Roll the tortilla tightly from the bottom upward, ensuring the seam is pressed firmly shut to prevent leaking.
Phase 3: Cook the Chimichangas
- Preheat your oven to 400°F (200°C) if using the baking method, or prepare your skillet for shallow frying.
- Place the rolled chimichangas seam-side down on a prepared baking sheet if baking, or into the hot oiled skillet.
- Brush the tops with vegetable oil for an even, golden-brown finish if you are opting for the oven method.
- Bake for 18–20 minutes, flipping once, until the tortillas are crisp and golden (internal temperature should reach 165°F / 74°C).
- Fry for 2–3 minutes per side if you chose the skillet method, until the edges are golden and sizzling.
Chef Tips for Perfect Results
- Temperature Matters: Ensure your oil is at medium, or roughly 350°F (175°C), to fry correctly. If it is too low, the tortilla absorbs the oil; if too high, the exterior burns before the cheese melts.
- The Seam Secret: Always place the seam side down first. The heat seals the flap closed, preventing the filling from bursting out during cooking.
- Resting Time: Let the chimichangas rest for at least 2 minutes. This brief pause allows the internal structure to set, preventing the filling from spilling out upon the first bite.
Common Mistakes to Avoid
- Overstuffing: [WHAT] Filling leaks out. [WHY] Too much pressure on the tortilla edges. [FIX] Use exactly 1/3 to 1/2 cup of filling per tortilla.
- Not Draining Grease: [WHAT] Soggy texture. [WHY] Excess oil prevents the starch in the flour from crisping up. [FIX] Always use a slotted spoon to drain the beef after it browns.
- Cold Tortillas: [WHAT] Cracks in the wrap. [WHY] Flour tortillas lose elasticity when cold. [FIX] Microwave them for 10 seconds before assembly.
How to Make This Recipe Healthier
You can adjust this recipe to improve the nutritional profile without sacrificing the essential texture. Instead of traditional white flour tortillas, use whole wheat tortillas to increase fiber content, although this will result in a slightly nuttier flavor. Swapping standard cheddar for a lower-fat variety reduces saturated fat, though it may be slightly less creamy. If you prefer to avoid frying altogether, the oven-bake method is inherently healthier while still delivering a satisfying crunch through the use of minimal heart-healthy oil brushing.
Variations and Substitutions
Customize this recipe to fit your dietary preferences or spice tolerances.
| Ingredient | Substitution | Flavor Impact | Texture Impact |
| Ground Beef | Ground Turkey | Milder | Lighter |
| Cheddar | Pepper Jack | Spicier | Equally creamy |
| Flour Tortilla | Gluten-Free Tortilla | Nutty | More delicate |
Can You Make This Ahead?
Yes, you can prepare these up to 3 days in advance. Follow the assembly instructions through step 2, but do not cook them. Wrap the unbaked, assembled chimichangas individually in plastic wrap and store them in the refrigerator. When you are ready to serve, remove the plastic and cook them according to the oven or skillet instructions. Adding 2-3 minutes to the cooking time ensures the center is fully heated through.
Serving Suggestions and Pairings
Serve these hot with a side of Mexican-style rice, freshly shredded lettuce, and a generous dollop of sour cream. A vibrant pico de gallo or guacamole provides a refreshing acidity that cuts through the richness of the fried flour and cheese. For a complete meal, pair with a lime-infused sparkling water or a crisp, chilled Mexican lager. Plating them with a sprinkle of fresh cilantro adds a pop of color that highlights the golden-brown crust of the chimichangas for a truly appetizing presentation.
Best Occasions to Serve This Recipe
This recipe is ideal for casual family dinners when you crave something special but simple. It is also excellent for game day gatherings, as it can be kept warm in a low-temperature oven, making it a stress-free option for hosting. Because it is highly customizable, it works well as a weeknight meal prep option for busy professionals who need a hearty, grab-and-go lunch that stays intact.
Storage and Reheating
Store leftovers properly to maintain the best possible texture.
| Method | Duration | Instructions |
| Refrigerator | 3 days | Airtight container |
| Freezer | 2 months | Freeze individually wrapped in foil |
| Reheat Oven | 10-12 mins | 375°F until exterior crisps |
To reheat, the oven is the best method to restore the initial crispness. Microwaving is possible for quick results, but it will result in a softer exterior.
Nutritional Information
Approximate nutritional values per serving:
| Nutrient | Amount per Serving |
| Calories | 450 |
| Protein | 22g |
| Fat | 21g |
| Carbohydrates | 38g |
| Fiber | 4g |
| Sugar | 2g |
| Sodium | 750mg |
*Approximate values based on standard ingredients. Actual nutrition varies by brand and substitutions. This information is not a substitute for professional nutritional advice.
Conclusion
Beef and cheese chimichangas offer the perfect balance of convenience and flavor, proving that you do not need complex methods to produce high-quality results at home. By mastering the assembly and controlling your cooking temperature, you can create a golden, crispy exterior that yields to a perfectly melted, savory heart. This dish transforms standard pantry staples into an impressive meal that works for everything from quick weeknight dinners to relaxed weekend entertaining.
You will discover that this technique is incredibly versatile, allowing you to experiment with different spices, beans, and cheeses as you grow more comfortable with the process. The combination of textures is what truly makes this recipe a standout in any repertoire. Keep this formula in your back pocket for those times when you need an efficient, crowd-pleasing dinner that delivers on every level. Try creating your own batch this week, and you will see how easily it becomes a favorite in your household.
FAQ
Can I substitute beef with another protein?
Yes, ground turkey or chicken works perfectly with this seasoning profile, providing a slightly lighter alternative to beef.
How do I know when the chimichanga is done?
The chimichanga is done when it reaches a deep, consistent golden-brown color and the internal temperature hits 165°F (74°C).
What should I do if the tortilla tears during rolling?
If the tortilla tears, use a small amount of extra cheese or a tiny dab of refried beans to patch the opening before cooking, as the heat will help seal it shut.
Can I freeze these after cooking?
Yes, you can freeze fully cooked chimichangas for up to 2 months and reheat them directly from the freezer in a 400°F (200°C) oven until crisp.
Is this recipe suitable for a gluten-free diet?
While this recipe traditionally uses flour tortillas, you can substitute them with high-quality gluten-free wraps, ensuring they are at room temperature to avoid cracking during the folding process.
Print
Crispy Beef and Cheese Chimichangas
- Total Time: 30
- Yield: 6 servings
- Diet: Non-Vegetarian
Description
These Crispy Beef and Cheese Chimichangas deliver a satisfying, restaurant-style Tex-Mex experience right in your own kitchen. By combining savory, perfectly seasoned ground beef with hearty refried beans and melted, gooey cheese, each pocket offers a delicious contrast between a crunch-filled golden flour tortilla and a flavorful, creamy center. This recipe is an ideal, family-friendly dinner solution for busy weeknights, providing a hearty, handheld meal that is both comforting and consistently impressive without the need for deep-frying.
Ingredients
1 lb lean ground beef
1/2 cup yellow onion, finely diced
1 cup canned refried beans
1 tsp ground cumin
1 tsp chili powder
1/2 tsp garlic powder
1/2 tsp salt
1/4 tsp black pepper
2 cups shredded cheddar cheese
6 large flour tortillas
2 tbsp vegetable oil (for brushing)
Instructions
Preheat your oven to 400°F (200°C) and line a baking sheet with parchment paper.
In a large skillet over medium-high heat, cook the ground beef and onions until the meat is browned and onions are softened.
Drain excess fat and stir in the refried beans, cumin, chili powder, garlic powder, salt, and pepper until well combined.
Spoon approximately 1/2 cup of the beef mixture into the center of each tortilla, top with a generous portion of shredded cheese.
Fold in the sides of the tortilla, then roll tightly to create a sealed burrito shape.
Place the burritos seam-side down on the prepared baking sheet.
Lightly brush the tops and sides of each chimichanga with vegetable oil to promote browning.
Bake for 15 to 20 minutes, turning once halfway through, until the tortillas are golden brown and crispy.
Notes
Ensure the tortillas are at room temperature or slightly warmed in the microwave to prevent cracking during the rolling process. For extra crispiness, you can broil for the final minute of cooking, but watch closely to prevent burning. Leftovers can be stored in an airtight container for up to 3 days and reheated in an oven or air fryer to maintain texture.
- Prep Time: 10
- Cook Time: 20
- Category: Meals
- Method: Baking
- Cuisine: Tex-Mex