
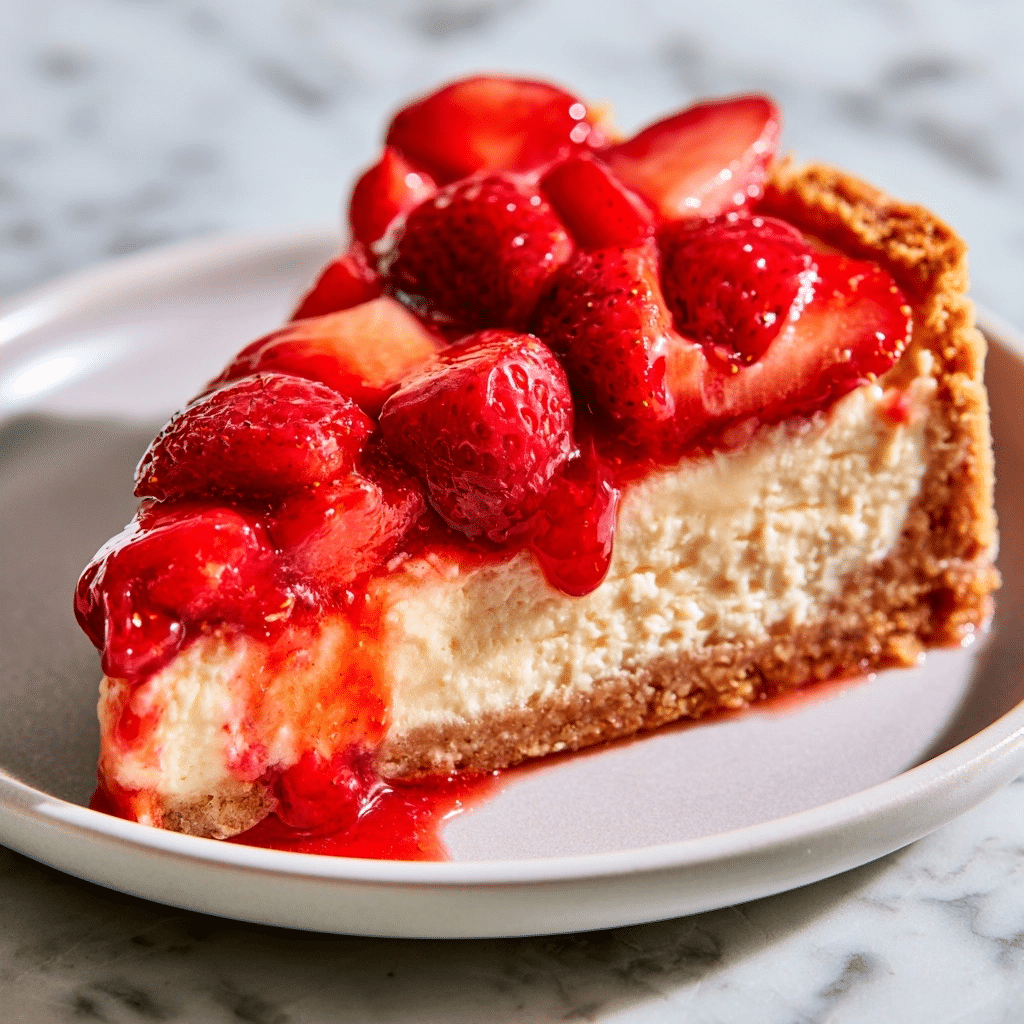
Strawberry Crunch Cheesecake provides a refreshing and sophisticated blend of textures for any occasion. This no-bake dessert combines a crisp vanilla cookie base with a velvety cream cheese center and a vibrant, fruit-forward gelatin layer. Perfect for home bakers looking to impress guests, this dish delivers a professional aesthetic with accessible ingredients. The interplay between the tart strawberry notes and the rich, smooth cream cheese creates a balanced profile that appeals to all ages. By following these precise steps, you will master a centerpiece dessert that offers both visual flair and a satisfying, multi-layered crunch in every bite.
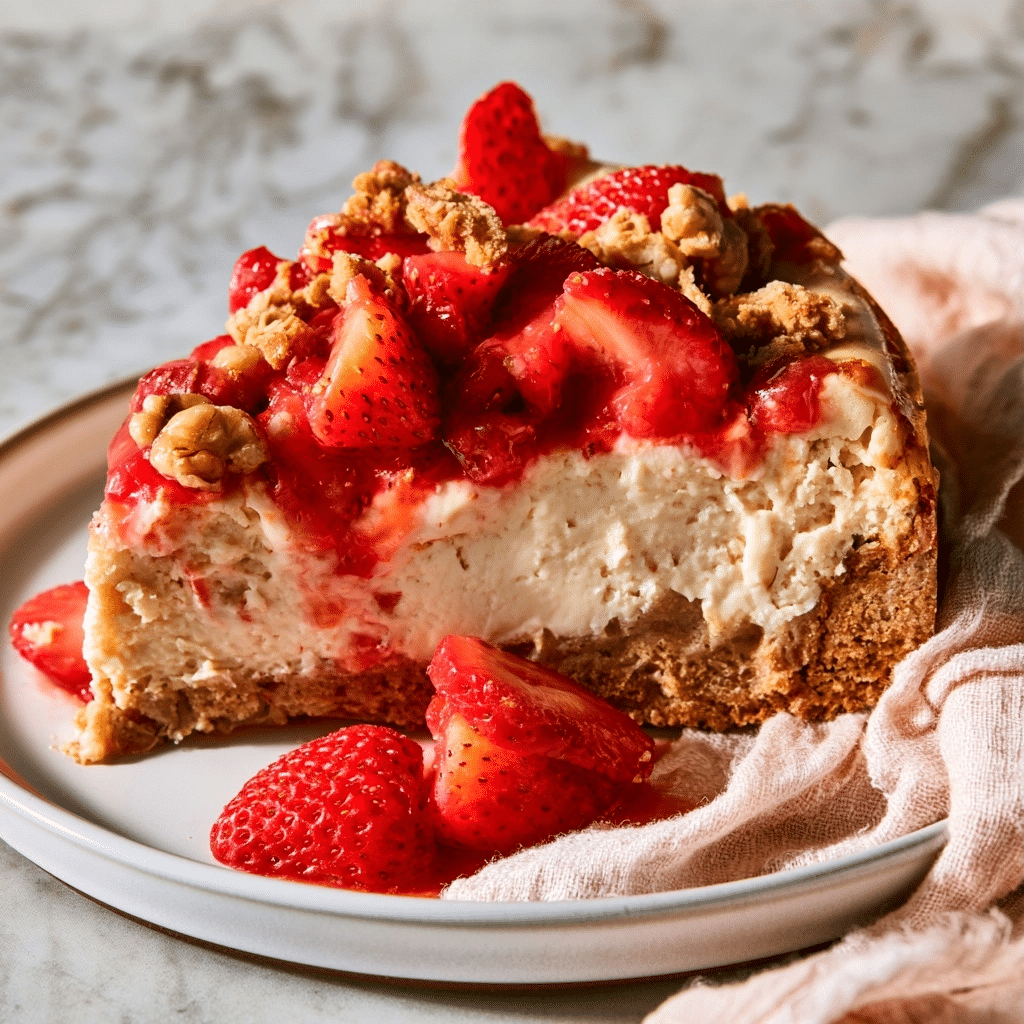
What Is Strawberry Crunch Cheesecake?
Strawberry Crunch Cheesecake is a layered, no-bake dessert characterized by a dense cookie crumb foundation, a dual-textured filling, and a signature crunchy topping. Unlike traditional baked cheesecakes that require a water bath, this version utilizes gelatin to set the structure, resulting in a lighter and smoother mouthfeel. It draws inspiration from classic strawberry crunch ice cream bars, utilizing strawberry wafer cookies to replicate that nostalgic, fruity profile. This dish stands out as an ideal choice for warm-weather gatherings where a chilled, refreshing treat is preferred over heavy, oven-baked alternatives.
| Prep Time | 25 minutes |
|---|---|
| Cook Time | 0 minutes (plus chilling) |
| Total Time | 4 hours 25 minutes |
| Servings | 12 |
| Difficulty Level | Easy |
| Cuisine | Modern American |
| Calories per Serving | 420 kcal |
Why You’ll Love This Recipe
Effortless Preparation: This no-bake method eliminates the anxiety of cracking or uneven rising associated with traditional baked cheesecakes.
Crowd-Pleasing Flavors: The combination of vanilla, cream cheese, and bright strawberry creates a familiar and universally loved flavor profile.
Time-Saving Chilling: While it requires fridge time, the active hands-on work is minimal, making it perfect for efficient meal planning.
Visually Stunning: The vibrant pink and white layers create a high-contrast appearance that looks professional on any dessert table.
Texture Variety: The contrast between the smooth filling and the crumbled wafer topping provides a satisfying sensory experience.
This recipe provides a foolproof pathway to a gourmet dessert experience. It is an excellent choice for beginners who want to build confidence in the kitchen while serving a dish that feels upscale. Whether you are prepping for a potluck or simply satisfying a sweet tooth, this cheesecake adapts perfectly to any schedule.
Why This Recipe Works
My experience developing this recipe stems from a desire to capture the iconic flavor of childhood strawberry treats without the complexity of a custard-based filling. The success of this dessert lies in the structural integrity provided by the interaction between the gelatin and the chilled heavy cream.
Technically, the recipe relies on the process of emulsification and setting. When you beat the heavy cream to stiff peaks, you incorporate air bubbles that provide stability. Folding this into the cream cheese and gelatin mixture ensures a light, aerated body that won’t turn gummy. The initial freeze for the crust and the intermediate layer prevents the different components from blending together, ensuring distinct, beautiful lines when you slice into the cake.
The sensory payoff is driven by the contrast in temperature and texture. The cold, dense cheesecake layers melt slowly on the tongue, while the coarse crumbs add a dry, sweet crunch that prevents the dessert from feeling one-dimensional. This balance is critical for any successful chilled dessert, as it keeps the palate engaged from the first bite to the last.
Pro Tips Before You Start
Room Temperature Dairy: Remove cream cheese from the refrigerator 30 minutes before mixing to ensure a smooth, lump-free filling.
Mise en Place: Measure all your ingredients before starting to ensure a seamless flow during the gelatin and whipped cream preparation.
Springform Prep: Grease your 10-inch springform pan lightly to ensure that the edges release cleanly without damaging the sides of the cheesecake.
Chilling Consistency: Do not rush the chilling process, as the structural integrity of the gelatin layer relies on a full four-hour rest.
Ingredients
Here is everything you will need to make this strawberry crunch cheesecake.
| Ingredient | Quantity | Notes |
|---|---|---|
| Vanilla Cream Cookies | 1 lb (approx. 34) | Divided use |
| Butter | 6 tbsp | Melted |
| Strawberry Jello | 3.3 oz (1 box) | Small box |
| Boiling Water | 1 cup | For dissolving gelatin |
| Cream Cheese | 16 oz (2 bricks) | Softened |
| Granulated Sugar | 3/4 cup | Divided use |
| Heavy Whipping Cream | 2 cups | Cold |
| Powdered Sugar | 1/2 cup | Sifted |
| Strawberry Wafer Cookies | 4 oz (10 cookies) | Coarsely crushed |
| Whipped Topping* | 1/2 small tub | Optional for garnish |
Best Ingredients for This Recipe
Quality ingredients dictate the final outcome of your dessert. Use full-fat brick-style cream cheese rather than whipped or tub varieties, as the stabilizers in the latter can interfere with the setting process. Fresh heavy whipping cream is non-negotiable; do not substitute with half-and-half or milk, as they lack the fat content required for stiff peaks. Finally, selecting high-quality strawberry wafers adds a more authentic fruit flavor that elevates the topping above basic sugar-and-dye crumbles.
Step-by-Step Instructions
Phase 1: Prepare the Base
Process 26 vanilla cream cookies in a food processor until they form fine crumbs.
Add 6 tablespoons of melted butter to the crumbs and pulse until the mixture resembles wet sand.
Press the crumb mixture evenly into the bottom of a greased 10-inch springform pan.
Freeze the prepared crust for 15 minutes to firm the butter and stabilize the base.
Phase 2: Prepare the Filling
Combine 1 cup of boiling water and the strawberry gelatin in a bowl, mixing for 2 minutes until fully dissolved.
Set the gelatin aside at room temperature to cool completely (do not refrigerate).
Beat the softened cream cheese and 3/4 cup of granulated sugar in a medium bowl until smooth.
Whip the heavy cream and powdered sugar in a separate bowl until stiff peaks form, scraping the bowl once.
Fold half of the whipped cream mixture into the cream cheese and the remaining half into the cooled strawberry gelatin.
Beat the cream cheese portion until smooth and whisk the strawberry portion until consistent.
Phase 3: Assembly and Chilling
Pour half of the strawberry mixture onto the frozen crust and spread evenly.
Freeze for 15 minutes to allow the layer to set slightly.
Add the cream cheese mixture on top of the strawberry layer, smoothing with an offset spatula.
Top with the remaining strawberry mixture for a vibrant final layer.
Crush the remaining vanilla cookies and strawberry wafers coarsely using a rolling pin or mallet.
Sprinkle the mixed crumbs over the top of the cheesecake, pressing gently to adhere.
Refrigerate for at least 4 hours to ensure the no-bake cheesecake sets completely before serving.
Chef Tips for Perfect Results
Temperature Check: Ensure the gelatin is at room temperature before folding in the cream; if it is too hot, it will deflate the whipped cream.
Stiff Peaks: When whipping the heavy cream, stop immediately once stiff peaks form to prevent the cream from turning into butter.
Clean Slicing: Run your knife under hot water and wipe it dry between each cut for professional, clean slices.
Crumb Texture: Maintain a variety of crumb sizes by crushing the cookies manually instead of using a processor for the topping.
Common Mistakes to Avoid
Overmixing the Cream: Results in a grainy, separated texture. Stop as soon as the cream holds its shape.
Warm Gelatin: Results in a runny, melted filling. Cool the gelatin completely to room temperature before combining.
Skipping the Freeze: Results in blurred layers. Stick to the 15-minute freeze intervals to keep the colors sharp.
Insufficient Chilling: Results in a wobbly, unstable cake. Refrigerate for the full 4 hours for the best set.
How to Make This Recipe Healthier
Cream Cheese: Swap with Greek yogurt-based cream cheese to reduce total fat while maintaining a creamy texture.
Sugar: Replace granulated sugar with a monk fruit or erythritol blend to lower the glycemic index significantly.
Heavy Cream: Use a high-protein plant-based whipping cream alternative, though be aware that the set may be slightly less firm.
Variations and Substitutions
| Ingredient | Substitution | Flavor Impact | Texture Impact |
|---|---|---|---|
| Vanilla Cookies | Graham Crackers | Nutty, toasted note | Denser crumb |
| Strawberry Jello | Raspberry Jello | More tart/acidic | No change |
| Heavy Cream | Coconut Cream | Tropical undertone | Heavier, rich mouthfeel |
Can You Make This Ahead?
Yes, you can prepare this cheesecake up to 3 days in advance. Store the finished, covered cheesecake in the refrigerator. If you choose to add the whipped topping, wait until just before serving to ensure the cream remains fresh and maintains its shape.
Serving Suggestions and Pairings
Serve this cheesecake chilled, paired with a side of fresh sliced berries or a glass of sparkling lemonade. For a dinner party, a crisp white grape juice or a chilled hibiscus tea complements the strawberry notes beautifully. Present the cheesecake on a raised cake stand to highlight the beautiful pink and white layers, serving with a clean dessert fork for the best experience.

Best Occasions to Serve This Recipe
This dish is perfect for summer brunches, birthday celebrations, or any event requiring a visually impressive, stress-free dessert. It excels in potlucks because it remains stable at room temperature for the duration of a meal, provided it was thoroughly chilled beforehand.
Storage and Reheating
| Method | Duration | Instructions |
|---|---|---|
| Refrigerator | 4 days | Keep in an airtight container or wrap the springform pan tightly. |
| Freezer | 1 month | Wrap tightly in plastic wrap and foil; thaw in the fridge for 24 hours. |
Nutritional Information
Approximate nutritional values per serving:
| Nutrient | Amount |
|---|---|
| Calories | 420 |
| Protein | 6g |
| Fat | 28g |
| Carbohydrates | 48g |
| Fiber | 1g |
| Sugar | 32g |
| Sodium | 280mg |
Conclusion
Strawberry Crunch Cheesecake transforms simple ingredients into a sophisticated, multi-textured delight that never fails to impress. By mastering the layering technique and allowing for proper chilling time, you guarantee a dessert that looks just as good as it tastes. The combination of the creamy interior and the crisp cookie topping offers a balanced, professional experience that is surprisingly easy to achieve at home.
We encourage you to try this recipe for your next gathering. It is the perfect blend of nostalgic flavors and modern technique. Save this recipe for when you need a reliable, crowd-pleasing dessert that delivers consistent, delicious results every single time.
FAQ
Can I substitute the strawberry gelatin with a different flavor?
Yes, you can use any fruit-flavored gelatin, such as raspberry or peach, to change the profile while maintaining the same structural integrity.
How do I know when the cheesecake is done setting?
The cheesecake is properly set when the surface is firm to the touch and there is no visible movement in the center when the pan is gently shaken.
What should I do if the crust feels too crumbly?
Ensure you have added enough melted butter; if the mixture is still dry, add one extra tablespoon of butter and process again until it clumps easily in your hand.
Can I freeze the entire cheesecake?
Yes, this cheesecake freezes beautifully for up to one month; ensure it is wrapped thoroughly to prevent ice crystal formation and thaw it slowly in the refrigerator.
Print
Easy Strawberry Crunch Cheesecake
- Total Time: 265
- Yield: 12 servings
- Diet: Vegetarian
Description
Indulge in a sophisticated, no-bake dessert that pairs a buttery vanilla cookie crust with a velvety, smooth cream cheese filling and a vibrant, crunchy strawberry topping. This recipe captures the nostalgic flavor of strawberry crunch bars in a professional-looking, multi-layered masterpiece. Perfect for warm-weather gatherings, it offers a refreshing, tart-and-sweet profile that is sure to impress guests without the hassle of a traditional oven-baked water bath.
Ingredients
2 cups crushed vanilla wafers
1/2 cup unsalted butter, melted
16 oz cream cheese, softened
1/2 cup granulated sugar
1 tsp vanilla extract
1 cup heavy whipping cream
1 tbsp unflavored gelatin
2 tbsp cold water
1 cup strawberry wafer cookies, crushed
1/4 cup freeze-dried strawberries, pulverized
Instructions
Mix crushed vanilla wafers with melted butter and press into the bottom of a springform pan.
In a large bowl, beat the cream cheese, sugar, and vanilla until smooth.
Dissolve gelatin in cold water and heat gently until melted; fold into the cream cheese mixture.
Whip the heavy cream until stiff peaks form and fold into the cream cheese base.
Pour the filling over the crust and smooth the top with a spatula.
Combine crushed strawberry wafers and freeze-dried strawberry powder to create the crunch topping.
Sprinkle the crunch mixture evenly over the cheesecake.
Refrigerate for at least 4 hours until the gelatin has set the structure firmly.
Notes
Ensure the cream cheese is at room temperature before beating to avoid lumps. For a more intense strawberry flavor, you can swirl a small amount of strawberry preserve into the cheesecake batter before chilling. Store leftovers in the refrigerator for up to 3 days. Always ensure the gelatin is fully dissolved to prevent a grainy texture.
- Prep Time: 25
- Category: Desserts
- Method: No-bake
- Cuisine: Modern American