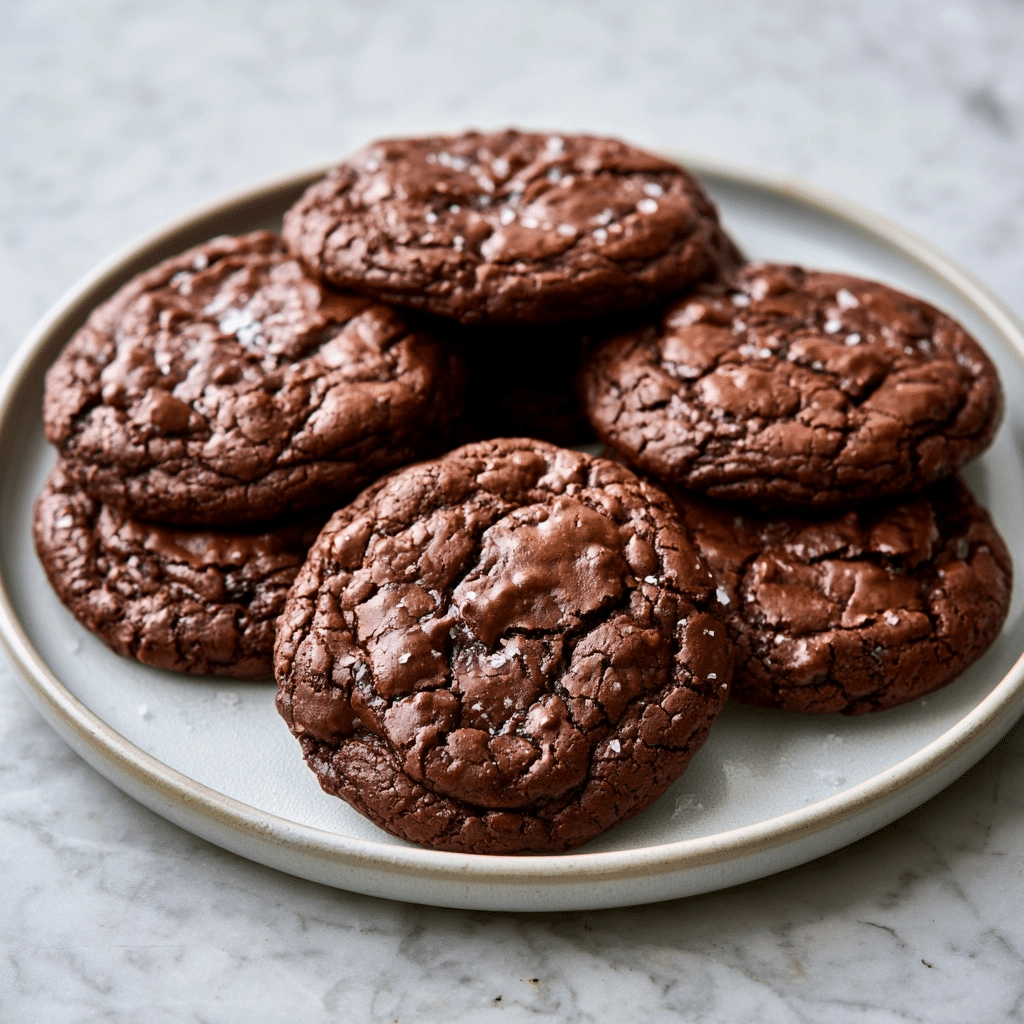
Salted brownie cookies provide a decadent cross between a fudgy brownie and a classic chewy cookie, offering the best of both worlds in every bite. Designed for bakers who crave deep cocoa intensity, this recipe delivers a crackly, shiny top and a rich, moist interior that satisfies any chocolate craving. Whether you are prepping for a weekend gathering, a classroom party, or a simple weeknight dessert, these cookies stand out for their sophisticated balance of sweet and savory notes. By combining high-quality cocoa with a gentle sprinkle of sea salt, you achieve a professional-grade result right in your own kitchen. You will appreciate the straightforward technique that ensures a consistently tender, melt-in-your-mouth texture that keeps everyone reaching for another.
What Is Salted Brownie Cookies?
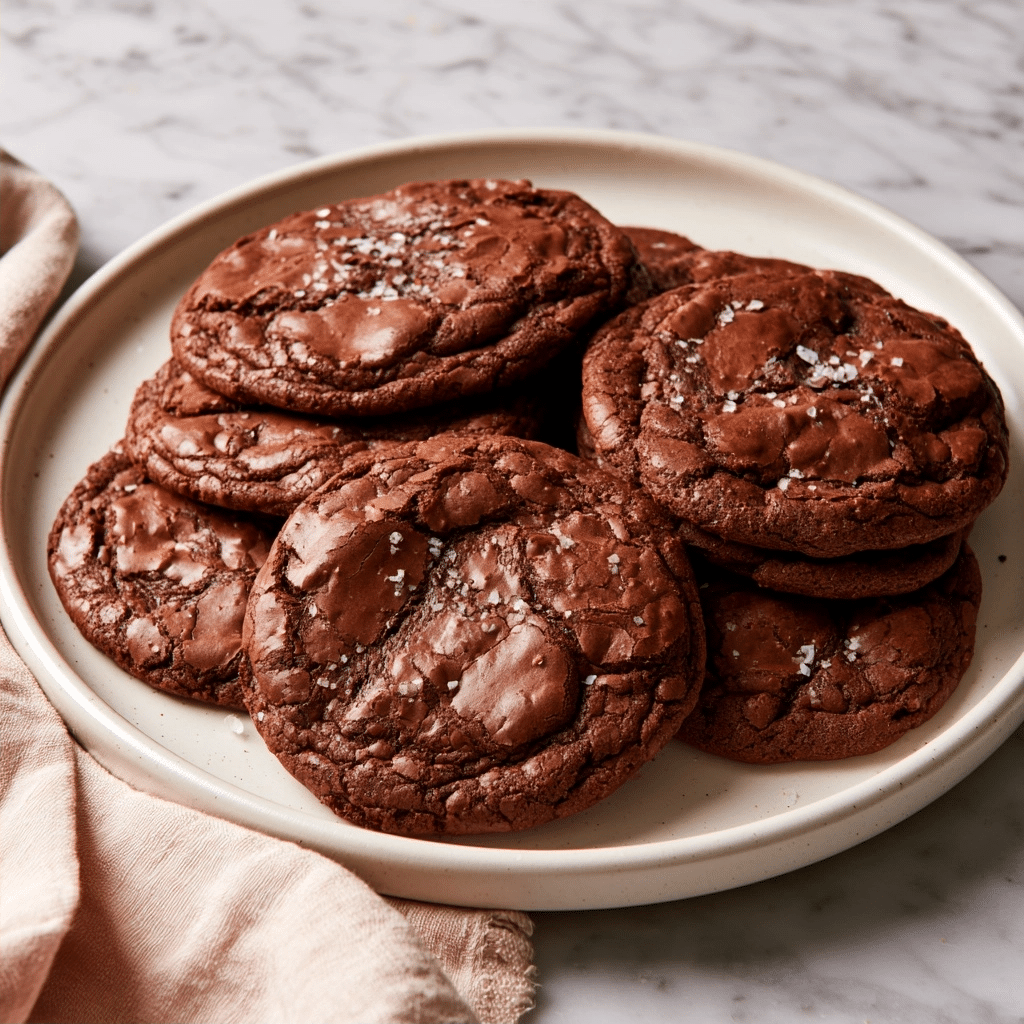
Salted brownie cookies represent a hybrid confection that marries the chewy structure of a traditional cookie with the dense, fudge-like consistency of a classic brownie. Unlike standard drop cookies that rely on creamed butter and flour, these treats prioritize chocolate, eggs, and sugar to create a signature moist crumb. The addition of flaked sea salt serves to cut through the sweetness, highlighting the complex flavor profile of the cocoa and semi-sweet chocolate. This bake remains distinct from ordinary chocolate cookies due to its thinner, brownie-like batter and the characteristic shiny, paper-thin crust that forms on the surface during the cooling process.
| Prep Time | 15 minutes |
| Cook Time | 10 minutes |
| Total Time | 25 minutes |
| Servings | 18 cookies |
| Difficulty Level | Easy |
| Cuisine | American |
| Calories per Serving | 160 kcal |
Why You’ll Love This Recipe
- Effortless Preparation: This recipe uses a simple one-bowl mixing method for the base, making it an ideal choice for busy schedules.
- Foolproof Texture: The specific ratio of eggs to fats ensures a soft, fudgy center every single time you bake.
- Crowd-Pleasing Profile: The blend of sweet semi-sweet chips and savory sea salt appeals to a wide variety of taste preferences.
- Time-Saving Efficiency: With a short bake time of under ten minutes, you can have fresh, warm cookies ready to serve in less than half an hour.
This recipe provides an accessible entry point for beginner bakers while offering the rich depth expected by seasoned dessert enthusiasts. You will find that the process remains remarkably streamlined, allowing for consistent results whether you are feeding a crowd or simply stocking your pantry for the week.
Why This Recipe Works
My experience testing this recipe revealed that the secret to the perfect texture lies in the initial aeration of the eggs and sugar. By whisking these components together until frothy, we create a stable foam that supports the structure of the cookie despite the high chocolate content. This initial step is non-negotiable for achieving that delicate, crackly surface.
Technically, the recipe relies on the emulsion created by combining melted butter and chocolate with the frothy egg base. The addition of a small amount of vegetable oil keeps the crumb tender and prevents the cookies from becoming brittle once they cool. Furthermore, the use of both baking powder and the specific egg-to-flour ratio ensures the cookies maintain a brownie-like density without turning into dense, inedible lumps.
The sensory payoff is driven by the contrast between the dark, bittersweet cocoa base and the occasional bite of coarse sea salt. This seasoning layer functions much like salt in a steak or savory soup, waking up the chocolate flavor and preventing the sugar from feeling one-dimensional. As the cookies rest on the pan, the carryover heat settles the centers, resulting in a firm yet gooey bite that looks and tastes like a gourmet bakery item.
Pro Tips Before You Start
Room Temperature Ingredients: Remove eggs and dairy 30 minutes ahead to ensure better emulsification and a smoother batter. Proper Measuring: Use the spoon-and-level method for flour to avoid dense, dry cookies. Mise en Place: Prepare all your ingredients, including pre-heating your oven, before starting the whisking process to maintain the aeration of the eggs.
Ingredients
Here’s everything you’ll need to make Salted Brownie Cookies.
| Ingredient | Quantity | Notes |
| All-Purpose Flour | 1 cup (125g) | – |
| Baking Powder | 1 tsp | Check expiry date |
| Salt | 1/8 tsp | Fine sea salt |
| Large Eggs | 2 | Room temperature |
| Large Egg Yolk | 1 | Room temperature |
| Granulated Sugar | 1 cup (200g) | – |
| Vegetable Oil | 1 tbsp | Use neutral oil |
| Vanilla Extract | 1 tsp | Pure extract |
| Unsalted Butter | 6 tbsp (85g) | Melted |
| Semi-Sweet Chocolate Chips | 1 cup (170g) | Plus extra for topping |
| Unsweetened Cocoa Powder | 1/4 cup (25g) | High quality preferred |
| Espresso Powder | 1 tsp | Optional |
| Sea Salt Flakes | To taste | For garnish |
Best Ingredients for Salted Brownie Cookies
Quality ingredients dictate the final outcome of these cookies. Using a high-quality, Dutch-processed cocoa powder will provide a darker color and a smoother, less acidic chocolate taste compared to standard grocery store brands. Furthermore, the espresso powder, while optional, acts as a flavor enhancer that bridges the gap between the sweet sugar and the bitter cocoa, creating a more professional complexity. Opt for pure vanilla extract rather than imitation to ensure the aroma is well-rounded. Finally, always use coarse sea salt flakes for the finish; fine table salt will dissolve too quickly and result in a salty rather than savory experience.
Step-by-Step Instructions
Phase 1: Prepare the Base
- Adjust the oven rack to the second level mark (just above center) and preheat your oven to 350ºF (175ºC).
- Line two baking sheets with parchment paper or silicone mats to ensure the cookies do not stick during the bake.
- Whisk together the flour, baking powder, and salt in a medium bowl, then set this mixture aside for later use.
Phase 2: Combine the Wet and Dry
- Beat the eggs, egg yolk, granulated sugar, vegetable oil, and vanilla extract in a bowl using a mixer on medium-high speed.
- Continue mixing until the combination is fully combined, frothy, and has lightened in color.
- Heat the semi-sweet chocolate chips and unsalted butter in a small saucepan over medium heat until melted and smooth.
- Remove the saucepan from the heat immediately, then stir in the unsweetened cocoa powder and espresso powder until incorporated.
- Pour the chocolate mixture into the egg base, mixing until the colors are uniform and the texture is glossy.
- Fold in the dry ingredients using a spatula until just combined, ensuring you do not overmix or the cookies will become tough.
Phase 3: Scoop and Bake
- Scoop the batter using a 1 1/2 tablespoon-size cookie scoop or two spoons onto the prepared baking sheets.
- Space the mounds about 1 1/2 inches apart to allow for proper spreading during the baking phase.
- Sprinkle a small pinch of sea salt flakes over the top of each cookie mound before placing them in the oven.
- Bake for 8-10 minutes at 350ºF (175ºC) or until the tops have developed a signature shiny, crackly appearance.
- Top with additional chocolate chips immediately after removing them from the oven, pressing them gently into the warm surface.
- Cool the cookies on the pan for 5 minutes, then move them to a rack to finish cooling completely.
Chef Tips for Perfect Results
- Temperature Precision: Use an oven thermometer to ensure your oven is actually at 350ºF (175ºC), as internal heating elements often vary.
- Visual Cues: Look for the crackly skin on top; this indicates the sugar has caramelized appropriately.
- The Rounding Trick: If cookies spread unevenly, place a large round cookie cutter over the warm cookie and nudge it gently in a circular motion to restore a perfect circle.
- Handling Patience: These cookies are extremely soft when warm; always use a flat spatula to transfer them to prevent tearing.
- Doneness Test: The edges should be set, but the center will remain slightly soft and fudge-like, which is exactly the texture you want.
Common Mistakes to Avoid
- Overmixing the Batter: [WHAT] Tough, dense texture. [WHY] Excessive gluten development happens when flour is overworked. [FIX] Use a spatula to fold the dry ingredients until just combined.
- Overbaking the Cookies: [WHAT] Dry, crumbly cookies. [WHY] The high sugar and chocolate content causes rapid moisture loss past the 10-minute mark. [FIX] Set a timer for 8 minutes and check every 30 seconds thereafter.
- Wrong Oven Rack Placement: [WHAT] Burnt bottoms and raw tops. [WHY] Heat radiates directly from the bottom element. [FIX] Always use the second rack from the top to ensure even heat distribution.
How to Make This Recipe Healthier
While these remain a dessert, you can make minor adjustments. All-purpose flour → White whole wheat flour: This substitution increases fiber content and adds a slightly nutty flavor without compromising the structure. Granulated sugar → Coconut sugar: This offers a lower glycemic index and a hint of caramel notes, though it may result in a darker color. Semi-sweet chips → Dark chocolate (70% cocoa): This increases the antioxidant count and reduces the total sugar intake per serving.
Variations and Substitutions
You can easily customize these to fit dietary needs or flavor cravings.
| Ingredient | Substitution | Impact on Flavor | Impact on Texture |
| Butter | Coconut oil (1:1) | Subtle tropical hint | Slightly crisper edge |
| All-purpose flour | GF All-purpose blend | Neutral | Requires extra binding |
| Espresso powder | None | Less chocolate intensity | None |
Can You Make This Ahead?
Yes. You can prepare the cookie dough through step 6 and refrigerate it for up to 24 hours. When ready to bake, let the dough sit at room temperature for 15 minutes to soften before scooping onto the baking sheets. Alternatively, you can scoop the dough balls and freeze them individually on a tray, then transfer to a freezer bag for up to one month. Bake the frozen dough balls directly from the freezer, adding 1-2 minutes to the total baking time.
Serving Suggestions and Pairings
Serve these cookies slightly warm for the best experience. They pair exceptionally well with a glass of cold almond milk or a hot cup of black coffee, which complements the espresso notes in the dough. For a dinner party, consider serving them alongside a scoop of vanilla bean ice cream to create a brownie-like sundae effect. The contrast of cold, creamy ice cream against the salty, fudgy cookie is unmatched. Place them on a slate board or a white ceramic platter to make the dark chocolate color stand out.
Best Occasions to Serve This Recipe
These cookies are perfect for casual weekend get-togethers, school bake sales, or as a thoughtful homemade gift. They are particularly popular during the winter holiday season when the rich chocolate profile feels indulgent and comforting. Because they are easy to produce in large batches, they serve as an excellent solution for office potlucks or as a late-night treat for a family movie night. Their sophisticated appearance makes them suitable for more formal gatherings where you want to provide a decadent, professional-looking dessert without spending hours in the kitchen.
Storage and Reheating
Proper storage is key to maintaining the fudgy texture.
| Method | Duration | Instructions |
| Countertop | 2 days | Airtight container at room temperature. |
| Refrigerator | 5 days | Airtight container to prevent drying. |
| Freezer | 3 months | Airtight freezer-safe bag or container. |
| Reheating | 10-15 seconds | Microwave on low power to regain softness. |
Nutritional Information
Approximate nutritional values per serving:
| Nutrient | Amount per Serving |
| Calories | 160 |
| Protein | 2g |
| Fat | 8g |
| Carbohydrates | 22g |
| Fiber | 1g |
| Sugar | 16g |
| Sodium | 45mg |
*Approximate values based on standard ingredients. Actual nutrition varies by brand and substitutions.
Conclusion
Salted brownie cookies offer an ideal solution for anyone needing a quick, decadent dessert that never fails to impress. By mastering the simple technique of aerating your egg mixture, you unlock a professional, crackly-top finish that sets these apart from standard cookies. The careful balance of deep chocolate and savory sea salt ensures that every bite remains balanced and refined, avoiding the common pitfalls of overly sweet treats.
This recipe provides a reliable foundation that works for everything from last-minute cravings to planned party menus. Whether you are a novice baker or a veteran in the kitchen, the process is designed to be straightforward and rewarding. You will find that these cookies quickly become a staple in your rotation due to their consistent texture and rich flavor profile.
If you enjoy a perfect treat that satisfies both the need for a chewy cookie and a fudgy brownie, this is the recipe for your collection. Save this page to your bookmarks and gather your ingredients for your next baking session. You will certainly discover that these cookies are the ultimate way to elevate your home baking game.
FAQ
Can I substitute the egg yolk?
The extra egg yolk provides the necessary fat and richness for the fudgy brownie texture. While you can omit it, the cookie will lose some of its signature density and moisture.
How do I know when the cookies are done?
The cookies are done when the edges are set and the tops have developed a shiny, crackly appearance. The center will still look slightly soft and underbaked, which is exactly how you want it for a brownie-like texture.
What should I do if the dough is too thin?
The batter for these cookies is naturally on the thinner side compared to traditional cookie dough. If it seems too loose, chill the bowl in the refrigerator for 10-15 minutes before scooping.
Can I make these the day before?
Yes, you can prepare the dough in advance and keep it in the refrigerator. Just ensure the container is airtight to prevent the dough from drying out.
Is this recipe suitable for gluten-free diets?
Yes, you can substitute the all-purpose flour with a high-quality 1-to-1 gluten-free baking blend. Note that you may need to add a pinch of xanthan gum if your blend does not contain it.