
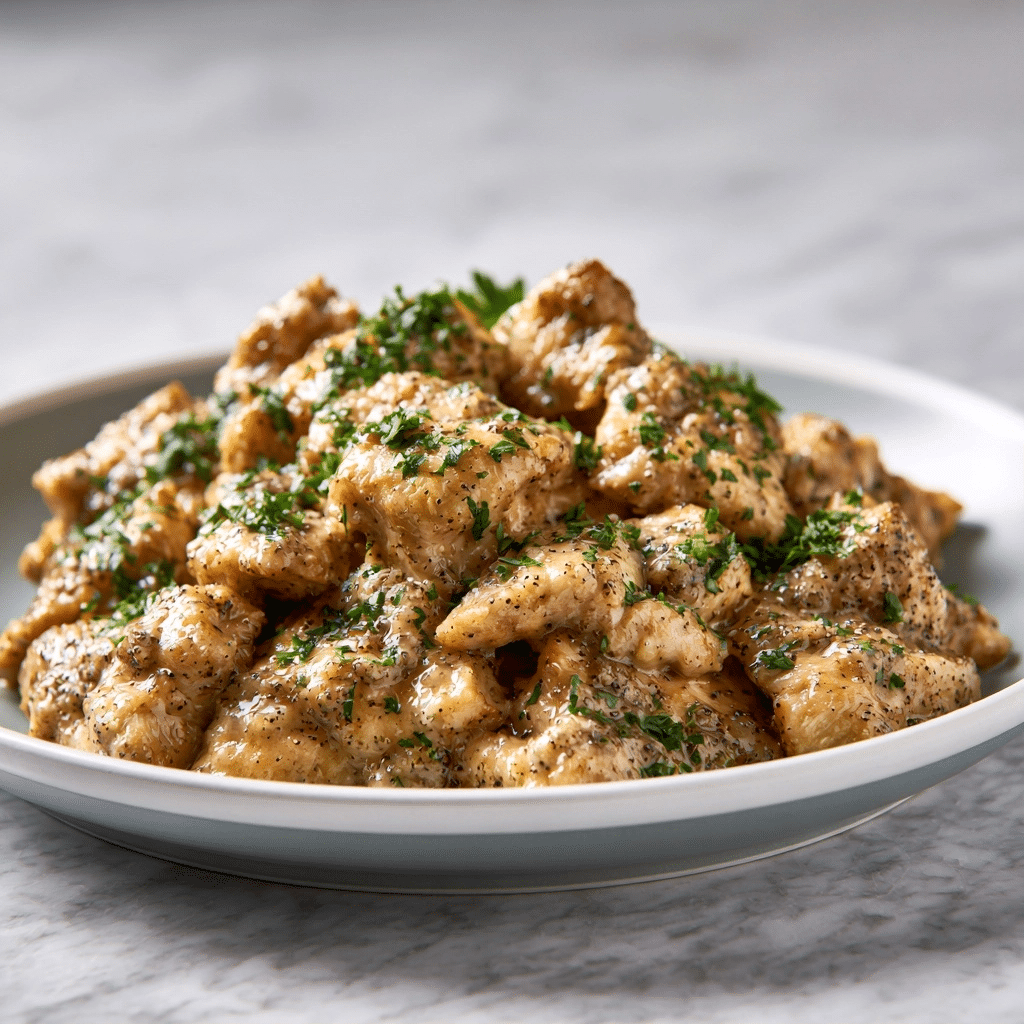
Salt and pepper chicken represents the pinnacle of home-style comfort food, offering a harmonious balance of savory, aromatic, and crispy textures. This dish features bite-sized pieces of marinated poultry coated in a light, crunchy cornstarch shell and seasoned with a sharp, vibrant blend of white pepper and chili. Busy home cooks choose this meal for its rapid preparation, making it a reliable solution for hectic weeknight dinners. Beyond its quick cooking time, the recipe delivers a satisfying textural contrast, where each golden-brown bite yields to tender, juicy meat inside. By mastering this simple technique, you gain the ability to create restaurant-quality results in your own kitchen.
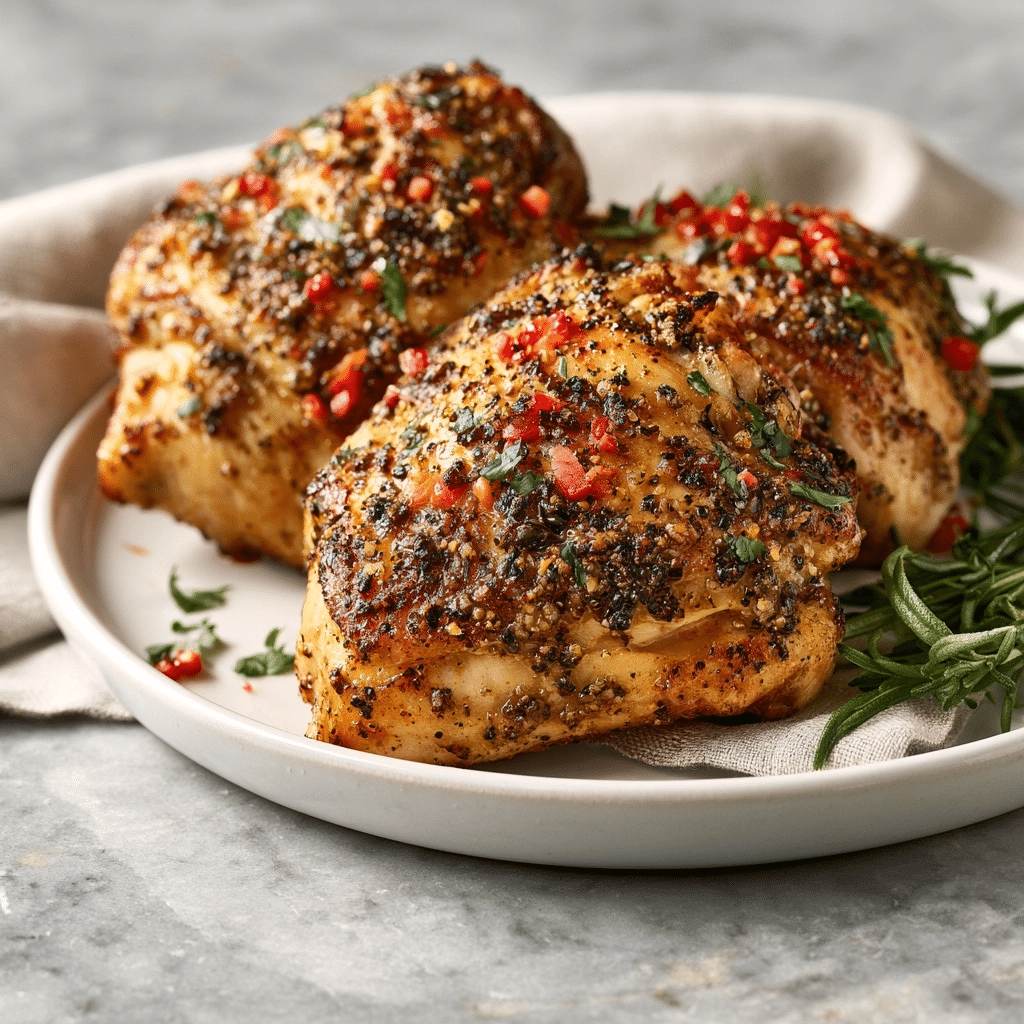
What Is Salt And Pepper Chicken?
Salt and pepper chicken is a classic preparation characterized by its dry, seasoned coating rather than a traditional heavy sauce. The dish relies on the bold, clean heat of white pepper and the subtle savoriness of salt to define its primary flavor profile. While originating from regional Cantonese traditions, this style has become a global staple in contemporary kitchens. Unlike stir-fries that focus on soy-based liquids, this preparation method prioritizes surface dehydration during the frying process. The result is a clean, non-greasy finish that places the quality of the seasoning and the texture of the chicken at the forefront of the dining experience.
| Prep Time | 15 minutes |
|---|---|
| Cook Time | 12 minutes |
| Total Time | 27 minutes |
| Servings | 4 |
| Difficulty Level | Easy |
| Cuisine | Chinese-inspired |
| Calories per Serving | 320 |
Why You’ll Love This Recipe
- Effortless Preparation: The focus on standard pantry staples ensures you can assemble this dinner without a trip to a specialty store.
- Foolproof Results: Following exact temperature guidelines guarantees consistent, golden-brown chicken every single time you cook.
- Crowd-Pleasing Texture: The cornstarch coating creates a delicate, glass-like crunch that remains stable even after sitting for a few minutes.
- Time-Saving Efficiency: With a total time of under thirty minutes, this dish fits perfectly into the most demanding weeknight schedules.
- Highly Customizable: Adjust the amount of chilies to suit personal preferences or intensify the aromatics with additional garlic or scallions.
This recipe provides value because it removes the intimidation factor often associated with frying at home. Its simple, effective structure allows beginners to achieve professional results, while the quick cook time serves experienced cooks during meal prep. It functions equally well as a standalone feast or a component for shared plates.
Why This Recipe Works
Experience has taught me that the secret to this dish lies in the balance between the marinade and the dry coating. In my own kitchen, I discovered that using chicken thighs instead of breasts prevents the meat from drying out during the high-heat frying process. The marinade works by penetrating the surface proteins, ensuring that each bite is seasoned from the inside out, rather than relying solely on the outer layer.
The science of the cornstarch coating is where the magic happens. Unlike all-purpose flour, cornstarch has a high amylose content, which prevents the absorbency of oil, resulting in a lighter and crispier exterior. When the starch encounters the 350-360 degree oil, it undergoes flash-evaporation, which locks in the internal moisture of the chicken while creating a rigid, golden lattice on the surface. This technique creates a physical barrier that protects the delicate meat fibers.
The final step, tossing the fried chicken with extra white pepper and chilies, creates an aromatic finish. The residual heat from the freshly fried chicken blooms the essential oils in the white pepper, layering a complex, earthy, and floral heat over the salty base. This interaction transforms the dish from a simple preparation into a multi-sensory experience of aroma, crunch, and savoriness.
Pro Tips Before You Start
Mise en Place: Prepare all ingredients, including chopping the chilies and measuring your cornstarch, before turning on the stove. Use a Thermometer: Relying on an instant-read thermometer for oil helps you maintain the critical 350-360 degree window, ensuring crisp results. Room Temperature Chicken: Remove poultry from the refrigerator 15 minutes before marinating to encourage even cooking. Drying the Chicken: Pat pieces dry with a paper towel if they seem moist, as surface water prevents the cornstarch from adhering properly.
Ingredients
Here’s everything you’ll need to make this salt and pepper chicken:
| Ingredient | Quantity | Notes/Alternatives |
|---|---|---|
| Chicken thighs | 1 lb / 450g | Use breast for a leaner option |
| Soy sauce | 2 tbsp | Use low-sodium to control salt |
| Rice wine or sherry | 1 tbsp | Essential for neutralizing gaminess |
| Brown sugar | 1 tsp | Supports caramelization |
| Salt | ½ tsp | Adjust based on soy sauce brand |
| White pepper | ½ tsp | Provides signature sharp heat |
| Garlic | 2 cloves | Minced finely |
| Cornstarch | ¾ cup / 95g | Do not substitute with flour |
| Chilies* | 2-3 | Optional, slice thinly |
| Oil for frying | As needed | Vegetable or canola recommended |
Step-by-Step Instructions
Phase 1: Prepare the Base
- Combine the chicken, soy sauce, rice wine, brown sugar, salt, white pepper, and minced garlic in a large mixing bowl.
- Incorporate the seasonings thoroughly by massaging the mixture into the meat with your hands or tongs.
- Rest the chicken in the refrigerator for 10-15 minutes to allow the flavors to penetrate the muscle fibers effectively.
Phase 2: Coating and Frying
- Place the cornstarch into a shallow dish to create a dedicated station for dredging.
- Dredge each piece of marinated chicken into the cornstarch until every side is evenly and fully covered.
- Shake off any excess powder to avoid messy, lumpy clumps in your oil during the frying process.
- Warm the oil in a deep pan to exactly 350-360°F (175-180°C) over medium-high heat for maximum crispness.
- Fry the chicken in small batches for 3-4 minutes until the exterior turns light golden and feels firm.
Phase 3: Final Seasoning
- Remove the chicken from the oil using a slotted spoon and place it on a wire rack to drain.
- Toss the warm chicken immediately with an extra dusting of white pepper and the sliced fresh chilies.
- Rest the finished chicken for 5 minutes before serving to allow the juices to redistribute for a better texture.
Chef Tips for Perfect Results
- Maintain Oil Temperature: Use an instant-read thermometer to verify oil temp before each batch to avoid oily, heavy coatings.
- Do Not Crowd: Fry in small batches to keep oil temperature stable, preventing the chicken from steaming instead of frying.
- Resting Period: Resting for 5 minutes is non-negotiable, as it locks in the moisture and settles the crunch of the cornstarch.
- Quality Pepper: Always use fresh white pepper, as its earthy fragrance is the primary aromatic driver of this classic dish.
- Drain Excess Oil: A wire rack is superior to paper towels for maintaining crunch, as it allows air to circulate underneath.
Common Mistakes to Avoid
Overcrowding the Pan | Results in soggy, pale chicken | Oil temperature drops too quickly when overloaded | Fry in small batches to maintain 350-360°F.
Ignoring the Resting Time | Results in a soft, non-crispy exterior | Moisture from the center creates steam beneath the crust | Always rest on a wire rack for 5 minutes.
Improperly Measured Starch | Results in thick, gummy patches | Too much moisture in the marinade for the amount of starch | Shake off excess before frying.
Not Using a Thermometer | Results in oily or burnt chicken | Heat is too low or too high for consistent browning | Use a thermometer for precision.
How to Make This Recipe Healthier
| Original Ingredient | Healthier Swap | Impact |
|---|---|---|
| Standard Frying | Air-fryer | Reduces fat content significantly while maintaining crunch |
| Chicken thighs | Chicken breast | Reduces overall calorie count and fat per serving |
| Brown sugar | Stevia/Erythritol | Reduces overall sugar content with minimal flavor change |
Variations and Substitutions
Customize this recipe to match your pantry staples or dietary preferences easily.
| Ingredient | Substitution | Flavor Impact | Texture Impact |
|---|---|---|---|
| Soy sauce | Tamari | Slightly more intense depth | No change |
| Chicken | Tofu cubes | Neutral profile | Softer exterior, firmer center |
| Cornstarch | Potato starch | Neutral | Increases crunchiness and lightness |
Can You Make This Ahead?
Yes. You can prepare the chicken through the marination step for up to 24 hours in advance, keeping it refrigerated in an airtight container. The coating process, however, must happen immediately before frying to ensure the cornstarch does not absorb the moisture of the chicken and turn gummy. If you need to save time, prep the marinade and set up your station early so that the actual frying is the only task remaining at dinner time.
Serving Suggestions and Pairings
Serve this chicken alongside fragrant jasmine rice or a refreshing cucumber salad to balance the heat. A light side of steamed bok choy with ginger adds a clean, verdant contrast. For a beverage pairing, a crisp, chilled sparkling mineral water or a dry green tea complements the sharp white pepper notes perfectly. Presentation matters, so garnish with thin slices of fresh chili or even some fried garlic flakes to enhance the visual appeal of the final platter.
Best Occasions to Serve This Recipe
This dish shines during casual weekend entertaining, where you want to impress guests without being trapped in the kitchen for hours. It serves as an excellent “quick-fix” meal for Tuesday night dinners when you crave something restaurant-style but want to avoid the expense of takeout. The simplicity of the ingredients also makes it a great choice for teaching beginners how to handle high-heat cooking techniques safely and effectively.
Storage and Reheating
Properly store leftovers in an airtight container for up to 3 days in the refrigerator.
| Method | Duration | Instructions |
|---|---|---|
| Refrigerator | 3 days | Store in airtight container; separate from sauces if possible |
| Reheating (Oven) | 10-12 minutes | Spread on wire rack at 375°F until heated through |
| Reheating (Air Fryer) | 4-5 minutes | Reheat at 350°F until crisp |
Nutritional Information
Approximate nutritional values per serving:
| Nutrient | Amount per Serving |
|---|---|
| Calories | 320 |
| Protein | 22g |
| Fat | 14g |
| Carbohydrates | 25g |
| Fiber | 1g |
| Sugar | 2g |
| Sodium | 450mg |
*Approximate values based on standard ingredients. Actual nutrition varies by brand and substitutions.
Conclusion
Mastering this simple salt and pepper chicken elevates your home cooking repertoire by proving that flavor does not require complex sauces or hours of labor. By focusing on the interplay of heat, texture, and high-quality aromatics, you can replicate a classic favorite that consistently outperforms standard takeout options. This recipe transforms standard pantry items into a dish that provides both immediate satisfaction and technical confidence in the kitchen.
You will discover that the precision of the oil temperature and the simplicity of the seasoning work together to create a light, perfectly crisp result every time you cook. This dish delivers a reliable and enjoyable dining experience that is sure to become a staple in your weekly rotation. Now that you have the tools and techniques, grab your ingredients and try this recipe tonight to see how straightforward professional results can be.
FAQ
Can I substitute soy sauce with coconut aminos?
Yes, you can substitute soy sauce with coconut aminos at a one-to-one ratio. This change will add a slightly sweeter, milder flavor profile to the marinade while maintaining the same liquid structure.
How do I know when the chicken is done?
The chicken is perfectly cooked when the exterior is firm and golden-brown and the internal temperature reaches 165°F (74°C). Relying on a probe thermometer is the most accurate way to verify this without cutting into the pieces.
What should I do if my coating is falling off?
Ensure that the chicken is not overly wet before coating and that the cornstarch is pressed firmly onto the surface. Preventing excess moisture in the marinade by patting the meat slightly helps the starch bond securely.
Can I make the chicken the day before?
While the chicken tastes best when fried fresh, you can prepare the raw marinated components the day before. Always fry the chicken immediately after coating, as the cornstarch will lose its crisp potential if it sits on the meat during storage.
How do I reheat without drying it out?
Reheat in an oven or air fryer at 350-375°F to restore crispness without overcooking the center. Avoid using a microwave, as it will cause the cornstarch coating to turn soggy due to retained steam.
Is this recipe suitable for gluten-free diets?
Yes, this recipe is naturally gluten-free if you ensure your soy sauce is certified gluten-free or replace it with tamari. Cornstarch is inherently gluten-free, making this a safe and delicious option for those avoiding gluten.
Print
Perfect Salt and Pepper Chicken
- Total Time: 27
- Yield: 4 servings
- Diet: Halal
Description
Experience the ultimate home-style comfort with this salt and pepper chicken, a dish celebrated for its harmonious balance of savory, aromatic, and crispy textures. Featuring tender bite-sized poultry coated in a light, glass-like cornstarch shell, this recipe relies on the sharp, vibrant heat of white pepper and salt. It is a rapid, restaurant-quality meal perfect for busy weeknights, delivering a clean, non-greasy finish that highlights the quality of the seasonings.
Ingredients
1.5 lbs chicken breast, cut into bite-sized pieces
1/2 cup cornstarch
1 teaspoon salt
1 teaspoon ground white pepper
1/2 teaspoon garlic powder
2 tablespoons vegetable oil
2 fresh red chilies, thinly sliced
3 cloves garlic, minced
2 scallions, thinly sliced
Instructions
In a medium bowl, toss the chicken pieces with salt, white pepper, and garlic powder until well coated.
Dust the seasoned chicken thoroughly with cornstarch, shaking off any excess.
Heat vegetable oil in a large skillet or wok over medium-high heat.
Add the chicken in a single layer and fry for 5-6 minutes per side until golden brown and crispy.
Remove the chicken and set aside on a paper towel-lined plate.
Wipe the skillet clean and add a splash of fresh oil.
Sauté the minced garlic and sliced chilies for 1 minute until fragrant.
Return the chicken to the pan and toss briefly with the aromatics and sliced scallions to coat.
Serve immediately while hot and crispy.
Notes
Ensure the oil is hot before adding the chicken to prevent a greasy texture.
Adjust the amount of chili based on your spice tolerance.
For extra aromatics, you can garnish with fried garlic bits.
- Prep Time: 15
- Cook Time: 12
- Category: Meals
- Method: Stir-fry
- Cuisine: Chinese-inspired