
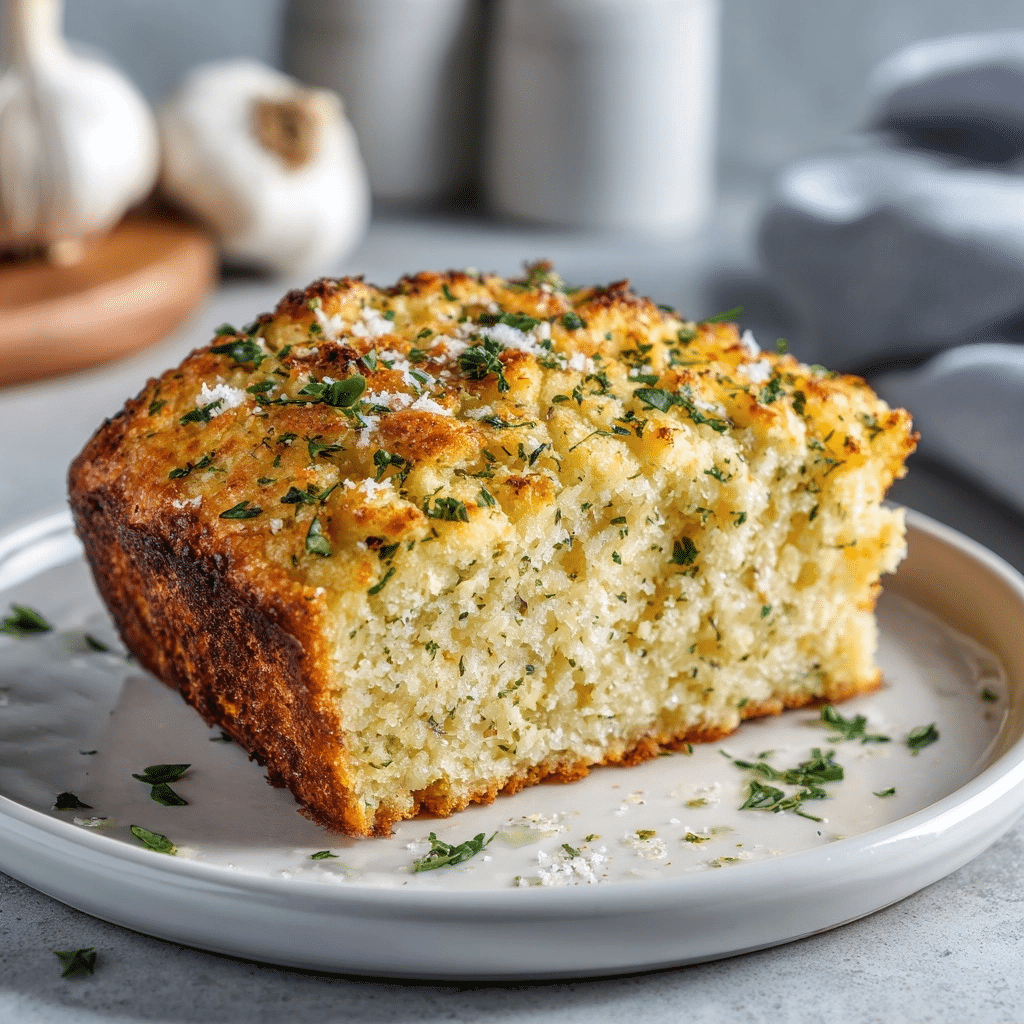
Garlic Parmesan Herb Bread is a savory, aromatic yeast bread that combines the pungent warmth of fresh garlic with the salty richness of aged parmesan cheese. This specific recipe utilizes a high-protein flour base infused with a trio of Mediterranean herbs to create a loaf that is both soft in the center and perfectly golden on the crust. You will find that the instant yeast activation ensures a reliable rise, while the olive oil provides a tender crumb structure that resists drying out. This bread serves as a versatile accompaniment to hearty Italian dishes or functions as a standalone snack when served warm with melted butter. The integration of dried rosemary, basil, and oregano creates a complex flavor profile that permeates every slice of the finished loaf.
Recipe Overview
| Prep Time | Cook Time | Total Time | Servings | Difficulty | Cuisine |
|---|---|---|---|---|---|
| 80 Minutes | 20 Minutes | 100 Minutes | 12 Slices | Intermediate | Italian-American |
Why This Recipe Works
I have tested numerous yeast bread variations, but this specific ratio of parmesan to flour creates a unique structural integrity that prevents the loaf from becoming too dense. The use of instant dry yeast removes the lengthy blooming process required by active dry varieties, allowing for a more streamlined preparation during busy weeknights. I find that the addition of granulated sugar serves a dual purpose by feeding the yeast and promoting a beautiful Maillard reaction on the crust during the baking process.
The incorporation of fresh chopped garlic rather than garlic powder makes a significant difference in the final aromatic output of the bread. By mixing the garlic directly into the dough, the oils from the cloves infuse the gluten network as it develops, ensuring that every bite carries a consistent savory note. The olive oil coating during the first rise prevents a dry skin from forming on the dough, which allows for maximum expansion and a lighter, fluffier internal texture.
Ingredients
| Ingredient | Quantity | Notes and Alternatives |
|---|---|---|
| Warm Water | 1 Cup | Temperature must be 100-110°F to activate yeast. |
| Granulated Sugar | 1 Tablespoon | Feeds yeast; substitute with honey if preferred. |
| Instant Dry Yeast | 1 Tablespoon | Rapid-rise yeast works perfectly for this schedule. |
| Salt | 1 Teaspoon | Fine sea salt merges best with the dough. |
| Dried Basil | 1 Teaspoon | Provides a sweet, peppery herbal note. |
| Dried Oregano | 1 Teaspoon | Adds a classic earthy Mediterranean flavor profile. |
| Dried Rosemary | 2 Teaspoons | Crush slightly to release more aromatic oils. |
| Fresh Garlic | 6 Cloves | Finely chopped for even distribution throughout. |
| All-Purpose Flour | 2 to 2½ Cups | Bread flour can be substituted for a chewier texture. |
| Parmesan Cheese | ⅓ Cup | Grated finely to ensure even melting into the dough. |
| Butter | 1 Tablespoon | Split for topping; use high-quality unsalted butter. |
| Olive Oil | 2 Tablespoons | For greasing the bowl and the baking sheet. |
Step-by-Step Instructions
Phase 1: Yeast Activation and Mixing
- Combine the yeast, granulated sugar, and warm water in a large mixing bowl.
- Wait for one minute until the mixture becomes foamy and active.
- Stir in the salt, dried basil, oregano, rosemary, and finely chopped garlic.
- Add 2 cups of the all-purpose flour along with the grated parmesan cheese.
- Mix the ingredients together until a sticky dough begins to pull away from the sides.
- Gradually add the remaining half cup of flour while mixing until the dough is soft and stretchy.
Phase 2: First Rise and Shaping
- Oil a clean glass bowl with one tablespoon of olive oil.
- Place the dough inside the bowl and turn it to coat the entire surface in oil.
- Cover the bowl with a clean kitchen towel or plastic wrap.
- Allow the dough to rise in a warm, draft-free area for 60 minutes.
- Preheat your oven to 375°F (190°C) while the dough finishes its first rise.
- Grease a large baking sheet using the remaining tablespoon of olive oil.
Phase 3: Shaping and Final Bake
- Punch down the risen dough gently to release excess air bubbles.
- Divide the dough into two equal portions and shape them into round loaves.
- Place the rounds on the prepared baking sheet with ample space between them.
- Cover the loaves loosely and let them rise for an additional 15 to 20 minutes.
- Brush the top of each round with half a tablespoon of melted butter.
- Bake the loaves for 18 to 20 minutes until they reach a deep golden color.
- Remove from the oven and verify doneness by tapping the bottom for a hollow sound.
- Transfer to a wire cooling rack to prevent the bottom crust from becoming soggy.
Chef Tips for Perfect Results
- Use a thermometer to verify your water temperature stays between 100°F and 110°F to avoid killing the yeast.
- Measure your flour using the spoon-and-level method to ensure you do not accidentally add too much and create dry bread.
- Slash the top of your loaves with a sharp serrated knife before baking to control the expansion and prevent side-splitting.
- Freshly grate your parmesan cheese from a block rather than using pre-shredded varieties which contain anti-clumping starches.
- Allow the bread to cool for at least ten minutes before slicing to let the internal steam settle the crumb.
Common Mistakes to Avoid
The most common mistake is using water that is too hot, which destroys the yeast and prevents the bread from rising entirely. Always test the water on your wrist; it should feel comfortably warm but never stinging or hot. Another frequent error is over-flouring the dough during the mixing phase because it looks too sticky at first. Resist the urge to add more than 2.5 cups of flour, as the dough will naturally become less tacky as the gluten develops and the flour hydrates.
Many bakers forget to grease the bowl properly, which leads to the dough tearing when you try to remove it for shaping. This tearing collapses the air bubbles you worked hard to build during the hour-long fermentation. Finally, do not skip the second rise on the baking sheet because this short window allows the gluten to relax. Failing to do this results in a dense, heavy loaf that lacks the airy texture characteristic of professional Garlic Parmesan Herb Bread.
Variations and Substitutions
| Ingredient | Substitution | Impact on Flavor |
|---|---|---|
| All-Purpose Flour | Bread Flour | Increases chewiness and height due to higher protein content. |
| Parmesan | Pecorino Romano | Provides a sharper, saltier, and more tangier cheese finish. |
| Fresh Garlic | Roasted Garlic | Creates a much smoother, sweeter, and caramelized garlic profile. |
| Dried Herbs | Fresh Herbs | Delivers a brighter, more vibrant and grassy herbal aroma. |
Serving Suggestions and Pairings
This bread serves as the perfect companion to a hot bowl of Minestrone soup or a rich Tomato Basil Bisque. The savory herbs complement the acidity of tomato-based sauces, making it an ideal side dish for classic Spaghetti Bolognese or Lasagna. For a more casual presentation, slice the bread into thick wedges and serve them alongside a charcuterie board featuring olives, roasted peppers, and soft cheeses. It also performs exceptionally well as the base for a gourmet grilled cheese sandwich filled with mozzarella and fresh spinach.
Storage and Reheating
| Method | Duration | Instructions |
|---|---|---|
| Room Temperature | 2-3 Days | Store in an airtight bag once completely cooled to maintain softness. |
| Freezer | 3 Months | Wrap tightly in plastic and foil; thaw at room temperature before use. |
| Oven Reheating | 10 Minutes | Warm at 350°F wrapped in foil to restore the crust’s texture. |
Nutritional Information
| Nutrient | Amount per Serving |
|---|---|
| Calories | 185 kcal |
| Protein | 6g |
| Fat | 5g |
| Carbohydrates | 28g |
| Sodium | 240mg |
Approximate values per slice based on 12 servings per recipe.
Conclusion
Creating your own Garlic Parmesan Herb Bread is a rewarding culinary endeavor that fills your kitchen with the intoxicating scent of roasted garlic and Mediterranean spices. This recipe provides a foolproof method for achieving a professional-quality loaf with minimal equipment and accessible ingredients. By accurately following the rising times and ensuring your yeast is fresh, you can produce a bread that rivals high-end bakery offerings. The combination of the salty parmesan and the earthy herbs ensures that this bread is much more than just a side dish; it is a centerpiece of the meal. You should feel confident sharing this recipe with friends and family during your next dinner gathering or holiday celebration. The soft interior and golden, buttery crust provide a satisfying contrast that appeals to both children and adults alike. Remember to allow the loaves to cool slightly before slicing to maintain the integrity of the crumb structure. Whether you pair it with a gourmet pasta dish or enjoy it simply toasted with extra butter, this bread will likely become a recurring requested item in your household. Master the basics of this dough and you will have a versatile foundation for many other savory bread variations in the future. Enjoy the rich, savory, and aromatic experience of your freshly baked Garlic Parmesan Herb Bread.
FAQ
Can I use garlic powder for this herb bread recipe?
You may substitute fresh garlic with one teaspoon of garlic powder if fresh cloves are unavailable. This change will distribute the garlic flavor more evenly but will lack the intense aromatic bursts found in the fresh version. Always ensure your powder is fresh and not clumped to avoid salty hot spots.
How do I know when the bread is finished baking?
The bread is done when the crust is deep golden brown and the internal temperature reaches 190°F. You can also perform a sound test by tapping the bottom of the loaf with your knuckles. A hollow, drum-like sound indicates the moisture has evaporated sufficiently and the structure is set.
Why did my bread fail to rise during the first hour?
Your yeast was likely expired or the water used during the initial mixing phase was too hot. Ensure your yeast is stored in a cool place and always check the expiration date on the package. If the room is too cold, the rise may take up to two hours instead of the suggested sixty minutes.
Can I prepare this dough the night before?
You can perform the first rise in the refrigerator overnight to develop a deeper fermented flavor. Place the oiled bowl in the fridge for up to 12 hours, then let it come to room temperature before shaping. This slow fermentation process often leads to a more complex taste profile and improved crumb texture.
What is the best way to slice this herb bread for crowds?
Use a long serrated bread knife and a gentle sawing motion to cut uniform slices without squashing the loaf. For larger gatherings, you can cut the halves into thick cubes for dipping into oils or sauces. Always slice only what you intend to serve immediately to prevent the remaining bread from drying out.