
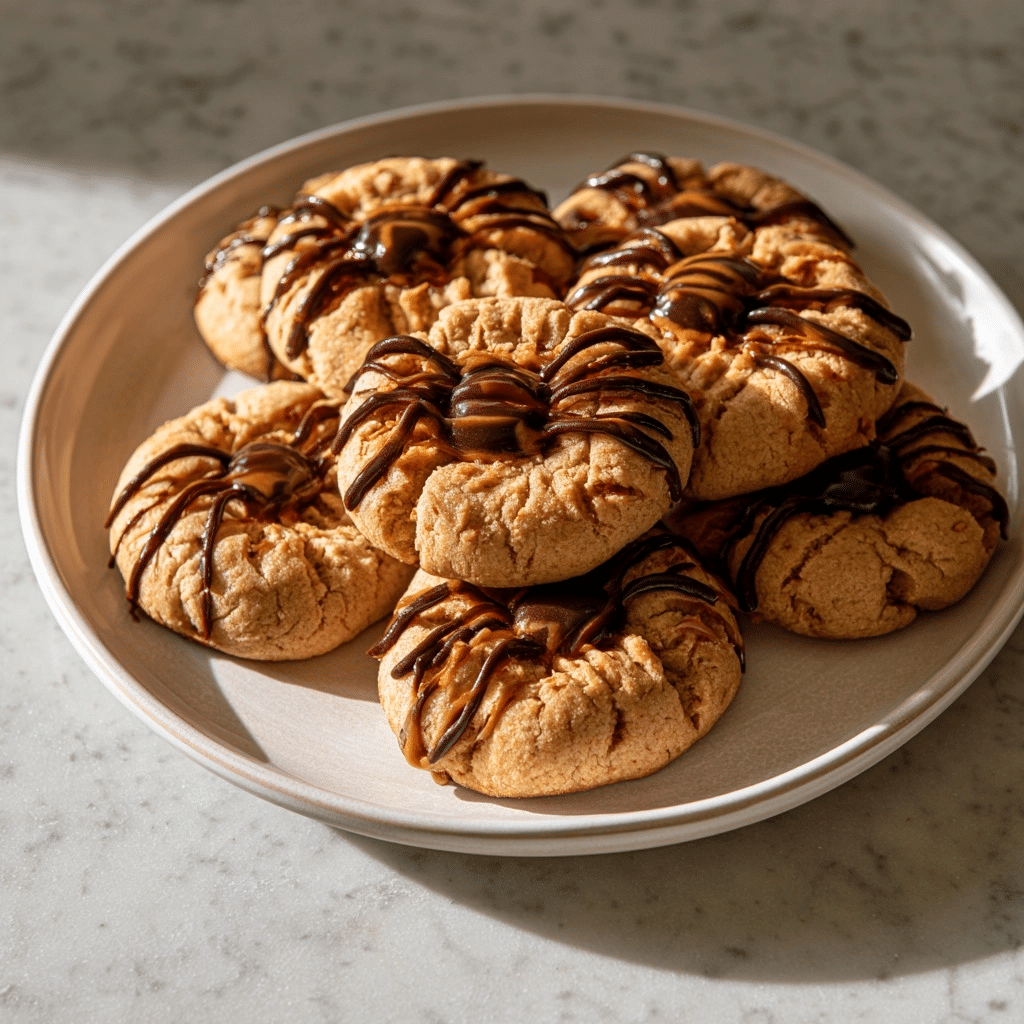
Simple Peanut Butter Spider Cookies provide the perfect balance of salty, nutty flavors and whimsical presentation for your next holiday celebration. These treats combine a chewy, soft peanut butter base with chocolate accents to create an adorable arachnid design that children and adults find irresistible. By utilizing pantry staples like malted milk balls and creamy peanut butter, this recipe allows you to assemble professional-looking festive sweets without complex baking techniques. These cookies offer a rich texture and comforting aroma that turns any gathering into a memorable event.
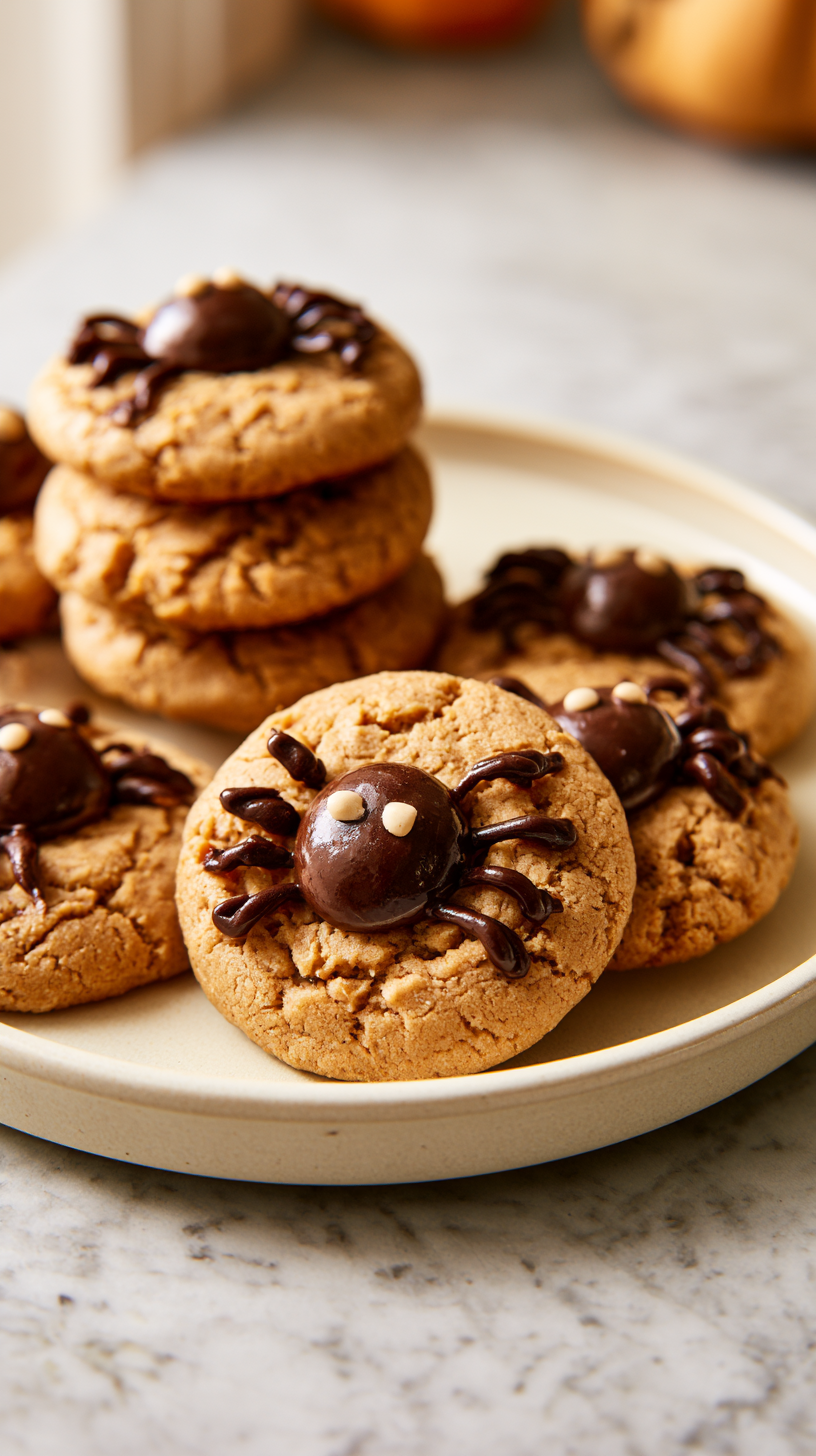
What Is Peanut Butter Spider Cookies?
Peanut Butter Spider Cookies are festive, themed baked goods consisting of a classic peanut butter dough shaped into spheres and topped with chocolate candies to resemble spiders. The dough relies on traditional sugar-cookie ratios, enriched with smooth peanut butter for depth and moisture. Once baked, the cookies feature a soft, slightly crumbly interior and a golden exterior. The spider transformation happens by pressing malted milk balls into the warm center, followed by melted chocolate piping for legs. This creative dessert remains a staple for fall festivities, school parties, and seasonal bake sales.
| Prep Time | 20 minutes |
| Cook Time | 10 minutes |
| Total Time | 30 minutes |
| Servings | 22 |
| Difficulty Level | Easy |
| Cuisine | American |
| Calories per Serving | 210 |
Why You’ll Love This Recipe
Effortless preparation allows for quick assembly even on busy weeknights.
Foolproof technique ensures consistent texture and flavor every time you bake.
Crowd-pleasing aesthetic makes these a highlight of any seasonal dessert platter.
Time-saving workflow uses simple ingredients commonly found in your pantry.
Beginner-friendly steps guide you through the decorating process with ease.
The primary appeal of these cookies lies in their ability to combine a sophisticated, high-quality flavor profile with a playful appearance. They serve as an excellent project for home bakers looking to impress guests without spending hours in the kitchen.
Why This Recipe Works
Through my years of experience developing holiday treats, I have found that the secret to a great spider cookie lies in the balance of the dough. The specific combination of granulated and brown sugar creates a structure that is sturdy enough to hold the weight of the malted milk ball while remaining tender when bitten. When the butter and sugars are creamed until light, the resulting air pockets ensure a soft, delicate crumb rather than a dense, heavy cookie.
Technically, the timing of adding the candy is critical. Pressing the malted milk balls into the cookies immediately after they exit the oven allows the residual heat to gently soften the bottom of the candy, anchoring it firmly in place as the cookie cools. The molten chocolate used for the legs undergoes a controlled cooling process, allowing it to set firmly into the desired shape without running, which provides both visual definition and a satisfying snap.
The sensory payoff is profound, starting with the aromatic nutty scent released while the dough hits the heat. Upon tasting, you experience the contrast between the velvety peanut butter center and the crunch of the malted milk ball. The final addition of the chocolate legs adds a layer of cocoa intensity that rounds out the savory notes of the peanut butter, resulting in a perfectly balanced bite.
Pro Tips Before You Start
Room Temperature Ingredients: Ensure your butter and eggs are at room temperature to facilitate proper emulsification and a consistent dough texture. Mise en Place: Measure all dry ingredients and arrange your decorating tools before preheating the oven to ensure a seamless workflow. Quality Baking Sheets: Use heavy-gauge baking sheets lined with high-quality parchment paper to prevent uneven browning on the bottom of the cookies.
Ingredients
Here’s everything you’ll need to make Peanut Butter Spider Cookies.
| Ingredient | Quantity | Notes |
|---|---|---|
| All-purpose flour | 1 ½ cups (190g) | Sift for best results |
| Baking soda | ½ tsp | Check expiration |
| Baking powder | ½ tsp | Check expiration |
| Salted butter | ½ cup (113g) | Softened |
| Granulated sugar | ½ cup (100g) | Extra for rolling |
| Brown sugar | ½ cup (100g) | Packed |
| Egg | 1 large | Room temp |
| Creamy peanut butter | ½ cup (128g) | Avoid natural brands |
| Vanilla extract | 1 tsp | Pure extract |
| Whoppers | 44 pieces | Malted milk balls |
| Semi-sweet chocolate chips | 1 cup (170g) | For legs |
| White cake decorating gel | 1 tube | For eyes |
Best Ingredients for Peanut Butter Spider Cookies
The quality of your peanut butter remains the most significant factor in this recipe. Select a standard creamy peanut butter rather than natural varieties, as the added stabilizers in commercial brands prevent the oil from separating and ensure a uniform texture in the dough. Using high-quality vanilla extract enhances the depth of the flavor profile, bridging the gap between the savory peanut butter and the sweet chocolate components.
Step-by-Step Instructions
Phase 1: Prepare the Base
Preheat your oven to 375°F (190°C) and line two large baking sheets with parchment paper for easy cleanup.
Combine the flour, baking powder, and baking soda in a medium bowl, whisking thoroughly to ensure even distribution.
Cream the softened butter in a separate large bowl until smooth and pale, creating a solid foundation for the dough.
Add both the granulated and brown sugars along with the peanut butter, mixing until the consistency is light and fluffy.
Incorporate the egg and vanilla into the butter mixture, beating until the liquid is fully absorbed into the fat.
Fold the dry ingredients into the wet mixture slowly, stirring until just combined to ensure the cookies remain tender and soft.
Phase 2: Baking and Shaping
Scoop the dough using a 2-tablespoon measure and roll each portion into a smooth, uniform ball with your palms.
Roll each ball in the extra granulated sugar until evenly coated to add a delicate crunch to the exterior.
Place the sugar-coated balls onto the prepared baking sheets, leaving at least 2 inches of space between each piece.
Bake for 8-10 minutes, observing closely until the edges appear set and the centers look slightly puffy and soft.
Press one large malted milk ball and one small ball into the warm centers immediately upon removing from the oven.
Cool the cookies in the refrigerator for 5-10 minutes, allowing the chocolate to firm up before moving to the next step.
Phase 3: Final Decoration
Melt the chocolate chips in a microwave-safe bowl using 30-second increments, stirring well between intervals to maintain a smooth consistency.
Pour the melted chocolate into a piping bag once it has cooled slightly, ensuring it is thick enough to hold its shape.
Pipe eight legs onto the sides of the malted milk ball bodies, creating four on each side of the spider.
Add two tiny dots of white cake decorating gel onto the smaller malted milk ball to create the spider’s eyes.
Place a tiny black nonpareil sprinkle into the center of each white eye dot for a finishing touch of detail.
Chef Tips for Perfect Results
Temperature Monitoring: Use an oven thermometer to verify 375°F (190°C) accuracy, as hot spots can cause uneven spreading.
Piping Consistency: Let the melted chocolate rest for three minutes before piping to achieve a thicker, more stable texture.
Cooling Cycle: Allow the cookies to chill completely in the fridge before serving to ensure the chocolate legs set securely.
Pressing Technique: Press the malted milk balls gently but firmly to ensure they anchor well into the warm, soft cookie dough.
Even Scooping: Utilize a spring-loaded cookie scoop to ensure every cookie is identical in size, which guarantees even baking times.
Common Mistakes to Avoid
Overmixing the Dough: Results in tough, dense cookies due to excess gluten development. Mix only until the flour disappears.
Using Natural Peanut Butter: Results in oily, spreading cookies because the oil separates. Use standard creamy peanut butter for structure.
Piping Too Hot: Results in messy, runny legs that pool on the cookie. Allow the melted chocolate to thicken before piping.
Crowding the Pan: Results in uneven browning and soft edges. Ensure 2 inches of space for proper air circulation.
How to Make This Recipe Healthier
You can adjust this recipe for a slightly more balanced profile without sacrificing the character of the cookies. All-purpose flour → White whole wheat flour: This adds fiber and a nuttier flavor profile while maintaining a similar texture; use a 1:1 ratio. Granulated sugar → Coconut sugar: This swap provides a lower glycemic index, though it will darken the color of the final cookie and add a slight caramel note. Semi-sweet chips → Dark chocolate (70% cocoa): This increases antioxidant content while reducing overall sugar intake for the spider legs.
Variations and Substitutions
Customization allows you to adapt these cookies to various dietary needs or flavor preferences while keeping the spirit of the original recipe intact.
| Ingredient | Substitution | Flavor Impact | Texture Impact |
|---|---|---|---|
| All-purpose flour | Gluten-free flour blend | Neutral | Slightly more crumbly |
| Salted butter | Coconut oil | Tropical note | Crisper edges |
| Whoppers | Chocolate-covered raisins | Fruity | Chewier |
| Creamy peanut butter | Almond butter | Nutty/Earthier | Similar |
Can You Make This Ahead?
Yes, you can prepare the dough up to 2 days in advance. Store the dough in an airtight container in the refrigerator and roll into balls just before baking. For the best texture, avoid assembling the spider decorations until the cookies have cooled completely on the day of serving.
Serving Suggestions and Pairings
Serve these cookies alongside a warm mug of apple cider or a chilled glass of almond milk to contrast the richness of the peanut butter. For a party setting, arrange them on a dark slate platter to emphasize the spider theme. They pair wonderfully with other fall favorites like pumpkin spice muffins or caramel corn for a complete seasonal spread. If serving at a brunch, these act as the perfect sweet closer after savory dishes.
Best Occasions to Serve This Recipe
These cookies serve as a perfect addition to classroom Halloween parties, neighborhood harvest festivals, or themed birthday celebrations in October. Their visual appeal makes them excellent for showing off your baking skills, while the simple process makes them low-stress for beginners hosting a casual gathering. They fit perfectly into any fall-themed menu, adding a touch of whimsy that guests of all ages appreciate.
Storage and Reheating
Store your finished cookies in an airtight container to maintain their crisp-yet-soft texture for as long as possible.
| Method | Duration | Instructions |
|---|---|---|
| Refrigerator | 5 days | Keep in a sealed container |
| Freezer | 3 months | Freeze plain, decorate after thawing |
| Reheating | N/A | Best enjoyed at room temperature |
Nutritional Information
Approximate nutritional values per serving:
| Nutrient | Amount per Serving |
|---|---|
| Calories | 210 |
| Protein | 4g |
| Fat | 11g |
| Carbohydrates | 26g |
| Fiber | 1g |
| Sugar | 18g |
| Sodium | 145mg |
*Approximate values based on standard ingredients. Actual nutrition varies by brand and substitutions.
Conclusion
Peanut Butter Spider Cookies represent the ideal intersection of creative baking and reliable, classic flavors. By following the precise techniques for dough preparation and careful timing of the candy additions, you ensure a treat that looks as professional as it tastes. The contrast of the chewy peanut butter dough against the crunchy malted milk balls provides a sensory experience that defines this seasonal favorite. This recipe transforms standard ingredients into an impressive centerpiece for your next fall event or gathering, offering a simple way to delight guests of all ages.
You will discover that the versatility of this base recipe allows for easy adjustments to suit various tastes or dietary preferences. Whether you are baking for a school party or a family dessert night, the reliability of this method guarantees consistent, pleasing results every time. I invite you to share these cookies with friends and family during your next celebration, as they are sure to become a requested tradition. Enjoy the process of creating these charming spiders and watching them disappear from the platter.
FAQ
Can I substitute creamy peanut butter with crunchy?
Yes, you can substitute crunchy peanut butter for a different texture, though the dough will be slightly more difficult to roll into uniform balls. The flavor remains largely the same, but you will notice an added texture contrast in every bite.
How do I know when the cookies are done baking?
The cookies are done when the edges look set and light golden brown, while the centers appear slightly soft or underbaked. They will continue to firm up as they cool on the baking sheet for a few minutes.
What should I do if the chocolate legs break?
If the chocolate legs break, you can use a tiny amount of leftover melted chocolate as glue to reattach them. Alternatively, wait for the chocolate to fully set and gently pipe over the break to reinforce the structure.
Can I make these cookies the day before?
Yes, you can bake and decorate these cookies one day in advance for optimal freshness. Store them in a cool, dry place within an airtight container to prevent the chocolate from blooming or the cookies from softening too much.
How do I reheat these if I prefer them warm?
If you prefer warm cookies, place them on a microwave-safe plate and heat for only 5-8 seconds. Do not exceed this time, or the malted milk ball and chocolate legs will melt completely.
Is this recipe suitable for gluten-free diets?
This recipe can be made gluten-free by substituting the all-purpose flour with a high-quality 1-to-1 gluten-free baking blend. Ensure that your baking powder and other ingredients are certified gluten-free to maintain safety for individuals with celiac disease.
Print
Simple Peanut Butter Spider Cookies
- Total Time: 30
- Yield: 22 cookies
- Diet: Vegetarian
Description
These delightful Peanut Butter Spider Cookies offer the perfect balance of salty, nutty flavors and a whimsical presentation. Featuring a soft, chewy peanut butter cookie base topped with chocolate malted milk balls and hand-piped chocolate legs, these cookies are an irresistible Halloween treat. Easy to prepare and visually striking, they are the ideal dessert for fall festivities, school parties, or any gathering where you want to impress guests with minimal effort.
Ingredients
1 cup creamy peanut butter
1/2 cup unsalted butter, softened
1/2 cup granulated sugar
1/2 cup packed light brown sugar
1 large egg
1 teaspoon vanilla extract
1 1/2 cups all-purpose flour
1/2 teaspoon baking soda
1/4 teaspoon salt
22 malted milk balls
1/4 cup semi-sweet chocolate chips (for melting)
Instructions
Preheat your oven to 350°F (175°C) and line a baking sheet with parchment paper.
In a large bowl, cream together the peanut butter, softened butter, granulated sugar, and brown sugar until light and fluffy.
Beat in the egg and vanilla extract until well combined.
In a separate bowl, whisk together the flour, baking soda, and salt.
Gradually add the dry ingredients to the wet mixture, stirring until just combined.
Roll the dough into 1-inch balls and place them on the prepared baking sheet.
Bake for 10 minutes until the edges are just set.
Immediately remove from the oven and press a malted milk ball into the center of each cookie.
Allow the cookies to cool completely on a wire rack.
Melt the chocolate chips in a microwave-safe bowl in 20-second intervals until smooth.
Use a piping bag or a small plastic bag with the corner snipped to draw eight spider legs on each cookie extending from the chocolate malted milk ball.
Notes
Ensure you press the malted milk balls into the center immediately after removing the cookies from the oven so they adhere properly to the warm dough. Store in an airtight container at room temperature for up to 5 days. For a nut-free variation, you may substitute the peanut butter with a seed-based butter.
- Prep Time: 20
- Cook Time: 10
- Category: Breakfast
- Method: Baking
- Cuisine: American