
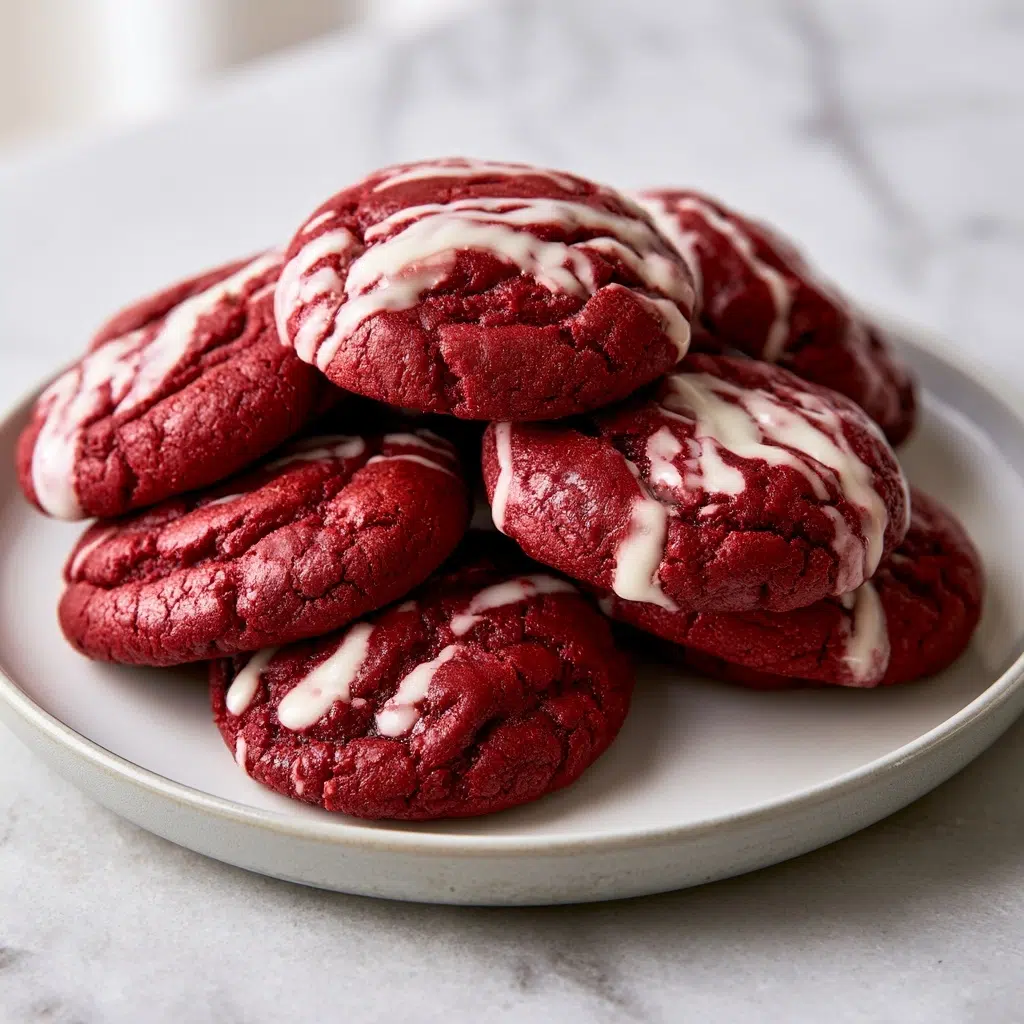
Red Velvet Cheesecake Cookies provide a sophisticated blend of cocoa-infused, vibrant red dough wrapped around a velvety cream cheese center. This treat satisfies dessert lovers looking for a decadent combination of textures, ranging from a soft, chewy exterior to a smooth, tangy core. Ideal for holiday gatherings or special occasions, these cookies deliver an impressive visual contrast that stands out on any dessert platter. You will find that mastering this recipe offers a reliable way to elevate your home baking with professional-level results.
What Is Red Velvet Cheesecake Cookies?
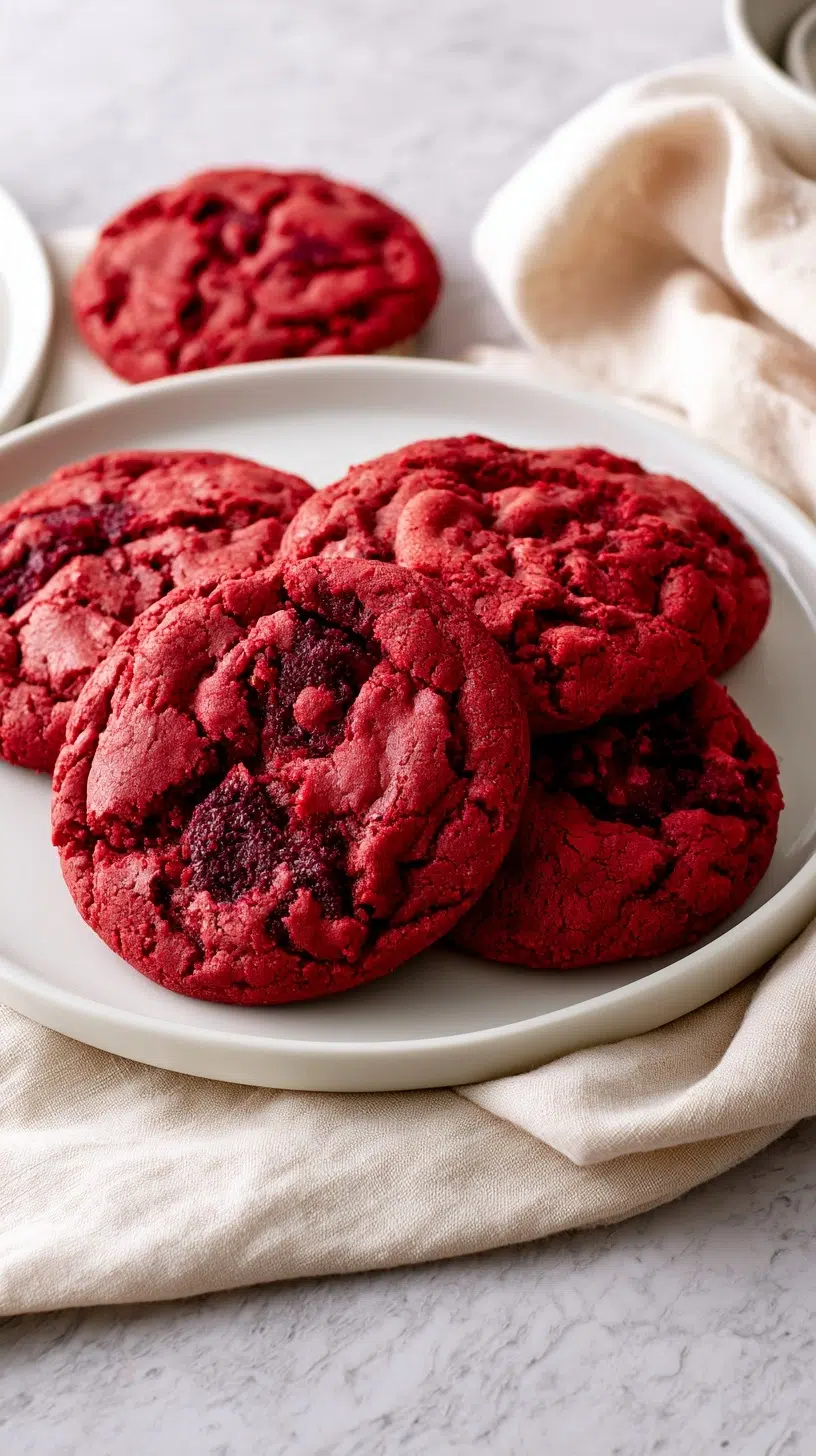
Red Velvet Cheesecake Cookies are a hybrid confection featuring classic Southern-style red velvet dough stuffed with a solidified cream cheese filling. Unlike standard sandwich cookies, this recipe utilizes a technique where the filling is frozen, then encased in dough to ensure the cheesecake center remains distinct during baking. These cookies represent a fusion of cookie and cake-like textures, resulting in a rich, indulgent experience that bridges the gap between traditional red velvet cake and portable handheld treats.
| Prep Time | 4 hours |
| Cook Time | 14 minutes |
| Total Time | 4 hours 15 minutes |
| Servings | 18 cookies |
| Difficulty Level | Intermediate |
| Cuisine | American |
| Calories per Serving | 210 kcal |
Why You’ll Love This Recipe
Foolproof Technique: The step-by-step method of freezing the filling makes assembly straightforward even for beginners.
Crowd-Pleasing Contrast: The combination of tangy cream cheese and sweet, mild chocolate dough appeals to a wide variety of palates.
Time-Saving Prep: You can prepare the dough and filling days in advance, allowing for stress-free baking when guests arrive.
Visually Stunning: The vibrant red color and white drizzle provide an elegant aesthetic suitable for formal events or casual gifting.
This recipe remains a favorite because it simplifies complex techniques into manageable steps. Whether you need an effortless dessert for a potluck or a fun weekend project, these cookies provide consistent, high-quality results every time.
Why This Recipe Works
My experience developing these cookies taught me that the secret lies in temperature control. By treating the cheesecake filling as a frozen element, the internal structure remains intact while the surrounding dough bakes. This ensures that the cream cheese does not bleed into the cookie, but rather stays soft and creamy inside the chewy red velvet shell.
The science of the cookie base is equally important. Using both brown and granulated sugar provides a balance between moisture and crispness. The addition of vinegar reacting with the baking soda and cocoa powder creates the signature tender, velvet-like crumb associated with classic red velvet cake. This reaction is essential for achieving the specific texture that distinguishes these cookies from a standard chocolate chip variety.
The visual payoff is equally deliberate. The gel-based red food coloring produces a deep, intense hue that persists after the bake. When finished with a simple milk and powdered sugar glaze, the visual contrast against the dark cocoa dough makes these cookies look as though they came from a professional bakery. Every step, from the initial chilling of the filling to the final bake, is calibrated to produce a harmonious bite.
Pro Tips Before You Start
Room Temperature Ingredients: Ensure your butter is softened to room temperature for optimal creamage with the sugars. Mise en Place: Measure all dry and wet ingredients before starting to ensure smooth, efficient assembly. Freezer Space: Clear enough flat space in your freezer to accommodate both the cream cheese dollops and the final dough balls.
Ingredients
Here’s everything you’ll need to make the perfect batch of Red Velvet Cheesecake Cookies.
| Ingredient | Quantity | Notes/Alternatives |
|---|---|---|
| Cream Cheese | 4 oz (112g) | Brick style, full fat only |
| Powdered Sugar | 3/4 cup | Sifted for smoothness |
| Flour (for filling) | 1 tbsp | Helps thicken the core |
| All-Purpose Flour | 1 2/3 cup (209g) | Standard wheat flour |
| Cocoa Powder | 3 tbsp | Unsweetened |
| Baking Soda | 1/2 tsp | Ensure it is fresh |
| Butter | 1/2 cup (112g) | Unsalted, softened |
| Brown Sugar | 1/2 cup (105g) | Light or dark |
| Granulated Sugar | 1/3 cup (67g) | For dough |
| Egg | 1 large | Room temperature |
| Vanilla Extract | 1 tsp | Pure extract preferred |
| Distilled Vinegar | 1 tsp | White vinegar is fine |
| Red Food Coloring | 1-2 tsp | Gel formula recommended |
Step-by-Step Instructions
Phase 1: Prepare the Cheesecake Core
Beat the cream cheese, 3/4 cup powdered sugar, and 1 tablespoon flour in a medium bowl until smooth and creamy.
Scoop 2-teaspoon sized dollops onto a wax-paper-lined tray and freeze for at least 2 hours until firm.
Phase 2: Create the Red Velvet Dough
Whisk the flour, cocoa powder, baking soda, and salt in a medium bowl until fully combined.
Beat the softened butter with both sugars in a large bowl until the mixture looks light and fluffy.
Mix the egg, vanilla, vinegar, and red food coloring into the butter mixture until the color is vibrant.
Beat the dry ingredient mixture into the wet ingredients until just combined (do not overmix or the dough will toughen).
Refrigerate the covered dough for at least 2 hours to allow the flour to hydrate and the dough to firm up.
Phase 3: Assemble and Bake
Scoop 1 tablespoon of dough, flatten, and curve the edges to form a shallow bowl.
Place one frozen cream cheese dollop into the center of the dough bowl.
Cover the filling with a second tablespoon of flattened dough, pinching the edges to seal completely.
Roll the ball between your palms to smooth, then optionally roll it in granulated sugar.
Freeze the assembled dough balls for 30 minutes before baking to ensure they do not spread too quickly.
Bake at 350F (180C) for 12-14 minutes, or until the tops appear set.
Drizzle with a thin glaze of milk and powdered sugar once the cookies have cooled completely.
Chef Tips for Perfect Results
Seal Perfectly: Ensure the cream cheese is entirely enclosed by dough to prevent leaking during the baking process.
Doneness Test: Remove from the oven when the edges are set; the center should remain soft but not wet.
Avoid Overbaking: These cookies are best when slightly under-baked as they continue to cook while cooling on the pan.
Use Gel Coloring: Gel food coloring provides more intensity without affecting the liquid ratios of your dough.
Freeze Firmly: Never skip the freezing steps, as temperature management is the key to this recipe’s success.
Common Mistakes to Avoid
Overmixing the Dough: | Results in dense, tough cookies. | Gluten over-develops when flour is overworked. | Stop mixing as soon as the last streak of flour disappears.
Leaking Filling: | Cream cheese spreads outside the cookie. | Dough was not sealed properly around the center. | Pinch the dough seams tightly together to create a completely enclosed ball.
Using Warm Dough: | Cookies spread too thin during baking. | Fat in the butter melts too early in the oven. | Keep the dough chilled right until the moment it enters the hot oven.
How to Make This Recipe Healthier
| Original Ingredient | Healthier Swap | Impact on Flavor/Texture |
|---|---|---|
| All-Purpose Flour | White Whole Wheat Flour | Adds slight nuttiness and more fiber |
| Granulated Sugar | Coconut Sugar | Adds a deep caramel note, slightly denser |
| Cream Cheese | Low-Fat Neufchâtel | Reduces fat content by 30% with minimal texture loss |
Variations and Substitutions
You can customize these cookies to suit dietary needs or flavor preferences using the following substitutions.
| Ingredient | Substitution | Flavor Impact | Texture Impact |
|---|---|---|---|
| Butter | Coconut Oil | Subtle tropical note | Slightly crisper |
| All-Purpose Flour | Gluten-Free 1:1 Blend | Neutral | Requires more binding (add xanthan gum) |
| Milk (Glaze) | Almond Milk | Nutty undertone | None |
Can You Make This Ahead?
Yes, these cookies are excellent for make-ahead planning. You can prepare the cheesecake dollops and the dough up to 48 hours in advance. Keep them refrigerated or frozen in an airtight container until you are ready to assemble and bake. For the best texture, assemble and bake fresh when you are ready to serve.
Serving Suggestions and Pairings
Serve these red velvet cookies alongside a warm cup of coffee or a glass of chilled milk to balance the richness. They work beautifully as part of a holiday dessert spread or a Valentine’s Day treat. Presentation is improved by using a simple parchment paper liner on a tiered stand. These pair exceptionally well with light, vanilla-based ice cream for a decadent dessert sandwich experience.
Best Occasions to Serve This Recipe
These cookies are ideal for holiday parties, cookie exchanges, or as a sophisticated addition to a dessert table at a dinner party. Because they can be frozen as raw dough balls, they are a perfect “emergency” dessert to have ready for surprise visitors. Their vibrant color makes them a standout choice for winter celebrations or any event where a visually impressive sweet is required.
Storage and Reheating
Store your cookies in an airtight container to maintain their soft texture. They will remain fresh at room temperature for up to 3 days or in the refrigerator for up to 1 week.
| Method | Duration | Instructions |
|---|---|---|
| Refrigerator | 7 Days | Store in an airtight container |
| Freezer | 3 Months | Freeze individually then bag |
| Reheating | 15 Seconds | Microwave on low for soft texture |
Nutritional Information
Approximate nutritional values per serving:
| Nutrient | Amount per Serving |
|---|---|
| Calories | 210 kcal |
| Protein | 3g |
| Fat | 10g |
| Carbohydrates | 28g |
| Fiber | 1g |
| Sugar | 18g |
| Sodium | 110mg |
*Approximate values based on standard ingredients. Actual nutrition varies by brand and substitutions.
Conclusion
Red Velvet Cheesecake Cookies deliver a perfect balance of professional pastry technique and home-baked charm. By mastering the simple process of freezing your filling and chilling your dough, you unlock a versatile recipe that performs consistently for any occasion. Whether you are aiming to impress guests at a holiday gathering or simply want a rewarding weekend baking project, this recipe provides the framework for success.
The combination of tangy cream cheese and cocoa-rich dough creates a balanced, indulgent flavor profile that appeals to all ages. You will discover that the slight effort required in the chilling stages pays off in the incredible texture and visual appeal of the finished cookies. I encourage you to save this recipe and share it with those who appreciate a well-crafted treat. Let this become a staple in your kitchen rotation, bringing a touch of elegance to your dessert repertoire with every batch you bake.
FAQ
Can I substitute the vinegar in the recipe?
You can substitute the distilled vinegar with white vinegar or lemon juice. The acid is necessary to react with the baking soda to achieve the correct crumb texture, so do not omit it entirely.
How do I know when the cookies are done?
The cookies are done when the edges look set and the tops appear dry. Avoid overbaking, as they will firm up significantly while cooling on the baking sheet.
What should I do if the dough is too sticky to roll?
If the dough is too sticky, place it back in the refrigerator for 20 minutes to firm up the fats. Keeping the dough cold is the most effective way to manage stickiness during assembly.
Can I make these cookies entirely gluten-free?
Yes, you can substitute the all-purpose flour with a high-quality 1:1 gluten-free baking blend. Ensure your blend includes xanthan gum to help hold the structure of the cookie together.
How do I reheat these cookies without melting the filling?
Reheat in a low-temperature oven or microwave for just a few seconds. Do not overheat, as the cream cheese filling can become too soft if the cookie is warmed for too long. Print

Red Velvet Cheesecake Cookies
- Total Time: 254
- Yield: 18 cookies
- Diet: Vegetarian
Description
Indulge in these sophisticated Red Velvet Cheesecake Cookies, featuring a vibrant, cocoa-infused red velvet dough that wraps around a decadent, tangy cream cheese center. These hybrid treats offer a perfect harmony of textures, combining a chewy cookie exterior with a smooth, velvety core. Ideal for holiday gatherings or special occasions, this recipe uses a freezing technique to ensure a distinct, creamy center in every bite. Follow these steps for an impressive, professional-level dessert that is sure to stand out on any platter.
Ingredients
8 oz cream cheese, softened
1/4 cup granulated sugar
1/2 cup unsalted butter, softened
3/4 cup granulated sugar
1/2 cup brown sugar
1 large egg
1 tsp vanilla extract
1 tsp red food coloring
1 3/4 cups all-purpose flour
1/4 cup unsweetened cocoa powder
1/2 tsp baking soda
1/4 tsp salt
Instructions
In a bowl, mix cream cheese and 1/4 cup sugar until smooth, then drop 18 small dollops onto parchment paper and freeze for 3 hours.
In a separate bowl, cream the softened butter, granulated sugar, and brown sugar until fluffy.
Beat in the egg, vanilla extract, and red food coloring until fully combined.
Whisk together flour, cocoa powder, baking soda, and salt, then gradually add to the wet ingredients.
Scoop 18 portions of dough, flatten each, place a frozen cream cheese dollop in the center, and wrap the dough around it to seal completely.
Place the stuffed balls on a baking sheet and chill for 1 hour.
Preheat oven to 350°F and bake the cookies for 14 minutes until the edges are set.
Notes
Ensure the cream cheese centers are completely frozen before wrapping to prevent leakage. Store leftover cookies in the refrigerator for up to 5 days due to the dairy content in the filling.
- Prep Time: 240
- Cook Time: 14
- Category: Desserts
- Method: Baking
- Cuisine: American