
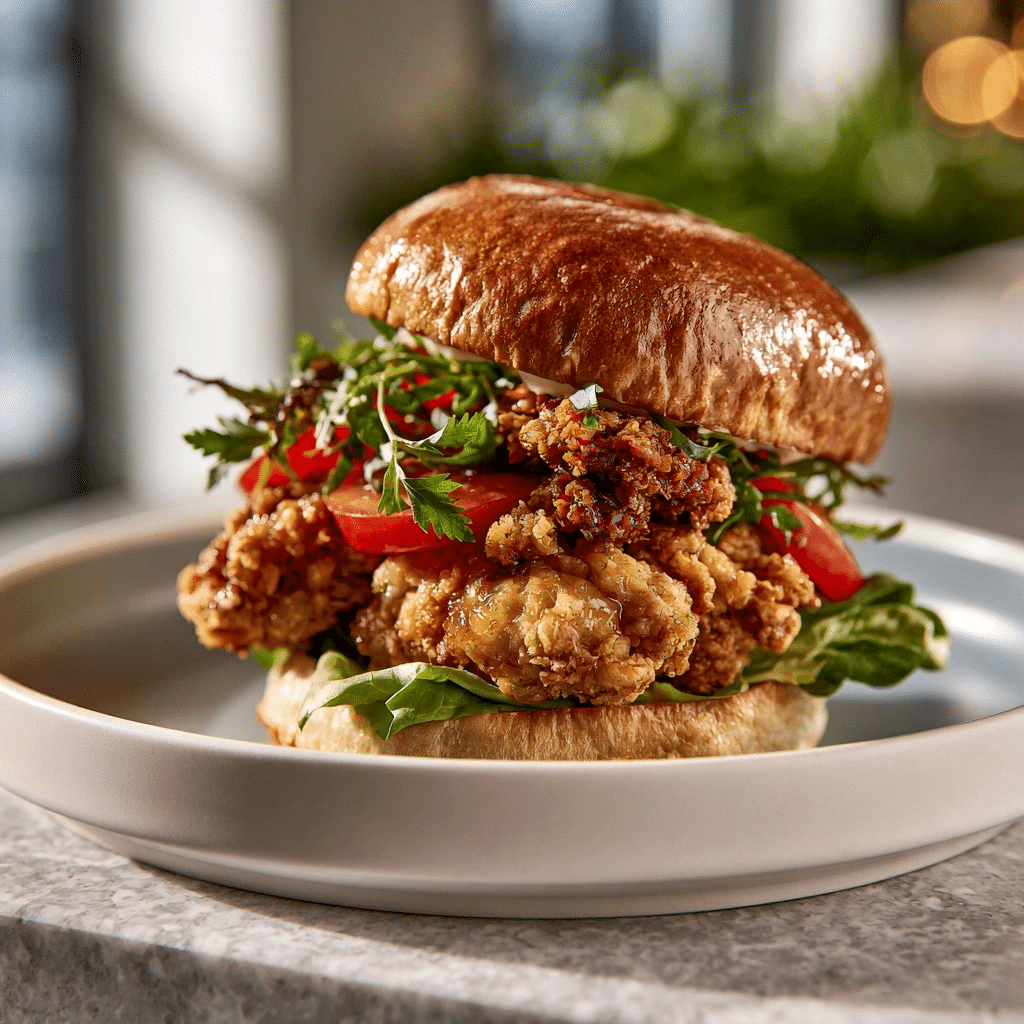
A Crispy Chicken Sandwich represents the ultimate balance of golden, audible crunch and tender, juicy poultry perfect for a quick weekend meal. This dish appeals to hungry families and home cooks seeking a professional bistro-quality experience without the high restaurant cost. The combination of a buttermilk-infused brine and a seasoned flour crust creates an unmistakable texture that keeps everyone coming back for seconds. By following these precise steps, you secure a sandwich that delivers intense flavor and satisfying satiety with every single bite.
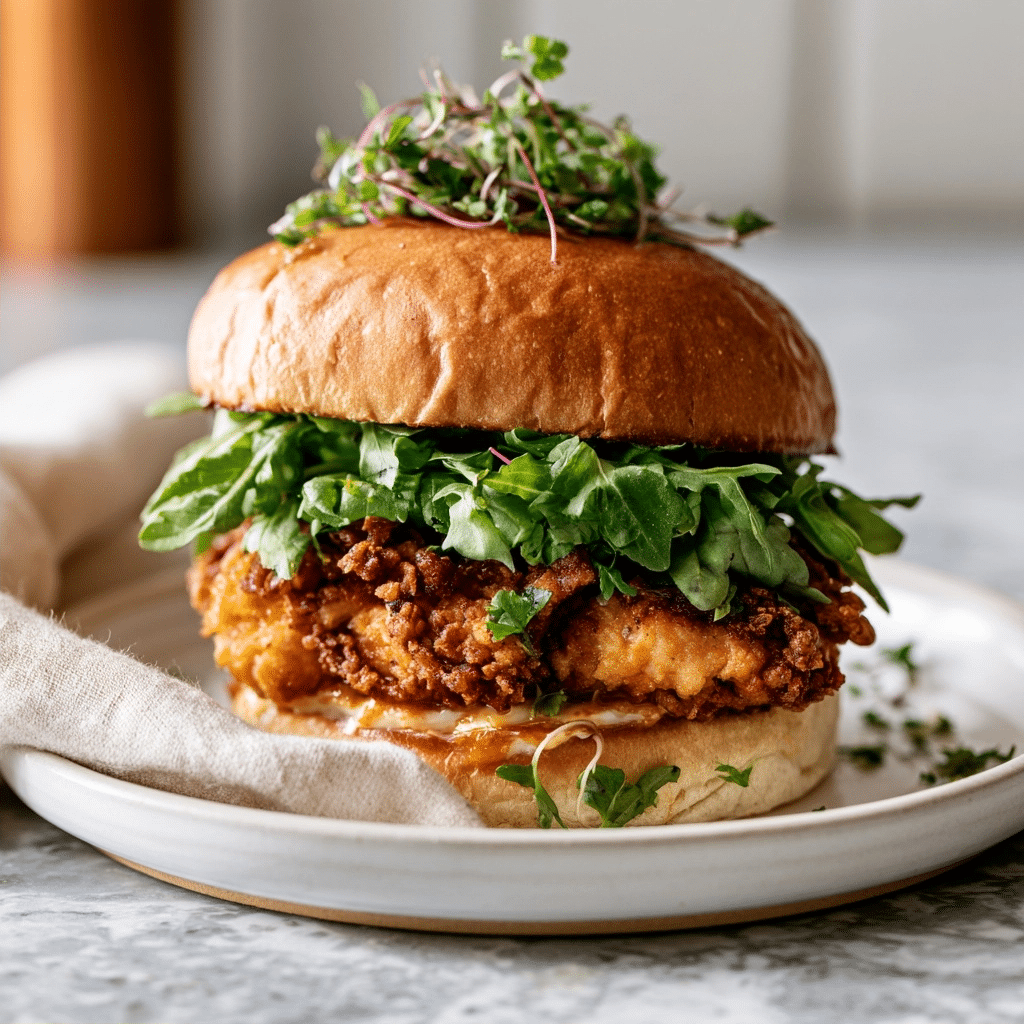
What Is A Crispy Chicken Sandwich?
A Crispy Chicken Sandwich is a classic culinary staple consisting of a deep-fried poultry breast fillet served on a toasted, soft bun with fresh garnishes. Its roots trace back to mid-century American diners, though modern versions emphasize the contrast between a crunchy exterior crust and a moist, flavorful interior. Unlike standard grilled alternatives, this version utilizes a double-leavening technique and precise fat temperatures to achieve its signature results. It stands apart from traditional fast-food offerings by using high-quality buttermilk and a custom blend of aromatic spices for a complex flavor profile.
| Prep Time | 20 minutes |
| Cook Time | 15 minutes |
| Total Time | 35 minutes |
| Servings | 4 |
| Difficulty Level | Easy |
| Cuisine | American |
| Calories per Serving | 580 |
Why You’ll Love This Recipe
- Effortless Preparation: This recipe utilizes simple pantry staples to produce restaurant-quality results at home.
- Foolproof Technique: The systematic approach to breading ensures a consistent, heavy crunch every single time you cook.
- Crowd-Pleasing Appeal: Classic flavors satisfy even the pickiest eaters, making it a perfect choice for casual family gatherings.
- Time-Saving Workflow: Most prep stages occur during the marination window, allowing you to focus on other tasks.
The primary appeal of this dish lies in its accessibility and the dramatic results achieved with minimal equipment. Whether you are hosting a weeknight dinner or preparing for an upcoming potluck, this sandwich provides a stress-free experience for any cook. Its reliable texture and balanced flavor depth make it a staple for home meal planning.
Why This Recipe Works
Years of testing different breading methods have shown me that the secret to a perfect crust involves more than just flour. Balancing the acidity of buttermilk with the starch-heavy coating prevents the chicken from drying out during the deep-frying process, preserving the natural moisture and delicate structure of the breast meat.
The science here relies on two key principles: protein denaturation and moisture control. By pounding the breasts to an even thickness, you ensure uniform cooking speed, meaning no part of the fillet turns rubbery before the thickest part reaches the safe internal temperature. The cornstarch in the breading acts as a moisture inhibitor, which prevents flour hydration and keeps the crust brittle and light rather than gummy or soggy.
Finally, the addition of reserved marinade into the dry flour creates small craggy clumps on the surface of the meat. These irregular textures expand during frying, increasing the surface area that directly contacts the hot oil. This leads to maximum caramelization and the characteristic golden appearance you expect from a premium sandwich, while the seasoning blend works to elevate the savory note of the poultry.
Pro Tips Before You Start
Mise en Place: Prepare all seasonings and breading stations before heating the oil to prevent unnecessary stress once the frying begins. Room Temperature Chicken: Remove the chicken from the refrigerator 15 minutes before cooking to ensure even heat penetration. Consistent Frying: Use a kitchen thermometer to maintain the oil at 350°F because temperature fluctuations cause grease absorption, which creates a heavy, oily crust.
Ingredients
Here’s everything you’ll need to make the perfect crispy chicken sandwich.
| Ingredient | Quantity | Notes/Alternatives |
| Chicken Breast | 1 lb | Use two small breasts |
| Buttermilk | 3/4 cup | Whole milk + 1 tbsp vinegar |
| Large Egg | 1 unit | Helps with browning |
| Flour | 3/4 cup | All-purpose |
| Cornstarch | 4 tbsp | Adds crispiness |
| Spices | Various | Garlic, onion, paprika, mustard |
| Vegetable Oil | 4 cups | High smoke point oil |
| Brioche Buns | 4 buns | Brioche provides richness |
| Cheddar Cheese | 4 slices | Sharp varieties preferred |
Best Ingredients for Crispy Chicken Sandwich
The quality of your breading materials fundamentally changes the outcome of the dish. Selecting high-grade cornstarch alongside quality flour ensures the crust remains light and airy rather than dense. Using fresh buttermilk is essential because the natural enzymes tenderize the poultry fibers more effectively than generic milk substitutes. Furthermore, choosing a high-quality brioche bun with a buttery crumb holds the moist ingredients without collapsing, maintaining the structural integrity of the sandwich until the final bite.
Step-by-Step Instructions
Phase 1: Prepare the Protein
- Place chicken breasts between two long sheets of plastic wrap.
- Pound the chicken to an even 1/2-inch thickness.
- Slice the meat into portions slightly larger than your bun size.
Phase 2: Marination and Coating
- Whisk together buttermilk, egg, and salt in a large bowl.
- Remove 2 tablespoons of the mixture and keep it aside.
- Add chicken to the bowl and coat thoroughly.
- Marinate in the refrigerator for at least 1 hour and up to 24 hours.
- Mix flour, cornstarch, and all spices in a separate bowl.
- Add the reserved 2 tablespoons of marinade to the dry breading.
- Rub the flour mixture with your fingers to create small, crunchy clumps.
Phase 3: Frying and Assembly
- Heat vegetable oil in a large, heavy pot to 350°F (177°C) using a thermometer.
- Lift the chicken from the marinade and allow excess liquid to drip off.
- Press the chicken into the breading mixture on both sides for coverage.
- Shake off any excess flour before placing it in the oil.
- Fry for 2 minutes without touching to set the crust.
- Flip carefully and fry for 2 more minutes until golden brown.
- Remove to a wire cooling rack and immediately top with cheese.
- Toast buttered buns in a dry skillet until golden.
- Spread Chick-Fil-A sauce generously on the buns.
- Assemble by layering lettuce, tomato, fried chicken, and optional pickles.
Chef Tips for Perfect Results
- Temperature Monitoring: Keep the oil at precisely 350°F (177°C) to ensure the exterior fries before the interior dries out.
- Wire Cooling Rack: Always place fried items on a rack instead of a paper towel to maintain airflow and prevent sogginess.
- Doneness Check: Use an instant-read thermometer to confirm the internal temperature reaches 165°F (74°C).
- Working in Batches: Fry no more than two pieces at a time to prevent the oil temperature from crashing.
- Resting Period: Allow the fried chicken to rest for at least 60 seconds before constructing the sandwich.
Common Mistakes to Avoid
- Crowding the Pan: When you add too many pieces, the oil cools down quickly (the breading becomes greasy and pale) | Heat oil between batches to stabilize the temperature.
- Skipping the Pounding: Uneven chicken thicknesses lead to parts being overcooked and dry (the meat loses juiciness) | Pound pieces to a consistent 1/2-inch thickness.
- Ignoring the Resting Time: Serving immediately causes moisture loss from the interior (the breading turns soft) | Rest chicken on a wire rack for one minute.
How to Make This Recipe Healthier
You can adjust the nutrient profile without sacrificing flavor by making simple tactical swaps. Substituting whole wheat flour for all-purpose adds necessary fiber and minerals, though it may result in a slightly denser crust. Using less oil or swapping for an avocado-based oil can change the fatty acid profile. Additionally, using reduced-fat cheese slices will lower the saturated fat while maintaining the essential creamy texture required for the melt.
Variations and Substitutions
This sandwich is highly customizable based on availability and personal taste. Use the table below to explore variations while keeping the structural integrity of the sandwich intact.
| Ingredient | Substitution | Flavor Impact | Texture Impact |
| Chicken Breast | Chicken Thigh | More savory/rich | Moister |
| All-Purpose Flour | Gluten-Free Blend | Neutral | Slightly crunchier |
| Sharp Cheddar | Pepper Jack | Spicier | Similar melt |
| Pickles | Pickled Jalapeños | Much hotter | Firmer |
Can You Make This Ahead?
Yes, you can streamline the process by partially preparing components in advance. Marinate the chicken for up to 24 hours in the refrigerator for the best flavor infusion. While you should fry the chicken immediately before serving for peak crispness, you can prepare the dry breading blend and the sauce up to three days early.
Serving Suggestions and Pairings
Serve this sandwich with a side of crispy oven-roasted potato wedges or a light apple-cabbage slaw to contrast the richness of the fried poultry. A crisp, acidic drink such as sparkling lemonade or a cold iced tea cuts through the oil profile effectively. For a casual lunch, stack the sandwiches on a platter alongside fresh pickles and extra dipping sauce.
Best Occasions to Serve This Recipe
This meal excels during casual weekend dinners or when hosting family who appreciate a warm, inviting dish. Because the preparation is largely passive during the marination stage, it allows you to focus on socializing once the guests arrive. It remains a reliable winner for busy weeknights when you want an elevated, store-bought quality meal at home.
Storage and Reheating
Store individual components separately to maintain the best quality over several days.
| Method | Duration | Instructions |
| Refrigerator | 3 days | Store in an airtight container |
| Freezer | 1 month | Freeze raw breaded pieces individually |
| Reheating | Oven | Bake at 375°F for 8 mins |
Nutritional Information
Approximate nutritional values per serving:
| Nutrient | Amount per Serving |
| Calories | 580 |
| Protein | 32g |
| Fat | 24g |
| Carbohydrates | 48g |
| Fiber | 2g |
| Sugar | 6g |
| Sodium | 850mg |
*Approximate values based on standard ingredients. Actual nutrition varies by brand and substitutions.
Conclusion
Mastering this Crispy Chicken Sandwich transforms your kitchen into a reliable spot for high-quality comfort food. By relying on the science of the buttermilk bath and the precise temperature control of your oil, you ensure a perfect, golden outcome every time. This recipe delivers a level of satisfaction that standardized versions simply cannot match, giving you full control over the flavor and quality of your ingredients.
The ease of execution makes this an ideal candidate for your weekly rotation, whether you are cooking for a crowd or enjoying a peaceful meal at home. You will appreciate the consistency of the technique and the immediate payoff of that first crunchy bite. Save this recipe for those moments when only a hearty, homemade sandwich will satisfy your cravings.
FAQ
Can I substitute buttermilk with regular milk?
You can substitute by mixing 3/4 cup of whole milk with 1 tablespoon of white vinegar or lemon juice. Let it sit for 5 minutes until it curdles slightly for the desired acidity.
How do I know when the chicken is done?
The chicken is fully cooked when an instant-read thermometer inserted into the center reads 165°F (74°C). The crust should also appear uniformly golden brown and feel firm to the touch.
What should I do if the breading falls off?
Ensure the chicken is thoroughly patted dry after marinating before dipping it into the flour. Pressing the flour firmly into the chicken helps the breading adhere better during the frying process.
Can I make the sandwiches the day before?
It is not recommended to assemble the sandwiches in advance as the bread will become soggy. Keep the fried cutlets separately and assemble fresh just before eating.
How do I reheat the chicken without losing the crunch?
Avoid the microwave entirely, as it creates steam that ruins the crispy texture. Reheat the chicken in an oven or air fryer at 375°F for 6 to 8 minutes until hot and reappearing crispy.
Print
Crispy Chicken Sandwich
- Total Time: 35
- Yield: 4 servings
- Diet: Halal
Description
This crispy chicken sandwich is a culinary staple that pairs an ultra-crunchy, golden exterior with perfectly tender and juicy chicken breast. By utilizing a buttermilk brine, this recipe ensures deep moisture retention and a delightful tangy flavor, perfect for a restaurant-quality meal at home. It is simple to prepare, incredibly satisfying, and designed to impress families and guests alike with its balanced textures and aromatic spice blend.
Ingredients
4 boneless, skinless chicken breasts
1.5 cups buttermilk
2 cups all-purpose flour
1 tablespoon paprika
1 teaspoon garlic powder
1 teaspoon onion powder
1/2 teaspoon cayenne pepper
Salt and black pepper to taste
Vegetable oil for frying
4 brioche buns
Lettuce, tomato, and pickles for serving
Instructions
Place chicken breasts in a bowl and pour buttermilk over them, covering completely, and refrigerate for 2 hours.
In a shallow dish, whisk together flour, paprika, garlic powder, onion powder, cayenne, salt, and pepper.
Remove chicken from buttermilk, letting excess drip off, then dredge thoroughly in the flour mixture until fully coated.
Heat 2-3 inches of oil in a heavy-bottomed pot to 350°F.
Fry chicken in batches for 5-7 minutes per side until golden brown and internal temperature reaches 165°F.
Drain on a wire rack to maintain crunchiness.
Toast brioche buns and assemble sandwiches with your preferred fresh garnishes and condiments.
Notes
Ensure the oil stays at the target temperature to prevent the breading from becoming greasy. Use a thermometer for the best results. The chicken can be stored in an airtight container in the refrigerator for up to 3 days, though it is best enjoyed immediately for maximum crispiness.
- Prep Time: 20
- Cook Time: 15
- Category: Meals
- Method: Deep Frying
- Cuisine: American