
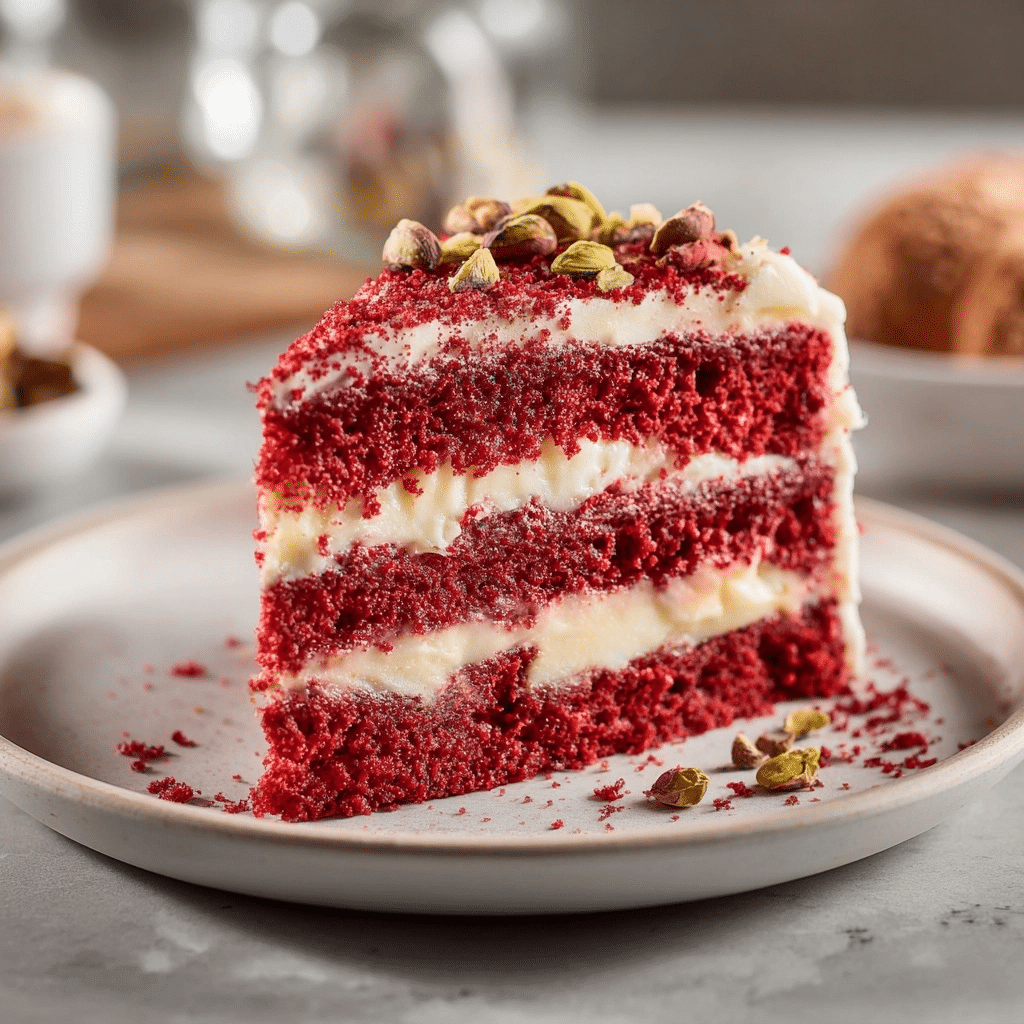
Red Velvet Cake is a classic American Layer cake characterized by its crimson hue, subtle cocoa flavor, and unique acidic tang from buttermilk and vinegar interactions. This iconic Red Velvet Cake represents the pinnacle of Southern baking tradition, providing a soft, tight crumb that feels remarkably like velvet on the tongue. Unlike standard chocolate cakes, this version relies on a precise chemical reaction between baking soda and acidic liquids to achieve its signature tenderness and lift. The inclusion of high-quality vegetable oil ensures the sponge remains moist for days, while the vibrant color serves as a striking visual contrast to the thick layers of traditional cream cheese frosting. Mastering this dessert requires understanding the balance between sweetness and the bitter notes of cocoa powder used in the batter.
| Prep Time | Cook Time | Total Time | Servings | Difficulty | Cuisine |
|---|---|---|---|---|---|
| 25 Minutes | 35 Minutes | 60 Minutes | 12 Slices | Intermediate | American |
Why This Recipe Works
Developing this specific formula required years of testing to ensure the crumb structure never becomes dry or overly dense. I have found that using vegetable oil instead of butter provides a superior texture that stays soft even when refrigerated, which is necessary for cream cheese topped cakes. The high ratio of buttermilk provides the necessary acidity to activate the leavening agents, creating a tall and airy rise that holds its shape beautifully.
This version also strikes the perfect balance with cocoa powder, using just enough to deepen the flavor profile without turning it into a standard chocolate sponge. By whisking the wet and dry ingredients separately before combined, you prevent overworking the gluten, which is the most common cause of tough cakes. This reliable method results in a consistent, professional-grade dessert that succeeds every time I prepare it for formal events or family gatherings.
Ingredients
| Ingredient | Quantity | Notes and Alternatives |
|---|---|---|
| All-Purpose Flour | 2 1/2 cups | Sifted for a lighter crumb; cake flour also works well. |
| Granulated Sugar | 1 1/2 cups | Fine caster sugar provides smoother integration. |
| Baking Soda | 1 teaspoon | Ensure it is fresh for maximum lift. |
| Cocoa Powder | 1 teaspoon | Use natural cocoa rather than Dutch-processed for color. |
| Buttermilk | 1 cup | Full-fat version yields the best moisture level. |
| Eggs | 2 large | Must be at room temperature for emulsification. |
| Vegetable Oil | 1 cup | Canola or grapeseed oil are suitable neutral swaps. |
| Red Food Coloring | 1 tablespoon | Use gel coloring for a more intense, darker hue. |
| Vanilla Extract | 1 teaspoon | Pure Madagascar vanilla offers the best aromatic depth. |
| Cream Cheese Frosting | As needed | Prepare using butter, cream cheese, and powdered sugar. |
Step-by-Step Instructions
Preparation and Dry Mixing
- Preheat your oven to 350°F (175°C) and position the rack in the center.
- Grease two 9-inch round cake pans with oil and dust lightly with flour.
- Sift the 2 1/2 cups of flour into a large mixing bowl to remove lumps.
- Add the sugar, baking soda, and cocoa powder to the flour.
- Whisk the dry ingredients vigorously to ensure even distribution of the leavening agent.
Wet Ingredient Integration
- Crack the room temperature eggs into a separate medium-sized bowl.
- Pour in the vegetable oil and buttermilk, whisking until the mixture is uniform.
- Stir in the red food coloring and vanilla extract until no streaks remain.
- Ensure the wet mixture looks vibrant and homogeneous before proceeding further.
Combining and Baking
- Pour the wet mixture into the dry ingredients gradually while whisking.
- Combine the ingredients until the batter is smooth and free of large flour pockets.
- Divide the red batter evenly between your two prepared cake pans.
- Bake in the preheated oven for 30 to 35 minutes or until a tester comes out clean.
- Remove the pans and allow them to rest on a wire rack for 10 minutes.
- Invert the cakes onto the rack to cool completely before applying the frosting.
Chef Tips for Perfect Results
- Bring all liquid ingredients to room temperature to prevent the batter from seizing during the mixing process.
- Use a heavy-duty gel food coloring rather than liquid drops to achieve a deep mahogany red without thinning the batter.
- Measure your flour using the spoon-and-level method to avoid adding too much weight to the cake structure.
- Rap the filled cake pans sharply against the counter twice before baking to release large air bubbles.
- Apply a thin crumb coat of frosting and refrigerate for 30 minutes before doing the final decorative layer.
Common Mistakes to Avoid
- Overmixing the batter once the flour is added will develop too much gluten and result in a rubbery texture.
- Substituting milk for buttermilk will fail to activate the baking soda, leading to a flat, dense cake layer.
- Using Dutch-processed cocoa powder can neutralize the acidity needed for the signature chemical reaction of this recipe.
- Frosting the cake while it is even slightly warm will cause the cream cheese frosting to melt and slide off.
- Opening the oven door too early during the baking cycle can cause the center of the cake to collapse.
Variations and Substitutions
| Ingredient | Substitution | Impact on Flavor |
|---|---|---|
| Vegetable Oil | Melted Coconut Oil | Adds a subtle tropical aroma and firm texture when chilled. |
| Buttermilk | Plain Yogurt + Milk | Maintains the tanginess but creates a slightly thicker crumb. |
| Red Food Color | Beet Powder | Provides a natural earthy flavor and a more muted burgundy color. |
| Vanilla Extract | Almond Extract | Introduces a nutty, cherry-like fragrance that complements cocoa. |
Serving Suggestions and Pairings
Serve this cake at room temperature to ensure the cream cheese frosting is soft and the crumb is tender. It is a traditional centerpiece for Christmas dinners, Valentine’s Day celebrations, and Southern-style wedding receptions. Pair a generous slice with a glass of cold milk or a robust espresso to balance the richness of the frosting. For a decorative touch, sprinkle leftover toasted cake crumbs over the top of the white frosting for a professional bakery finish.
Storage and Reheating
| Method | Duration | Instructions |
|---|---|---|
| Refrigerator | 5 Days | Store in an airtight container to prevent the frosting from absorbing odors. |
| Freezer | 3 Months | Wrap individual unfrosted layers tightly in plastic wrap and aluminum foil. |
| Room Temperature | 2 Hours | Keep covered; do not leave out longer due to the dairy in the frosting. |
Nutritional Information
| Nutrient | Amount per Serving |
|---|---|
| Calories | 450 kcal |
| Total Fat | 22g |
| Carbohydrates | 58g |
| Protein | 5g |
| Sodium | 310mg |
Approximate values based on standard ingredient data.
Conclusion
The Red Velvet Cake stands as a monument to American baking ingenuity, combining simple pantry staples to create something far more sophisticated than the sum of its parts. By following this precise method, you ensure that every slice delivers the characteristic moisture and tender grain that enthusiasts of this dessert expect. This recipe avoids the common pitfalls of dryness and blandness by leveraging the scientific interaction between buttermilk and cocoa. The resulting sponge provides a sturdy yet light base that handles the weight of decadent cream cheese frosting with ease. Whether you are preparing this for a festive holiday gathering or a simple weekend project, the visual impact of the deep red layers against the stark white frosting never fails to impress. Remember to handle the mixing process with care and give the cake ample time to cool to preserve its structural integrity. As you slice into the finished product, you will notice the tight crumb and delicate balance of flavors that have made this cake a staple for generations. Take pride in the process and enjoy the rewarding experience of serving a truly authentic Southern masterpiece. The sophisticated cocoa undertones and tangy finish will leave a lasting impression on your guests, making this your new go-to recipe for any occasion that calls for a signature flavor.
Frequently Asked Questions
Can I substitute the oil for butter in this Red Velvet Cake?
You can use butter, but it will significantly change the final texture of the cake. Oil-based cakes stay much moister at room temperature and remain soft when chilled, whereas butter cakes tend to harden. Use oil if you prefer the traditional velvety feel of a true Southern sponge.
How do I tell if my cake is fully baked through?
Insert a wooden toothpick into the center of the cake layer to check for any wet batter. The cake is done when the toothpick comes out clean or with just a few moist crumbs attached. Avoid over-baking, as the cake will continue to set while cooling in the pan.
Why did my Red Velvet Cake turn brown instead of bright red?
Natural chemical reactions between the cocoa powder and the heat can sometimes brown the batter if the pH balance is off. Using a higher quality gel food coloring and ensuring your buttermilk is fresh will help maintain the vibrant crimson shade. Ensure you are using natural cocoa powder rather than alkaline-processed varieties.
Can I make the cake layers in advance of my event?
You can bake the cake layers up to two days before you plan to frost and serve the dessert. Wrap the cooled layers tightly in plastic wrap and store them at room temperature or in the refrigerator. This advance preparation actually makes the layers easier to frost as they become slightly firmer.
What is the best way to slice a tall layer cake neatly?
Use a long, thin serrated knife to cut through the layers with a gentle sawing motion. Dip the knife in hot water and wipe it clean between each individual slice to prevent the frosting from smearing. Professional results require a clean blade for every single cut you make.
Print
Red Velvet Cake: The Ultimate Moist Southern Recipe
- Total Time: 60
- Yield: 12 slices
- Diet: Vegetarian
Description
A classic Southern red velvet cake with a tender crumb, subtle cocoa flavor, and tangy buttermilk-vinegar lift. Paired with cream cheese frosting for a striking visual and flavor contrast. Moist for days thanks to vegetable oil and precise acidity balance.
Ingredients
2 1/2 cups all-purpose flour
1 1/2 cups granulated sugar
1 teaspoon baking soda
1 teaspoon cocoa powder
1 cup buttermilk
2 large eggs
1/2 cup vegetable oil
1/4 cup white vinegar
1/2 teaspoon salt
Instructions
Preheat oven to 350°F (175°C). Grease two 9-inch layer pans.
Whisk flour, sugar, baking soda, cocoa powder, and salt in one bowl.
In separate bowl, whisk buttermilk, eggs, vegetable oil, and vinegar until emulsified.
Combine wet and dry ingredients gently, avoiding overmixing.
Pour batter evenly into prepared pans and bake 35-40 minutes.
Cool completely before frosting with cream cheese glaze.
Notes
Storage: Refrigerate up to 5 days or freeze 3 months.
Use cake flour for extra tenderness if desired.
Ensure buttermilk is full-fat for optimal moisture.
Test baking soda freshness for proper leavening.
- Prep Time: 25
- Cook Time: 35
- Category: Easy Romantic Sweet Treats
- Method: Baking
- Cuisine: American